Table of Contents
For Colleges: Slate Integration - Message Scoir Students from Slate
![]() Updated
by Customer Support
Updated
by Customer Support
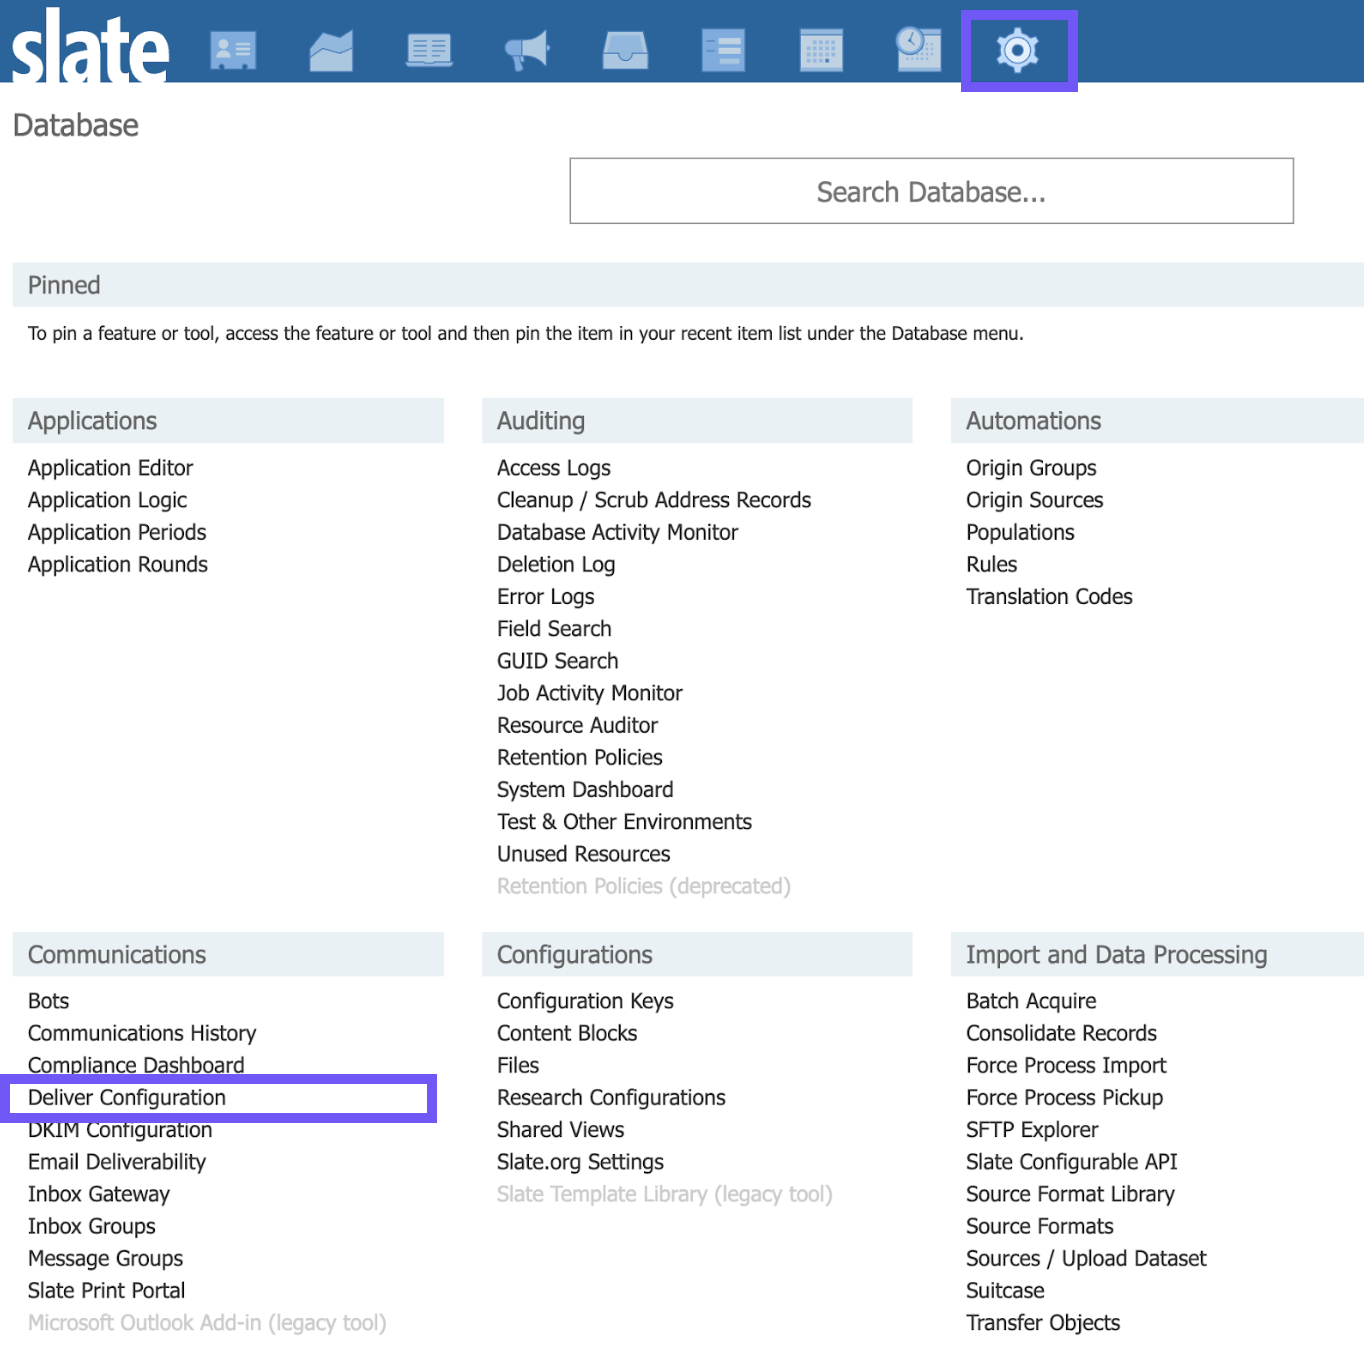
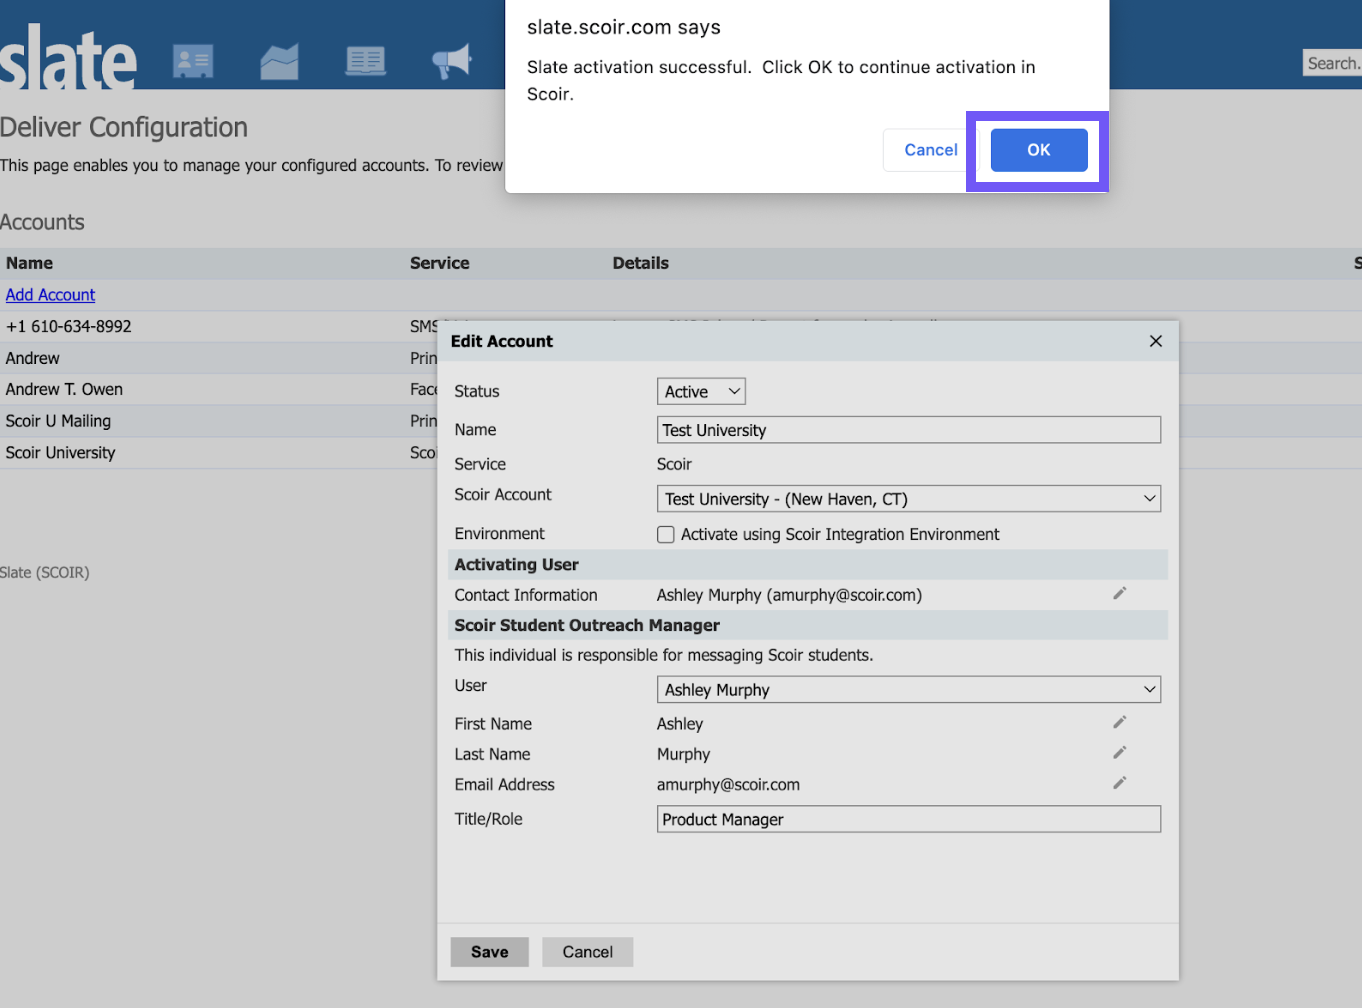
Adding a Scoir Deliver Account in Slate
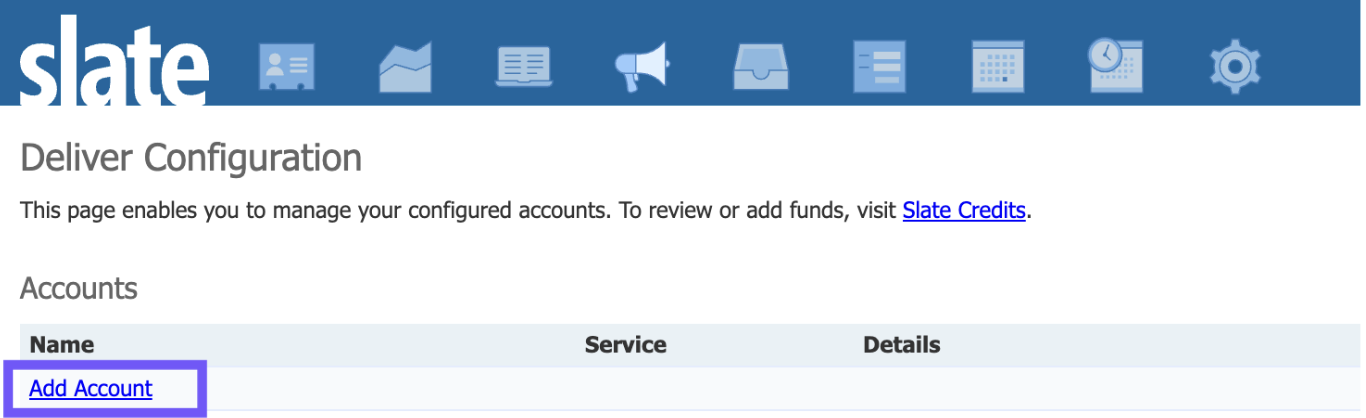
Navigate to Deliver Configuration in the Database.
Click Add Account.
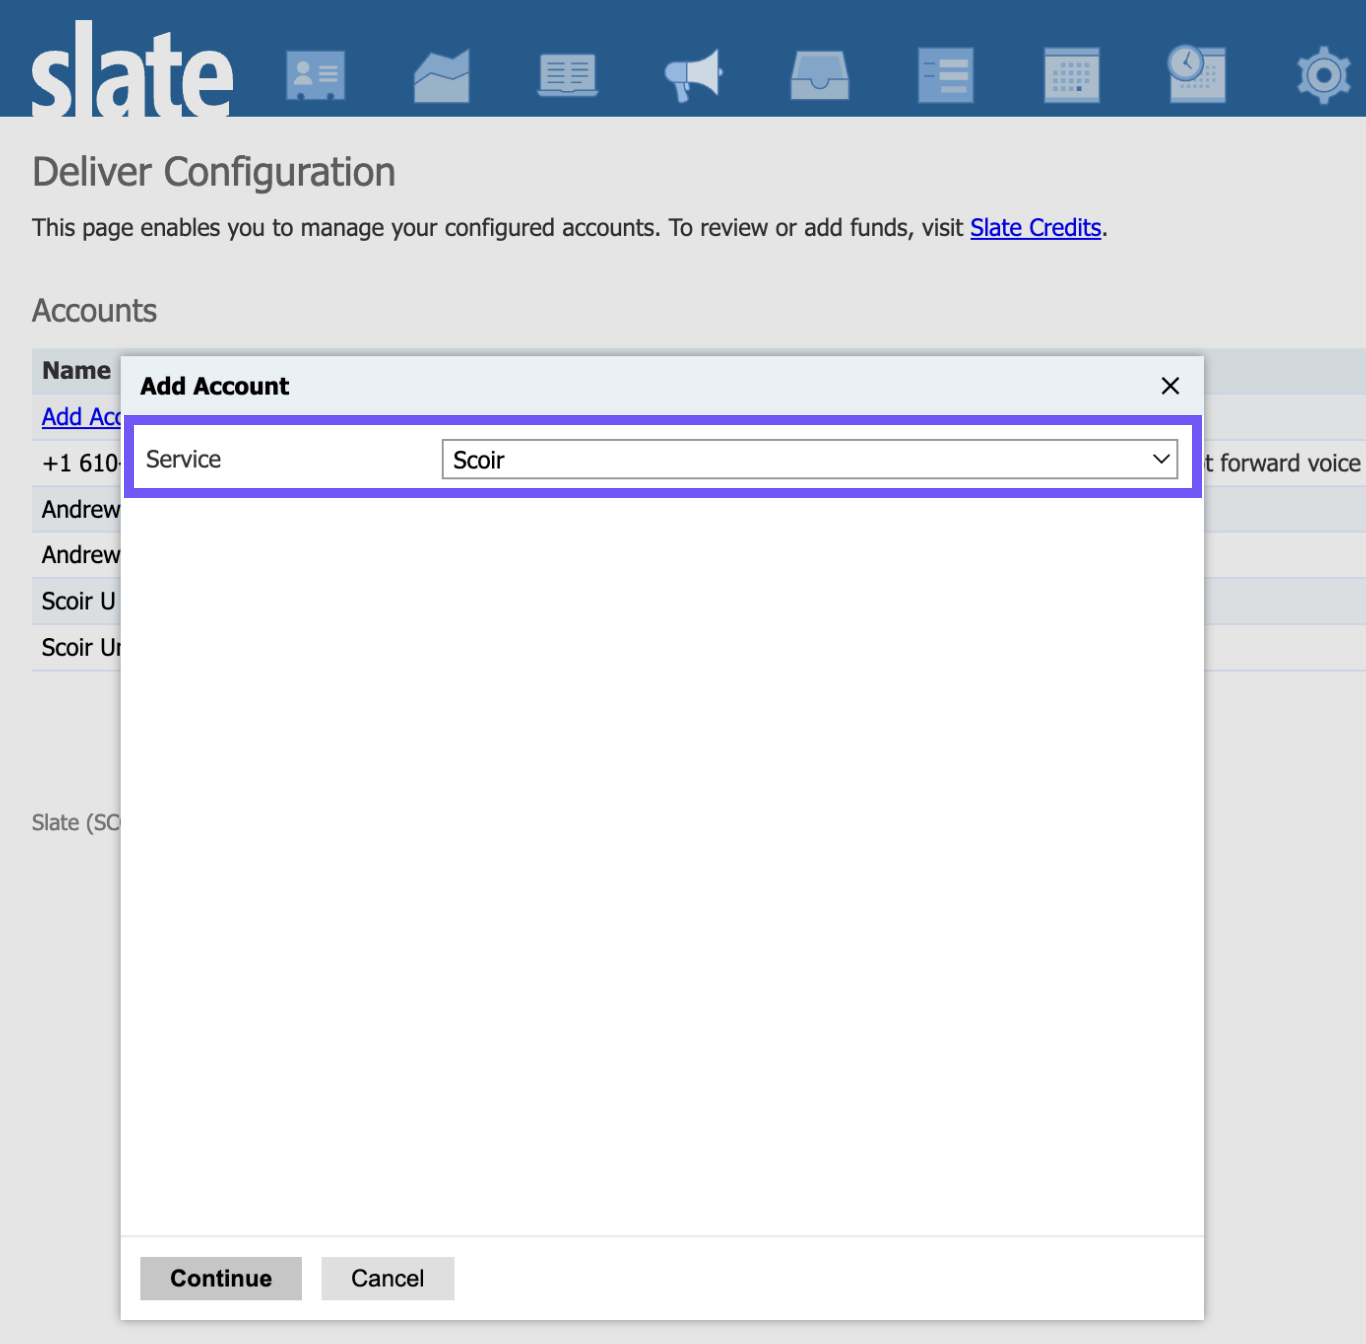
Select Scoir from the drop down menu and click Continue.
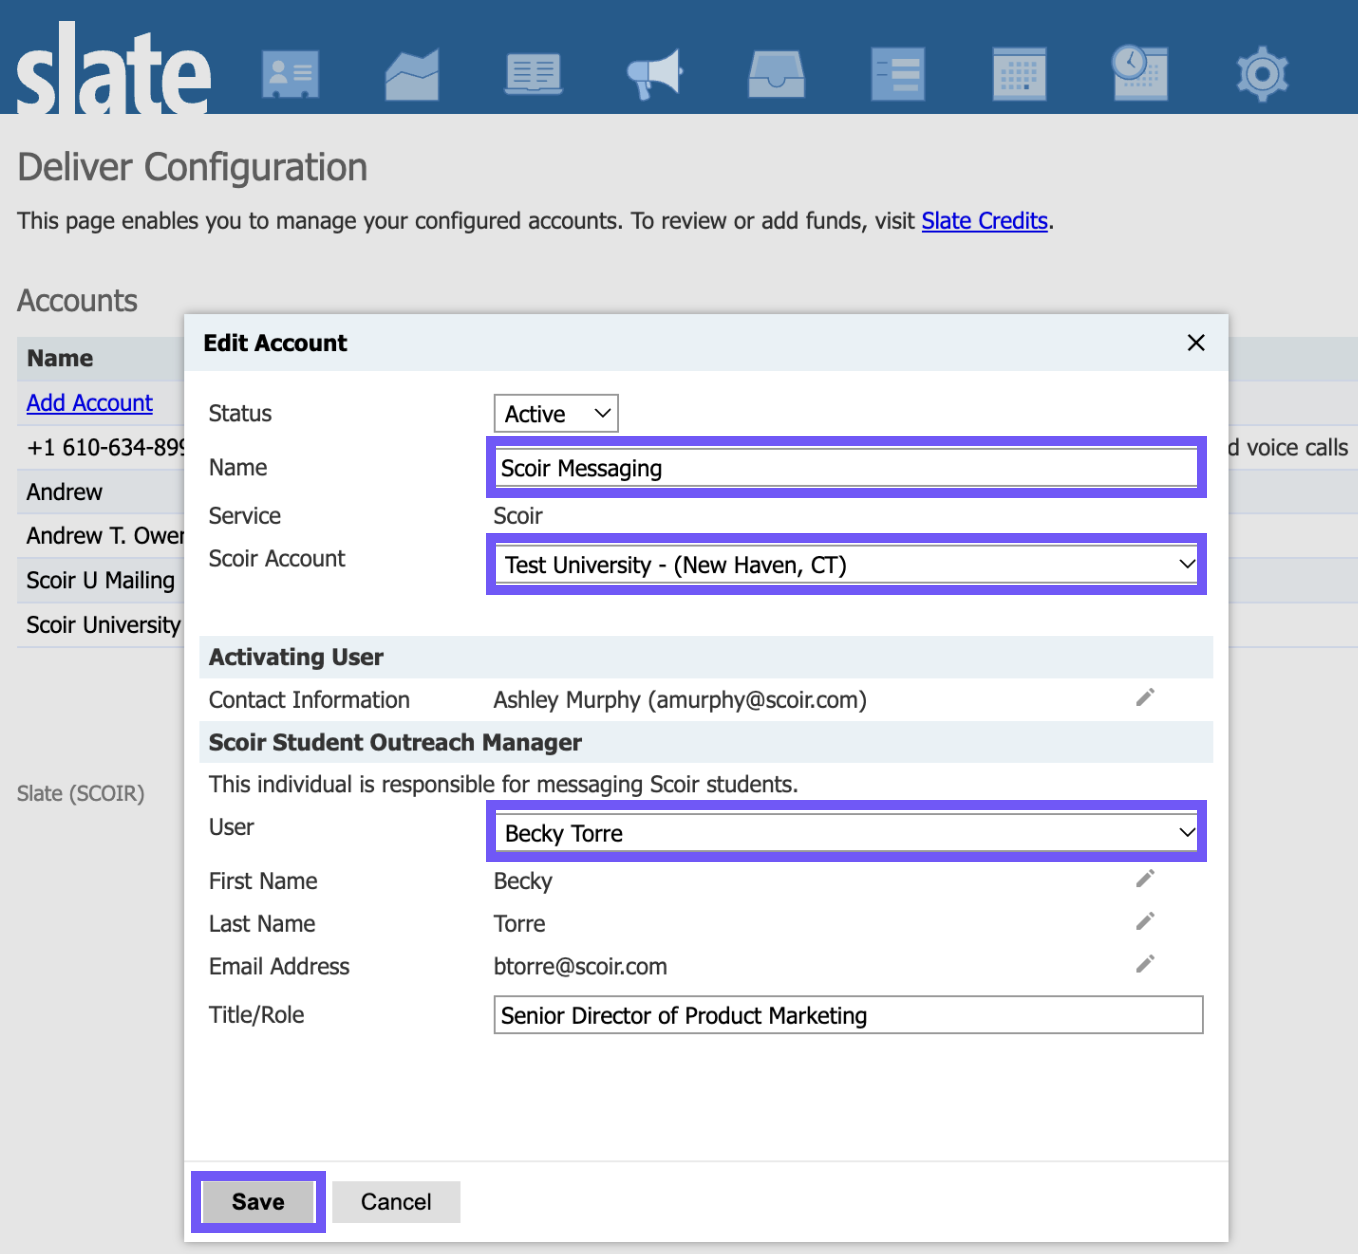
Give your account a name, like Scoir Messaging. Then select the appropriate Scoir Account from the drop down menu.
Select the user who will be the Scoir point of contact for messaging. This can be the same person who is activating the messaging integration, or someone else.
Click Save.
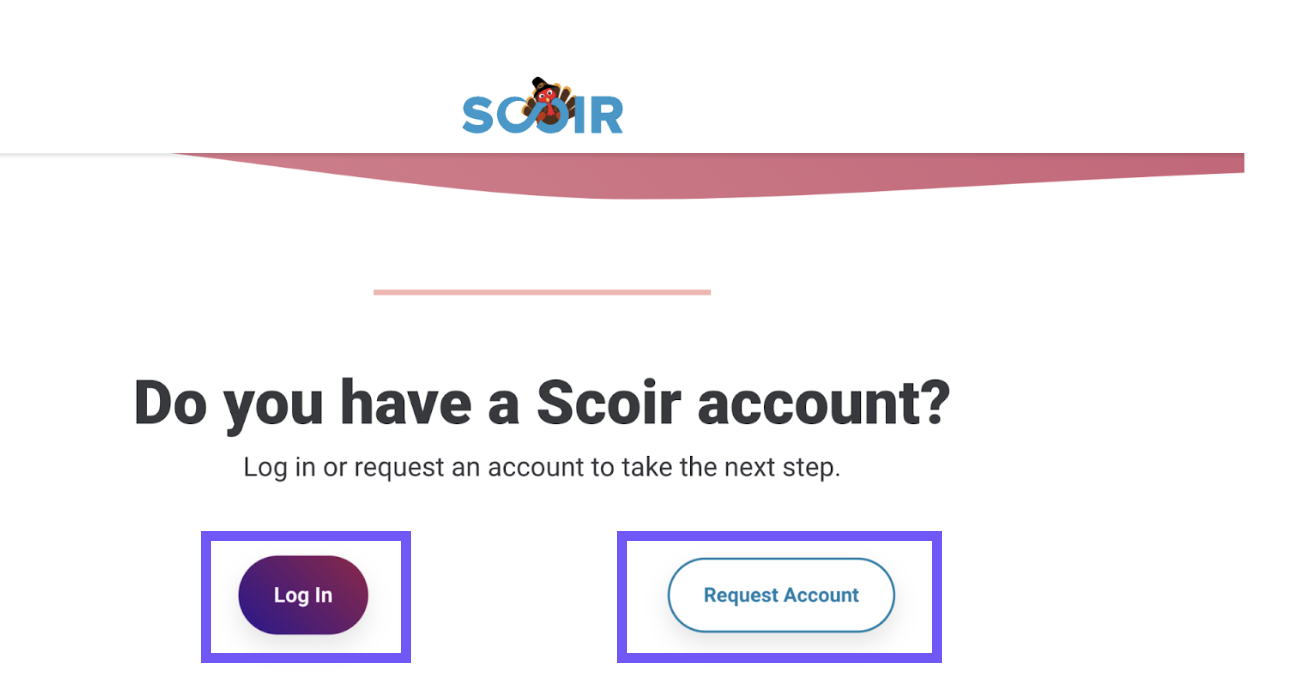
Activating the Account in Scoir
After you’ve added the Scoir Deliver Account in Slate, you'll be prompted to click through to activate the account in Scoir. This step will turn on the flow of data from Scoir to Slate via the Scoir Audience source format, but you’ll still need to activate the source format to start receiving the data (see next step).
If you’re not already a Scoir user, you can follow the steps on the screen to Request Account.
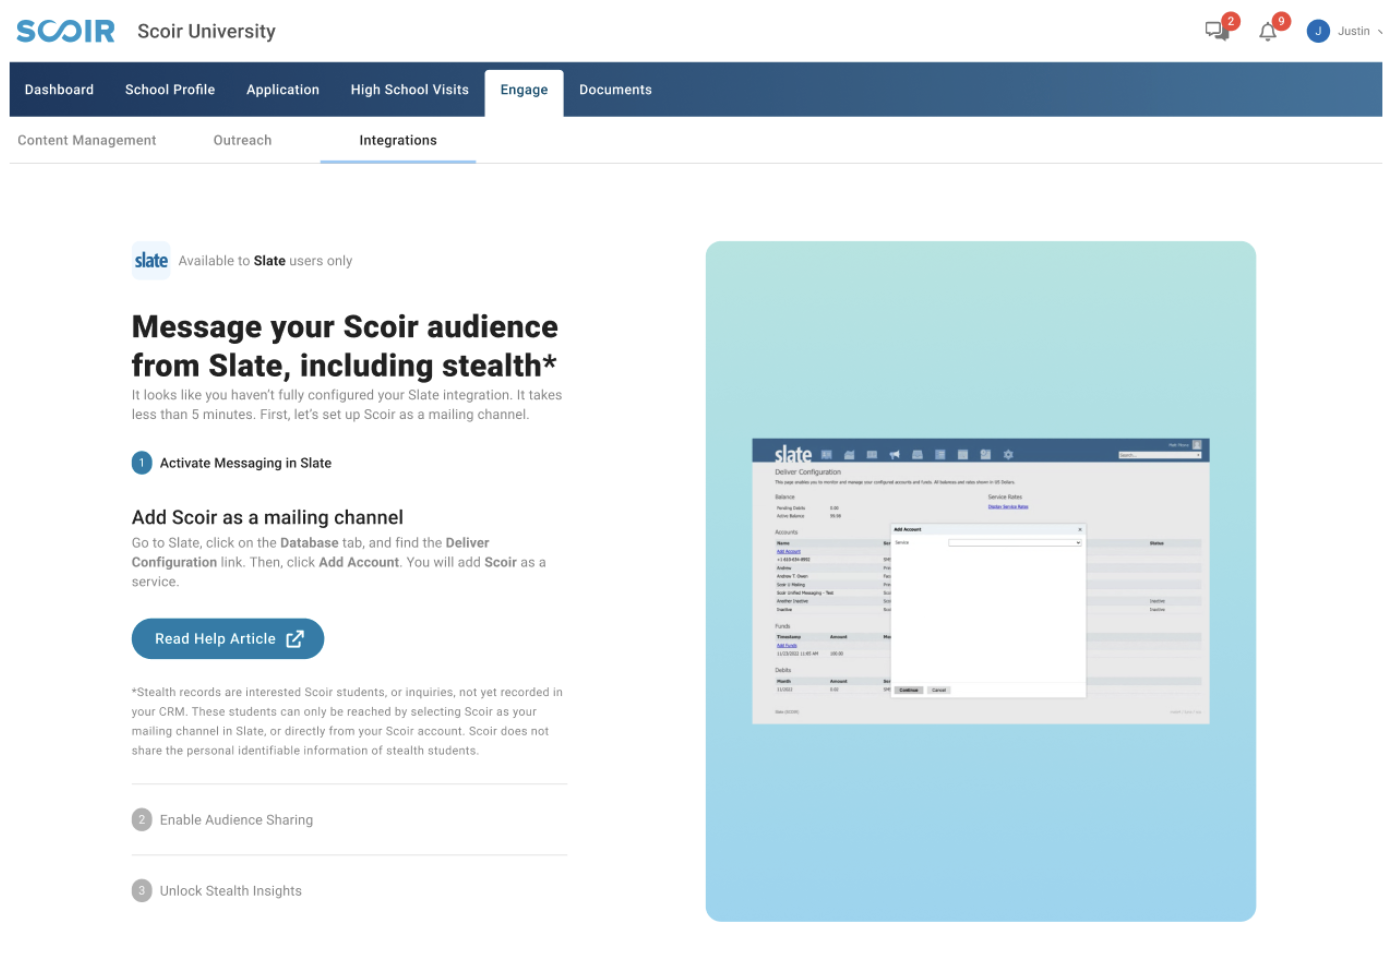
Once logged into Scoir, click the Enable Audience Sharing button in Engage > Integrations.
Click Continue.
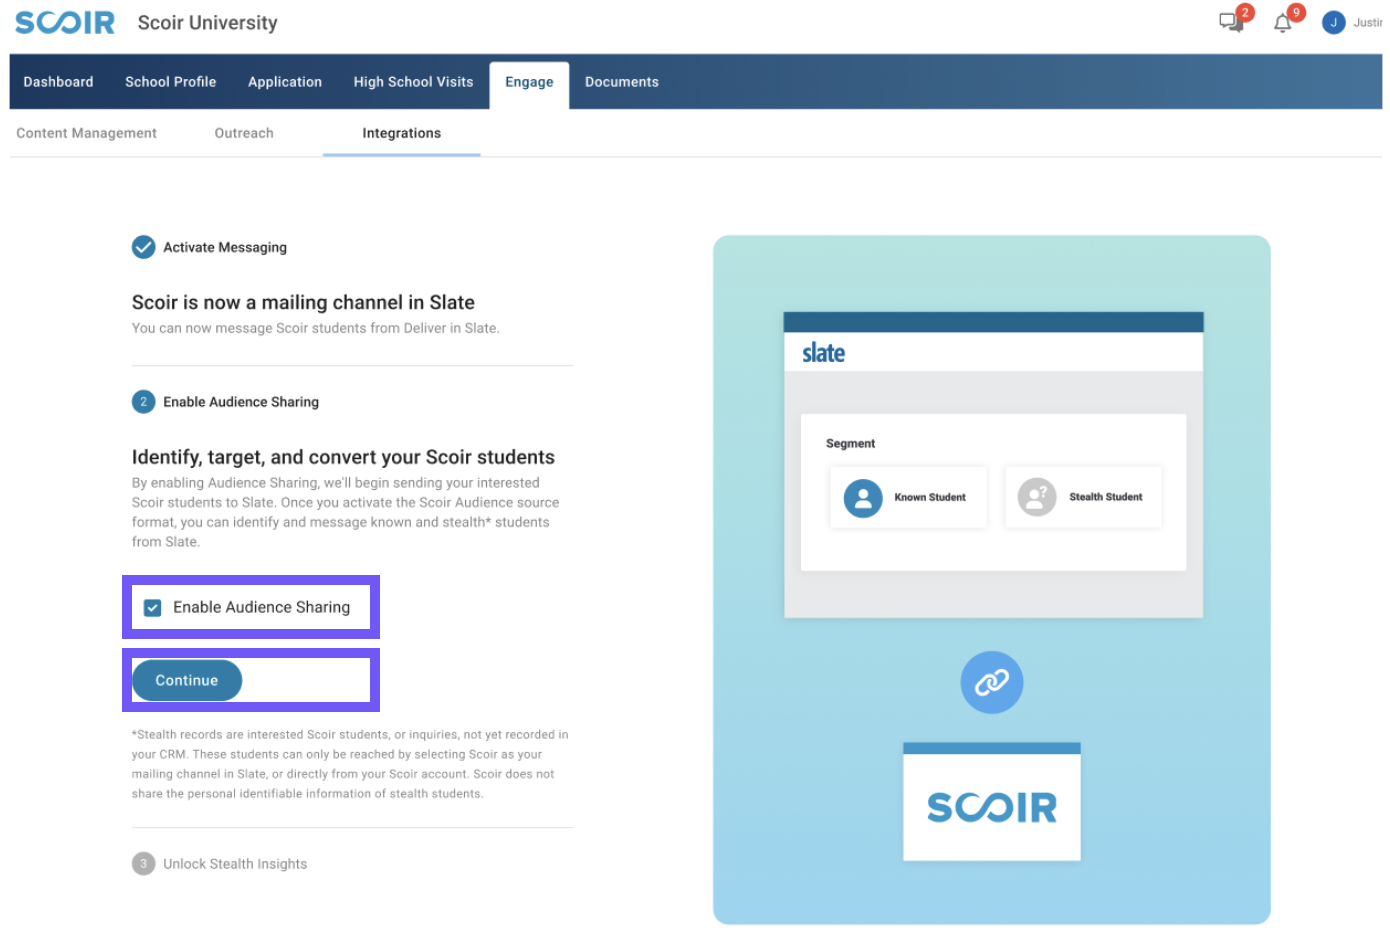
If you happen to land on this page before you’ve added the Scoir Deliver Account in Slate, you’ll be prompted to go back to Slate to add the account first.
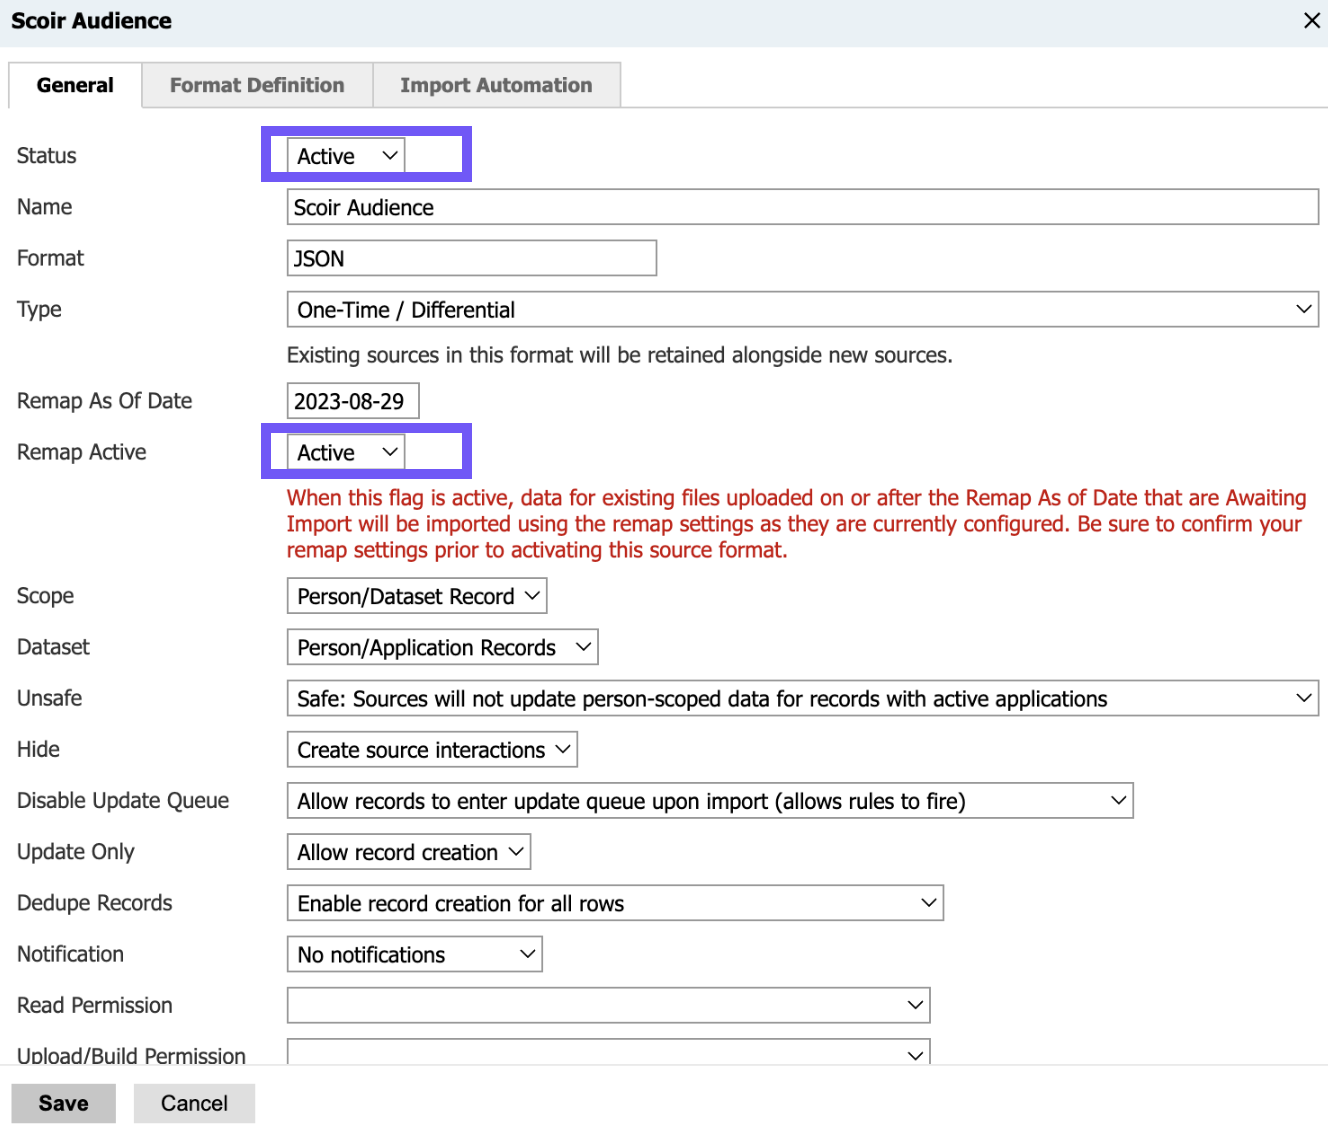
Mapping and Activating the Scoir Audience Source Format
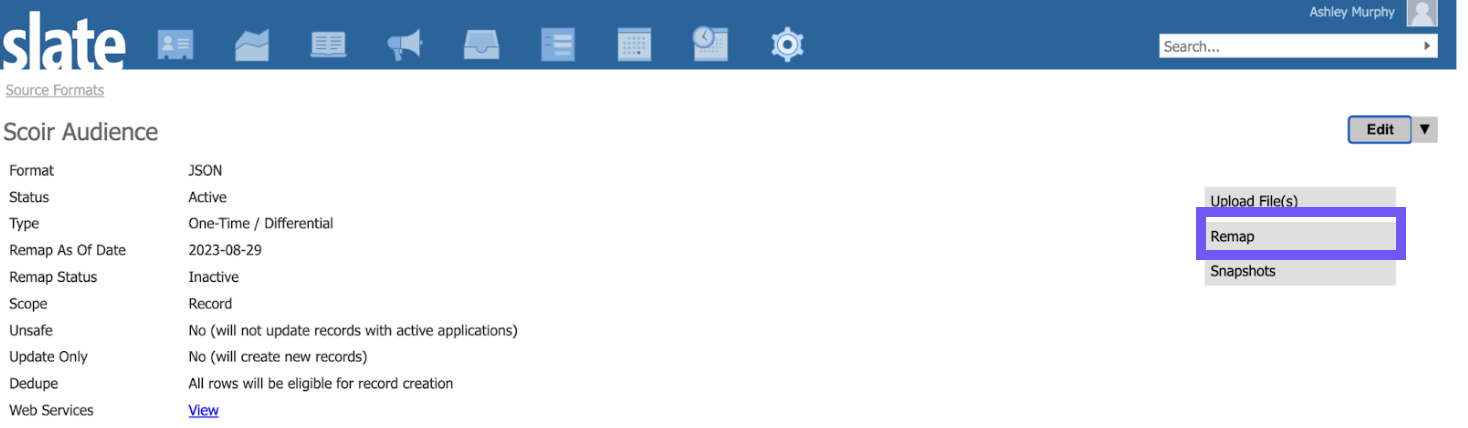
The Scoir Audience source format is the automated import that contains information on all of the students who have expressed interest in your college in Scoir. When you add the Scoir Deliver Account in Slate and activate it in Scoir, the source format is automatically added to your database with some pre-set default mappings.
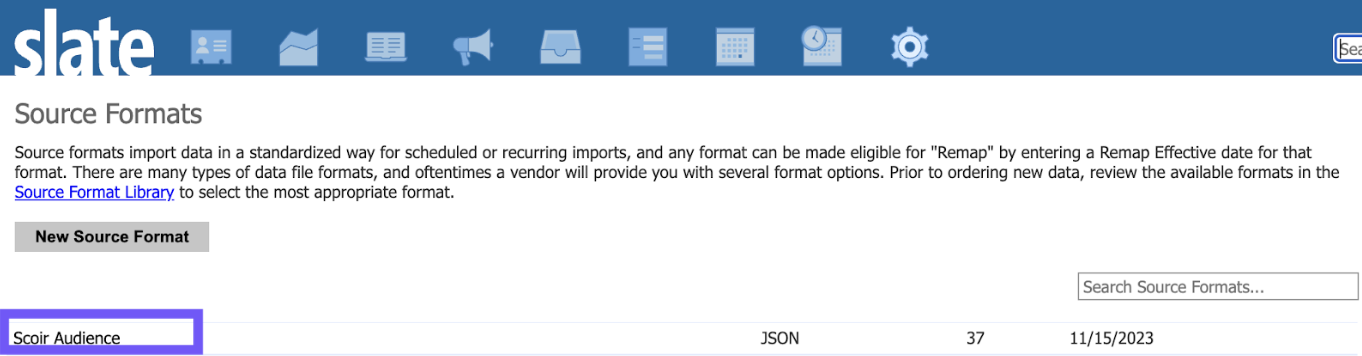
Navigate to Source Formats in the Database.
Click on the Scoir Audience source format.
Click Remap.
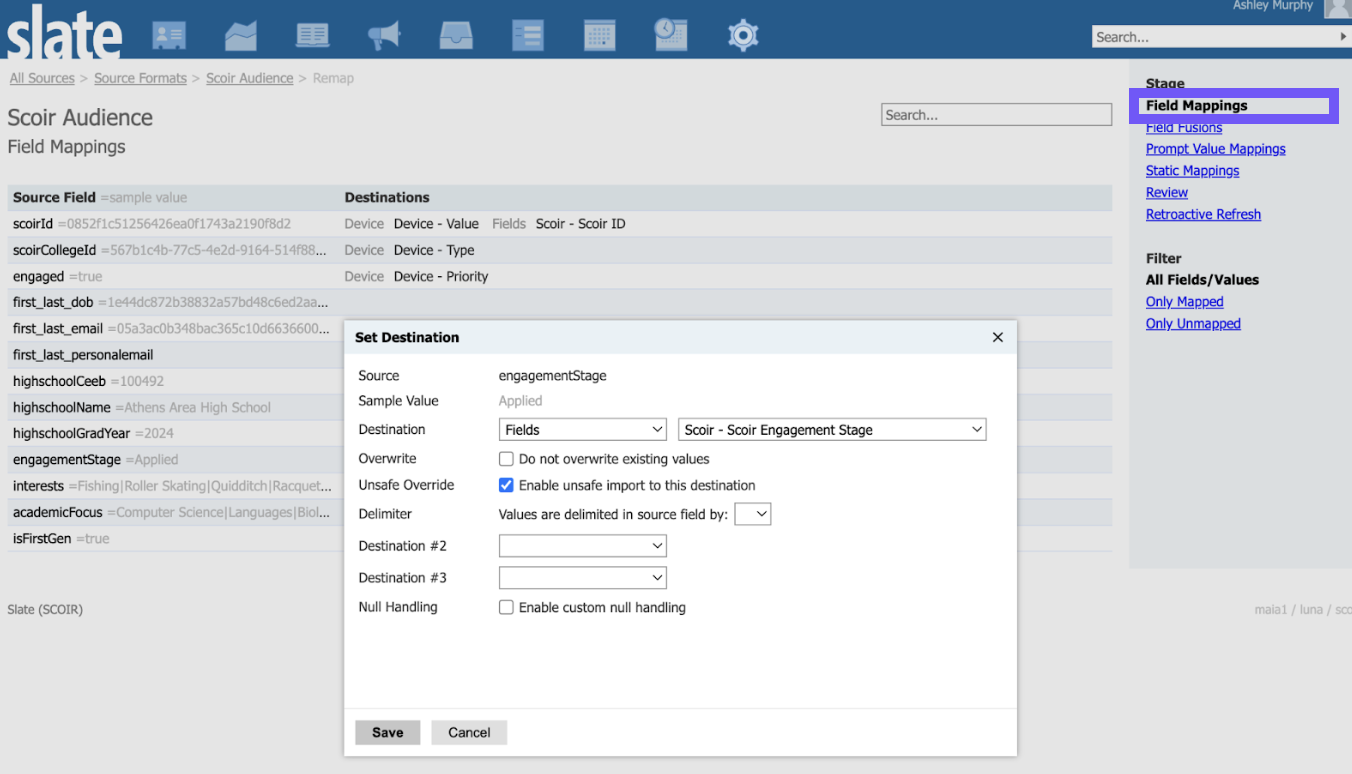
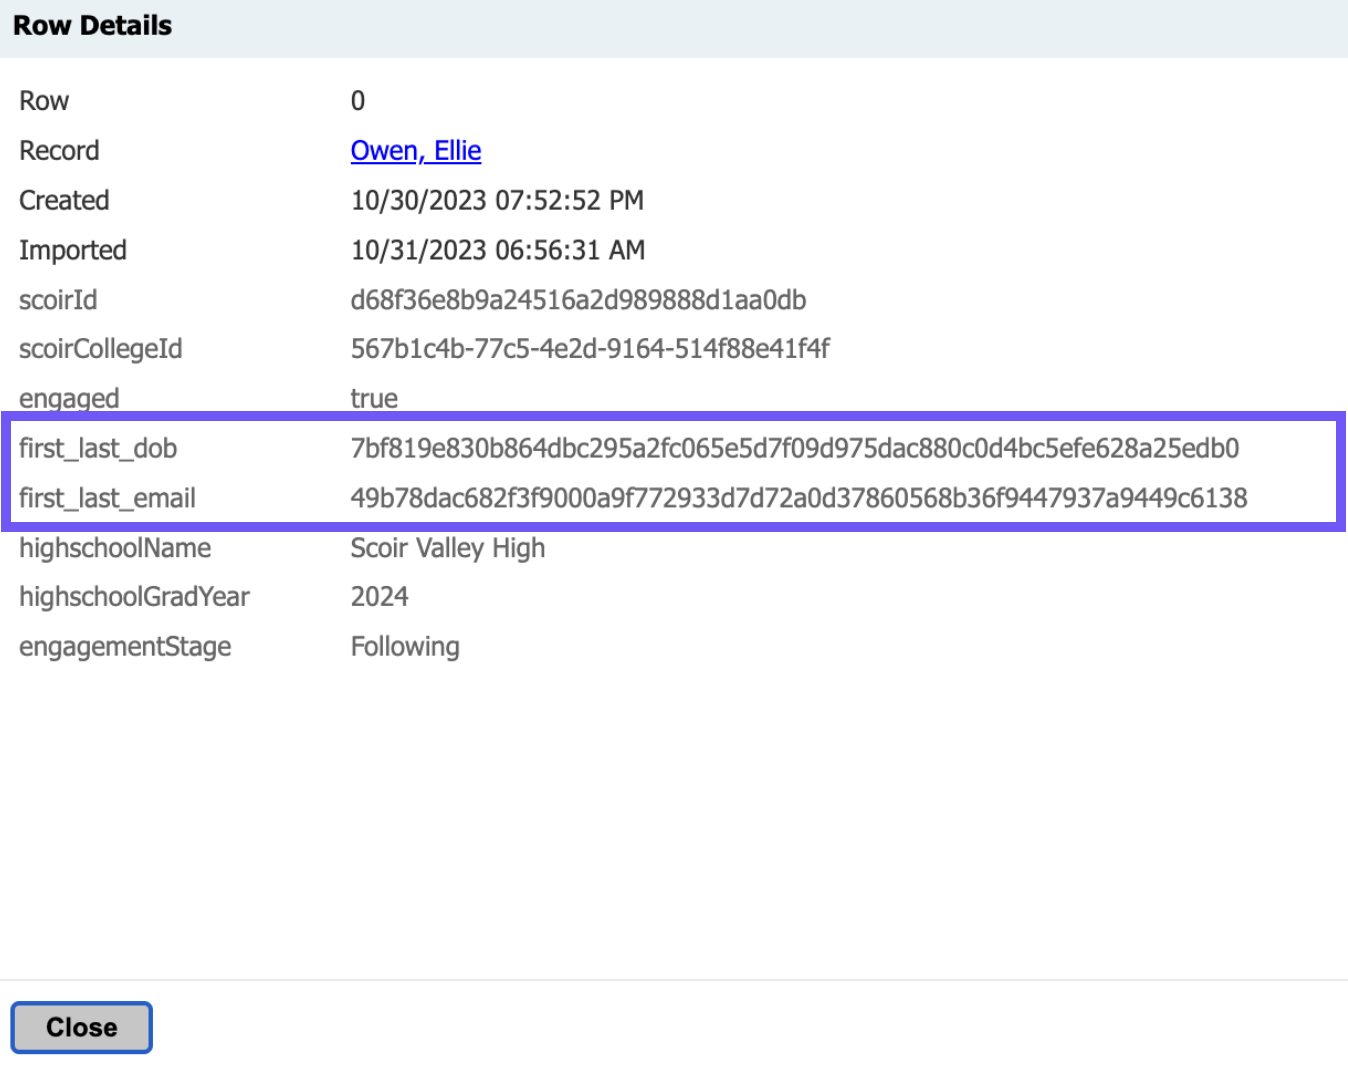
The pre-set default mappings are shown below.
The ‘scoirID’ source field and ‘scoirCollegeID’ source field are brought in as a new Device on the person record. This Device will serve as the delivery mechanism for Scoir Messages, similar to an email address for an email message or a mobile phone number for an SMS.
The ‘engaged’ source field is the field that sets whether the Device value is active or inactive. If one of your interested students decides to unfollow you in Scoir, then the integration will bring in that update as ‘engaged’ = ‘false’ and the Device Priority will be set to Inactive.
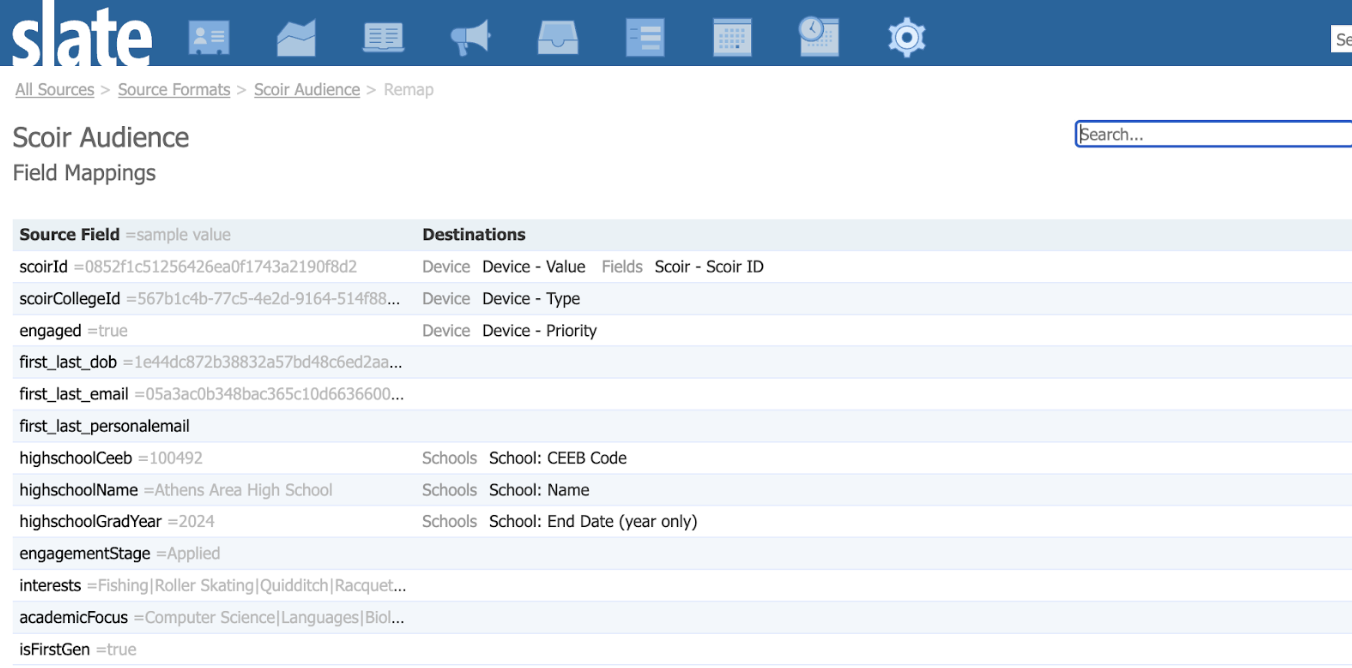
The source file will also contain an ‘engagementStage’ value for each record. This value lets you know whether the student has indicated in Scoir that they are following, planning to apply, or have already applied to your college.
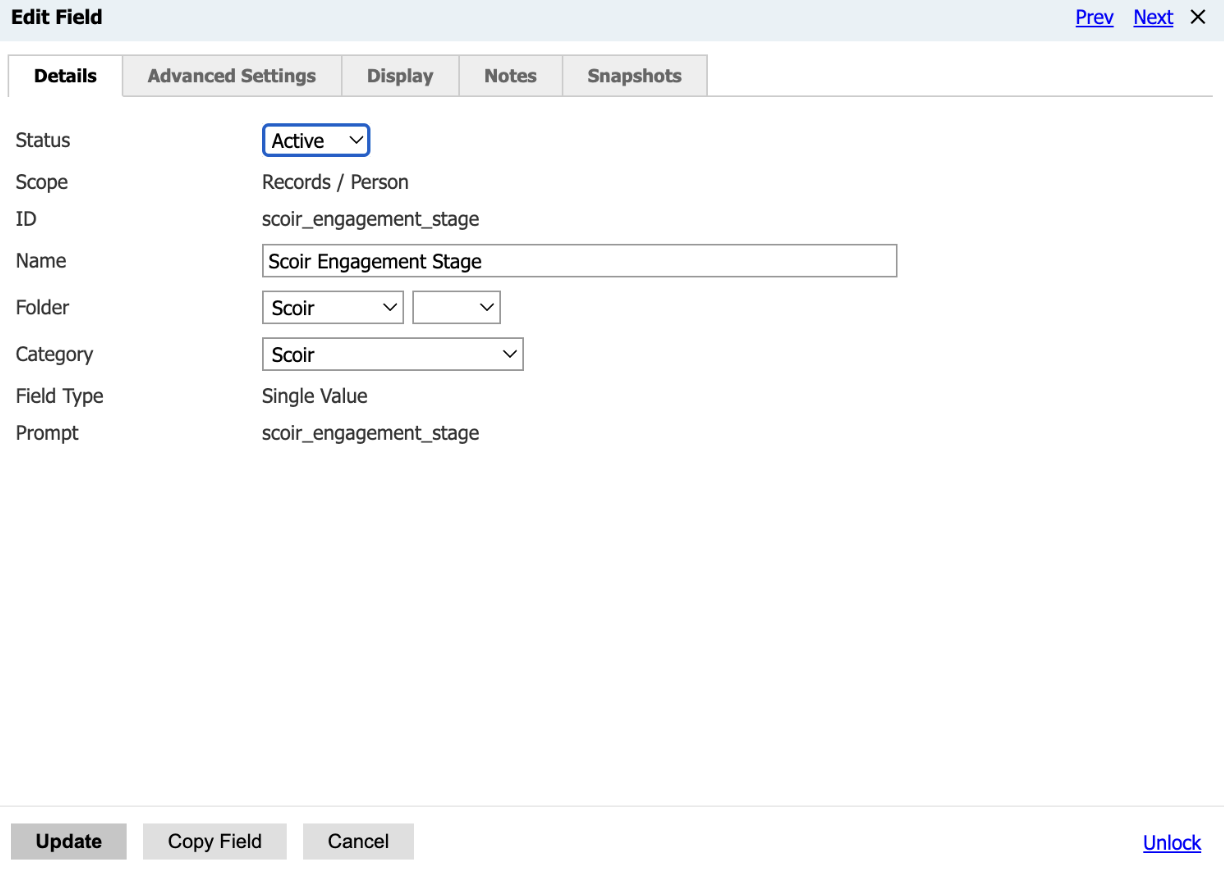
You will need to create a custom field and custom prompts in your database to store Scoir Engagement Stage.
Scoir Engagement Stage prompt values are Following, Applying, and Applied.
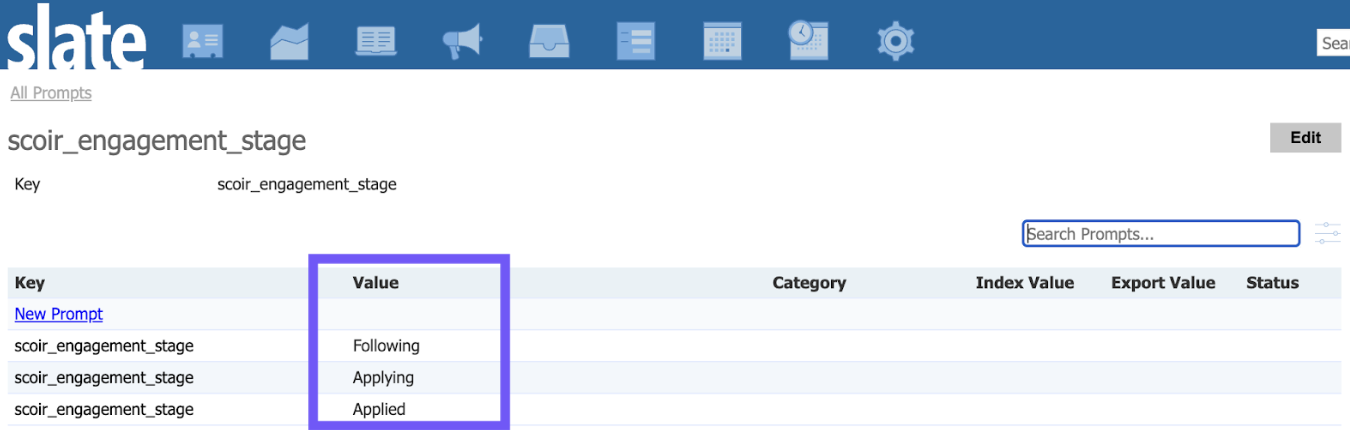
The Scoir Engagement Stage field should be person-scoped and a single-value type.
Navigating back to the Scoir Audience source format, you will then be able to update your source format mapping with the newly created Scoir Engagement Stage field and prompt values.

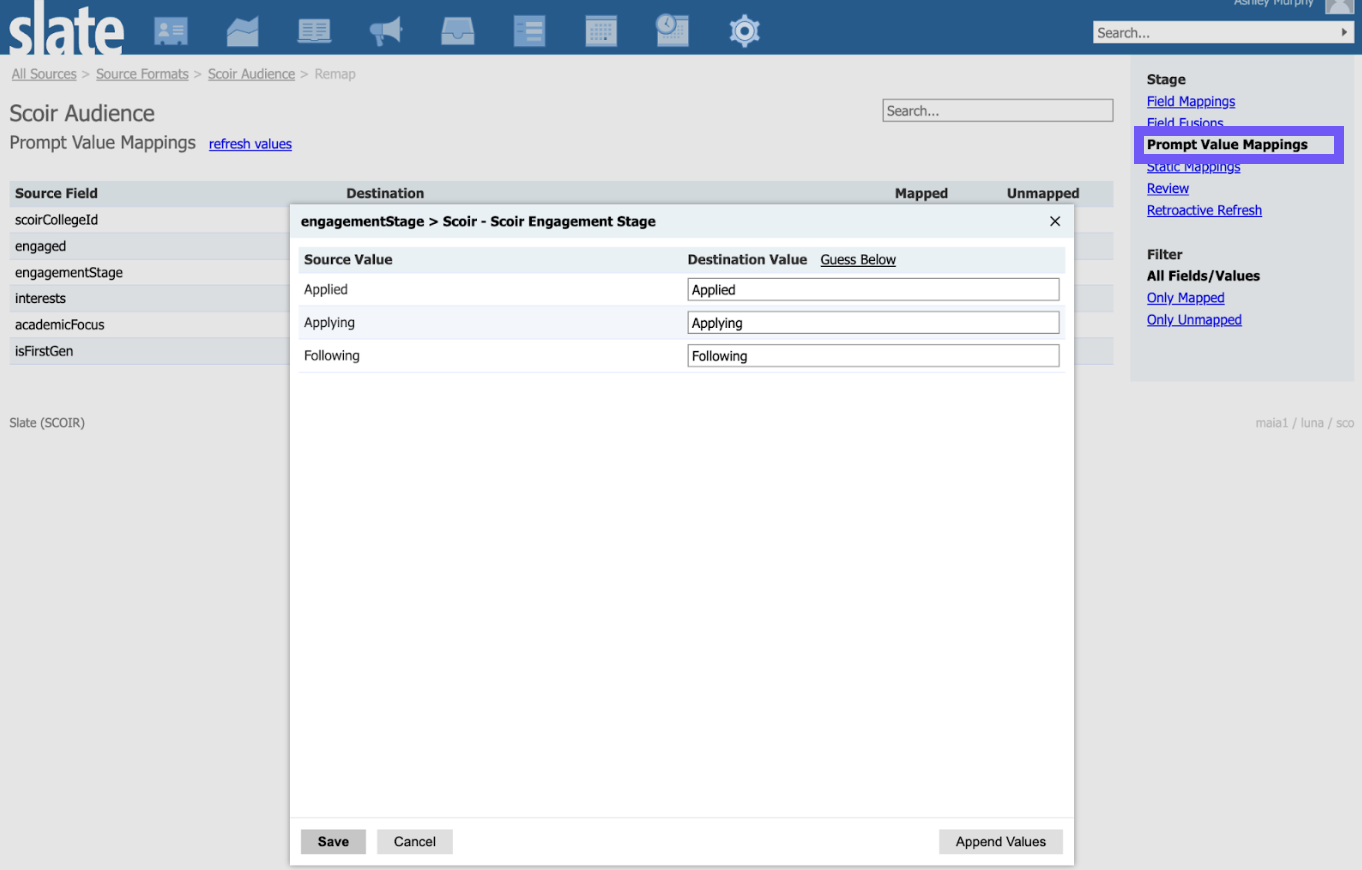
You can Append Values and add each of the Scoir Engagement Stage source values to map each to the appropriate destination value as shown in the mapping example above.
Then, be sure to activate the source format by selecting Active as the status. Once activated, imports will be sent from Scoir to Slate nightly as new followers are added or existing followers are updated.
Colleges who partner with Scoir receive additional attribute information for their Scoir followers:
- Interests
- Academic Focus
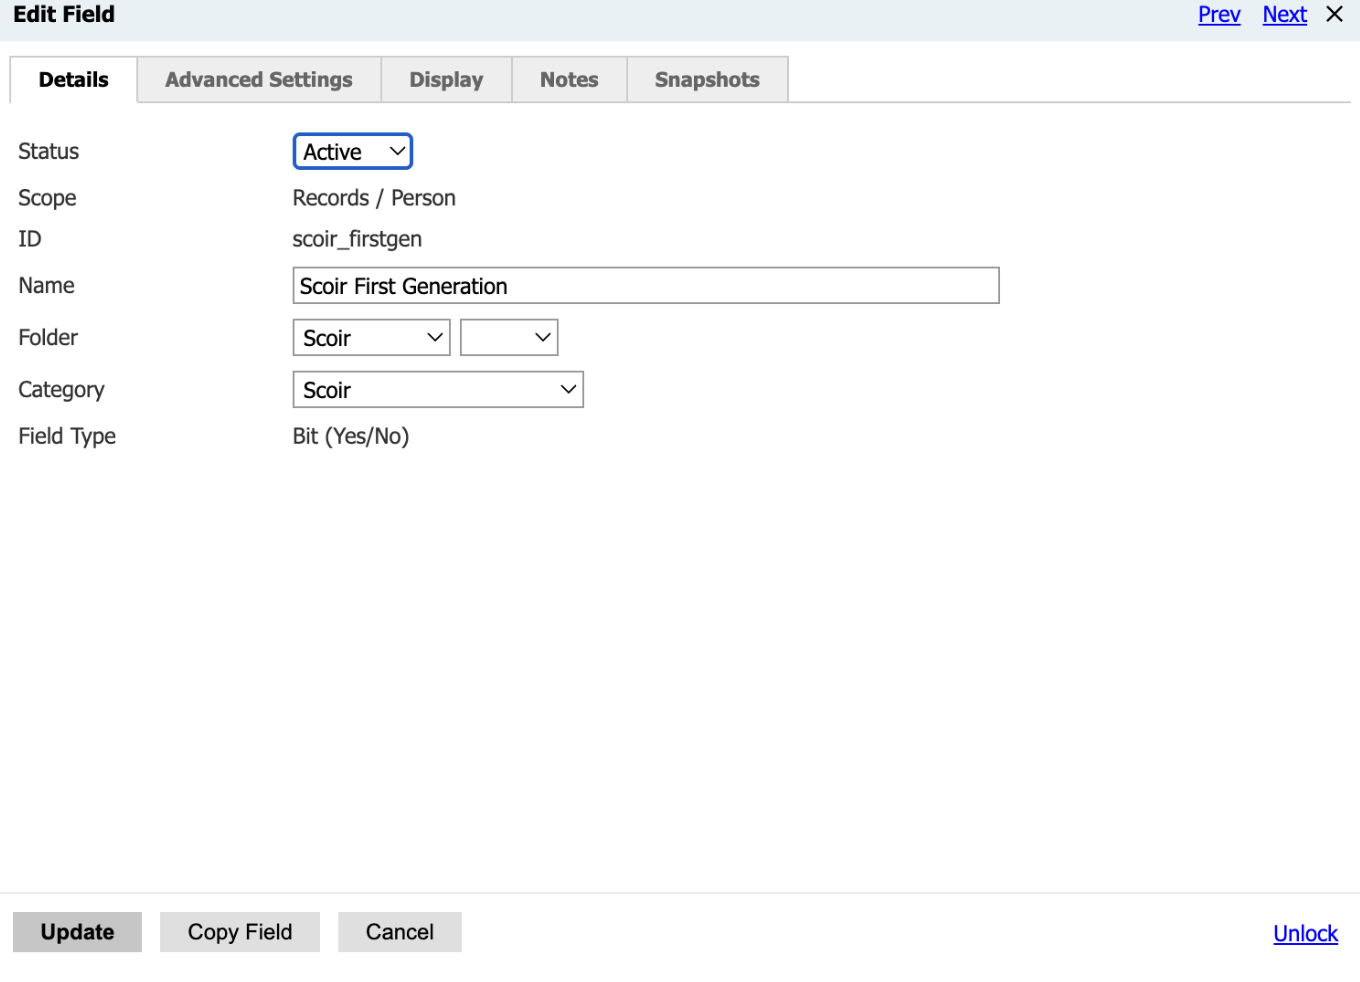
- First Generation Status
Custom fields will need to be created to map and store this information. Prompt values will need to be created for the Interest and Academic Focus fields.
Scoir First Generation Status should be set up as a person-scoped, bit field.
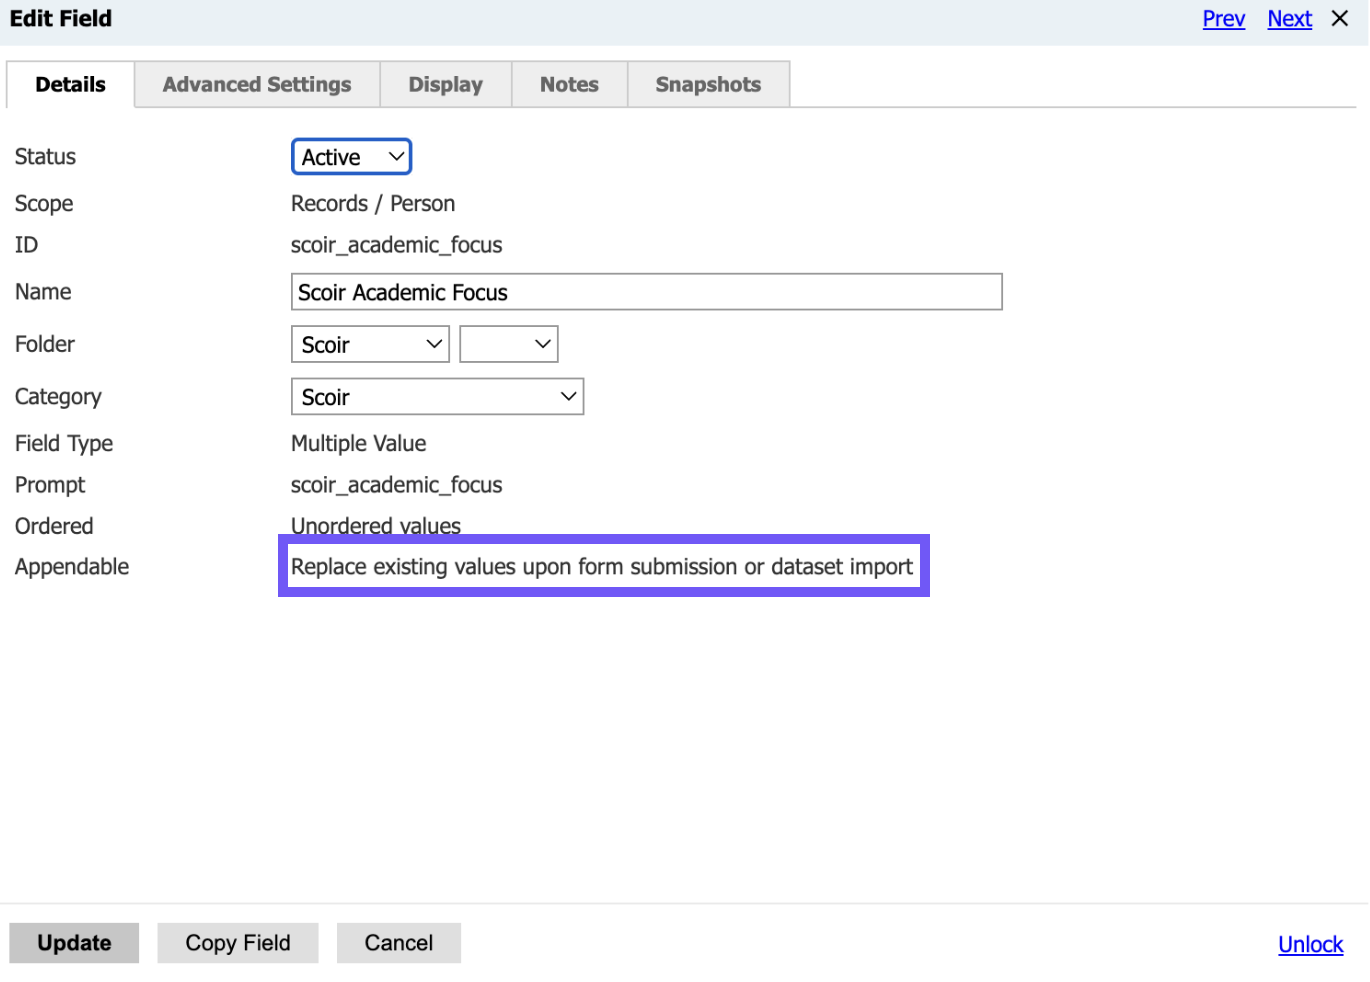
Scoir Interests and Academic Focus fields should be set up as person-scoped, multi-value fields. Make sure to mark Replace existing values so that future imports, as students update their interests in Scoir, are reflected accurately on the record in Slate.
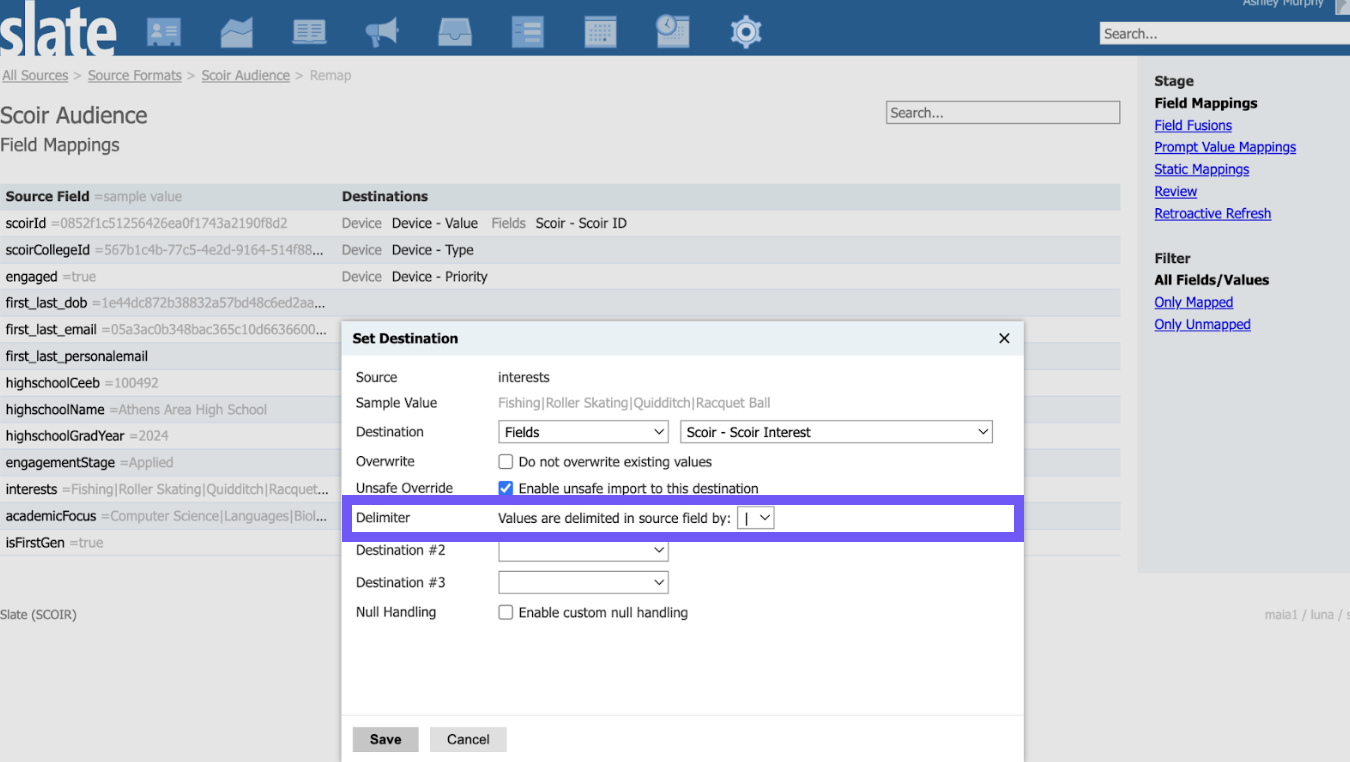
When mapping the Scoir Interests and Academic Focus fields in the Scoir Audience source format, be sure to select the value delimiter as shown below.
Record Matching and Creation
In addition to Scoir ID, the import will also look to match to an existing record based on the combination of First/Last/DOB or First/Last/Email.
Personal information is sent in a hashed format to protect the student’s identity for any record not already known to you. Slate can read the data to identify matching records in your system, but the end user will not be able to decipher it in the file. This is because all of your interested students in Scoir are sent to you, including those that aren’t able to be matched to a record already in your database.
Note: The order of matching logic is:
- Scoir ID
- Email address + first + last hash
- First + last + birthdate hash
This means you’ll have records created by the import for prospective students previously unknown to you. These are created with a name of “unknown.” A Scoir ID and a Scoir Device are attached to the record to facilitate Scoir Messaging, but no other personal information is provided.
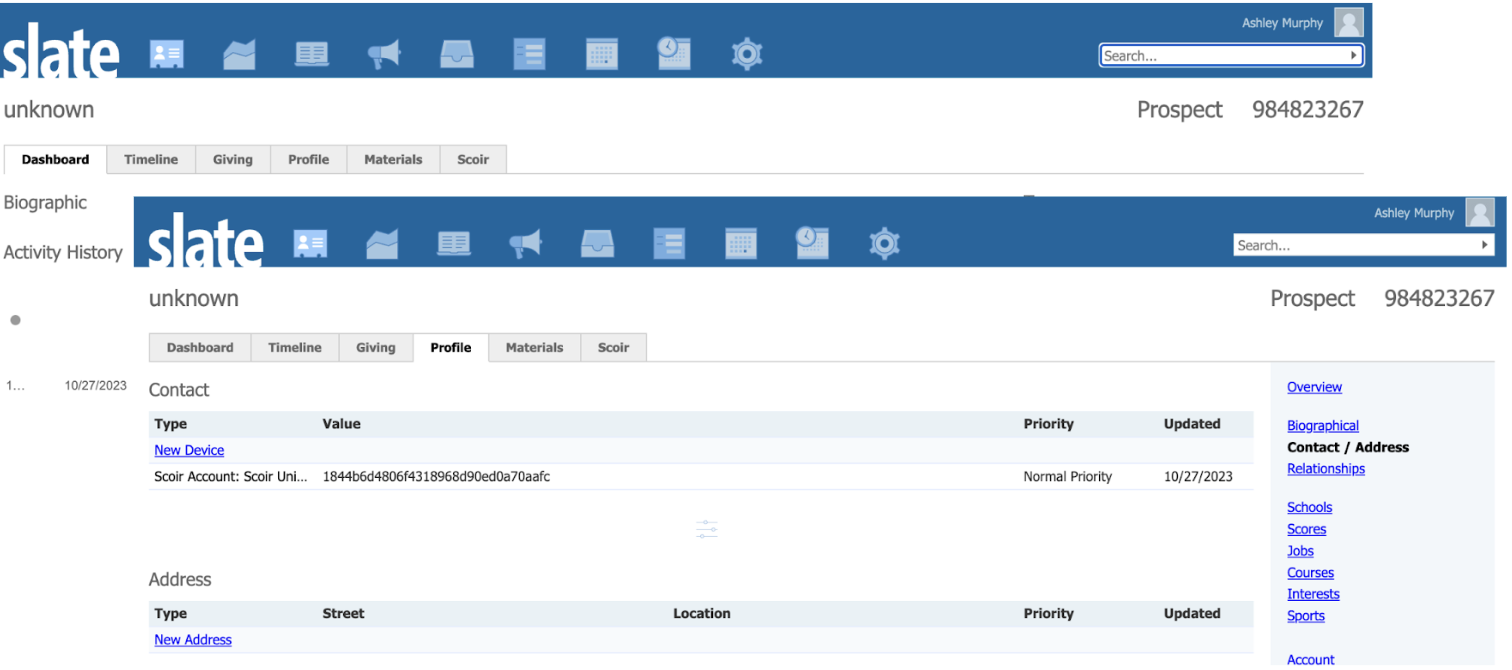
Unknown records will NOT land in Consolidate Records. However, when an unknown person record is created, Slate will store the hash values for those unknown records which can then be used for matching purposes by regular known-value imports and form submissions and to allow them to then become known records.
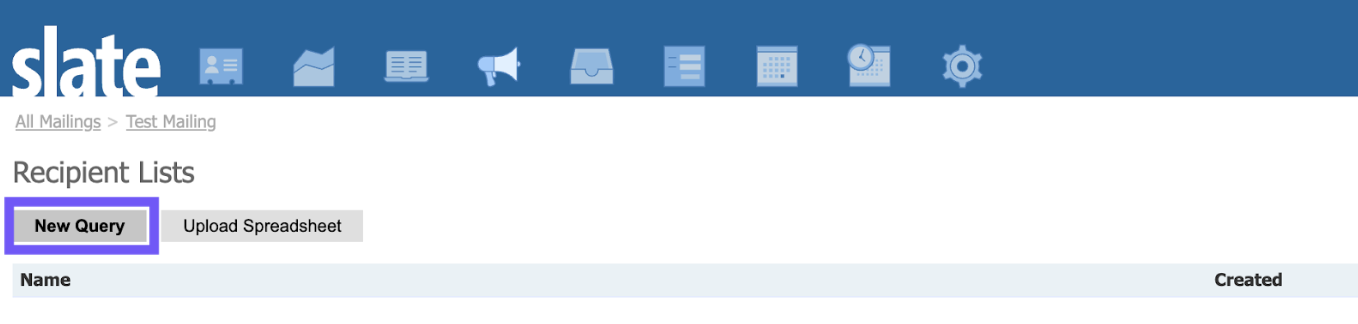
Creating a Scoir Mailing in Slate
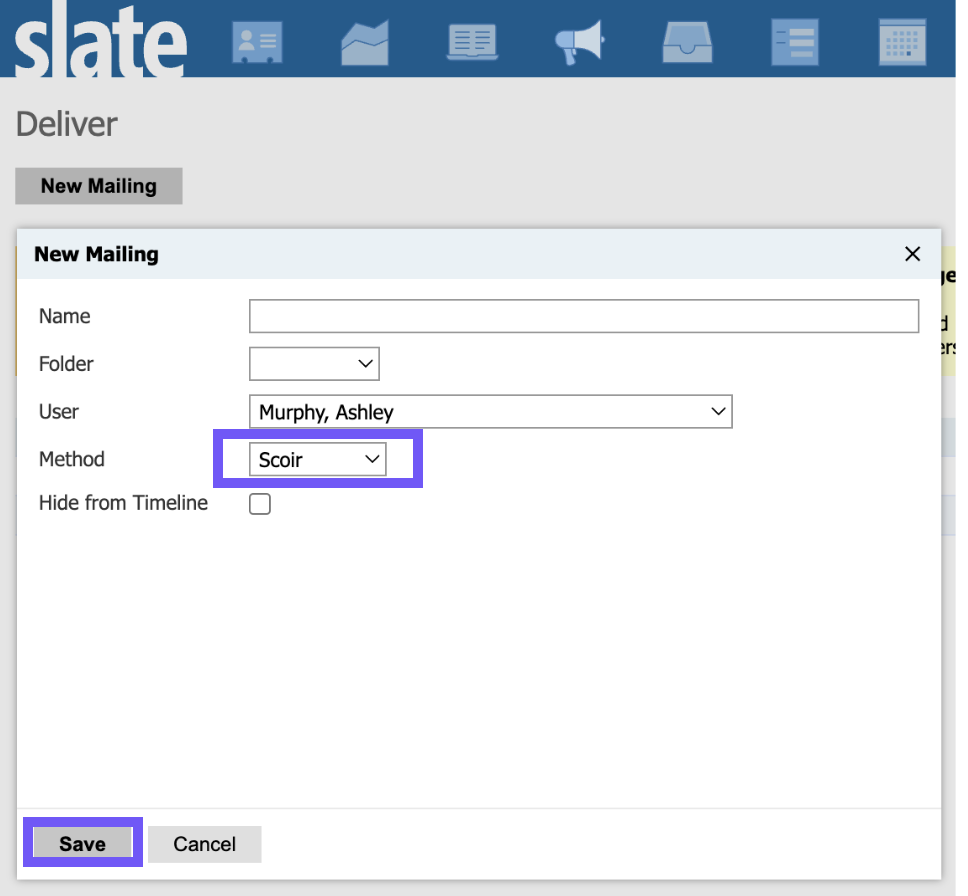
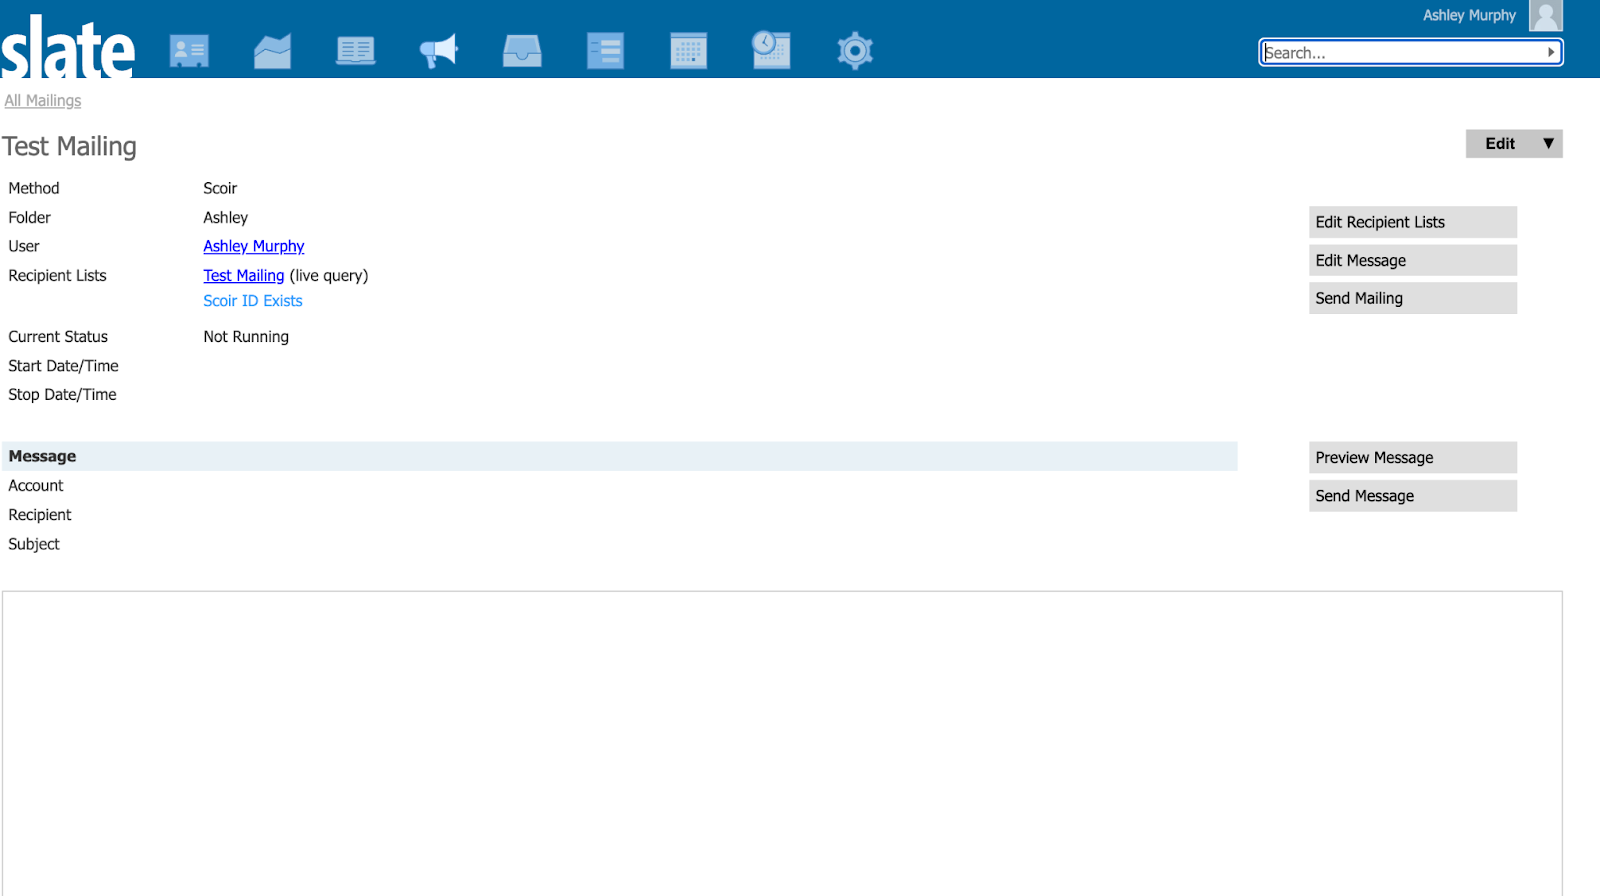
Navigate to Deliver and click New Mailing.

Name your mailing and file it in a folder as with other mailings. Select Scoir as the Deliver Method. Click Save.
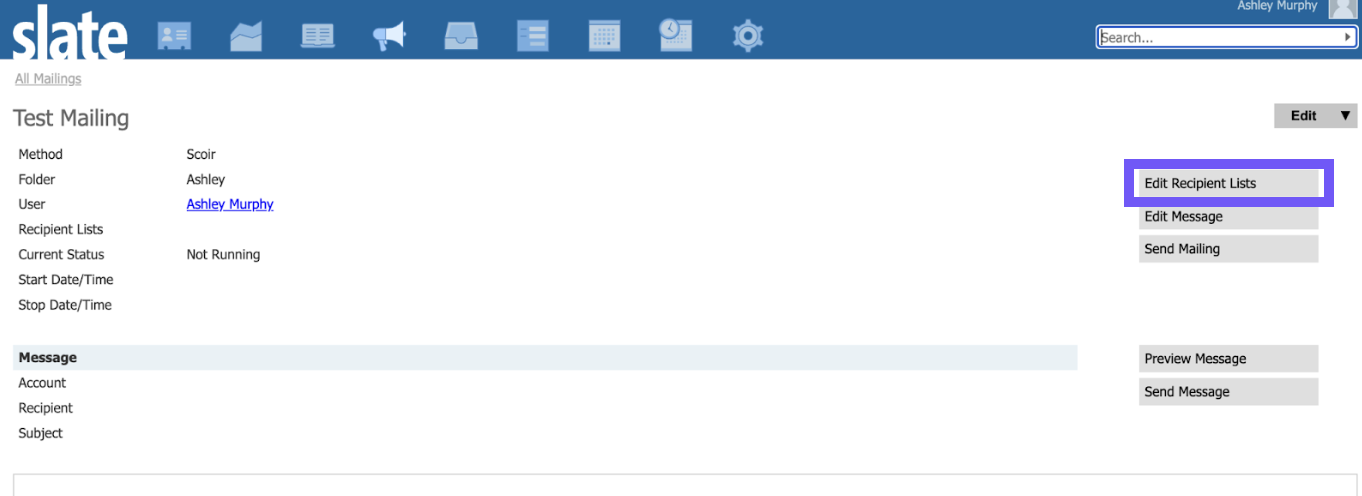
Click Edit Recipient Lists to specify who you want to send the mailing to and to pull any exports you’ll use as merge fields in your message. See Messaging Stealth Records
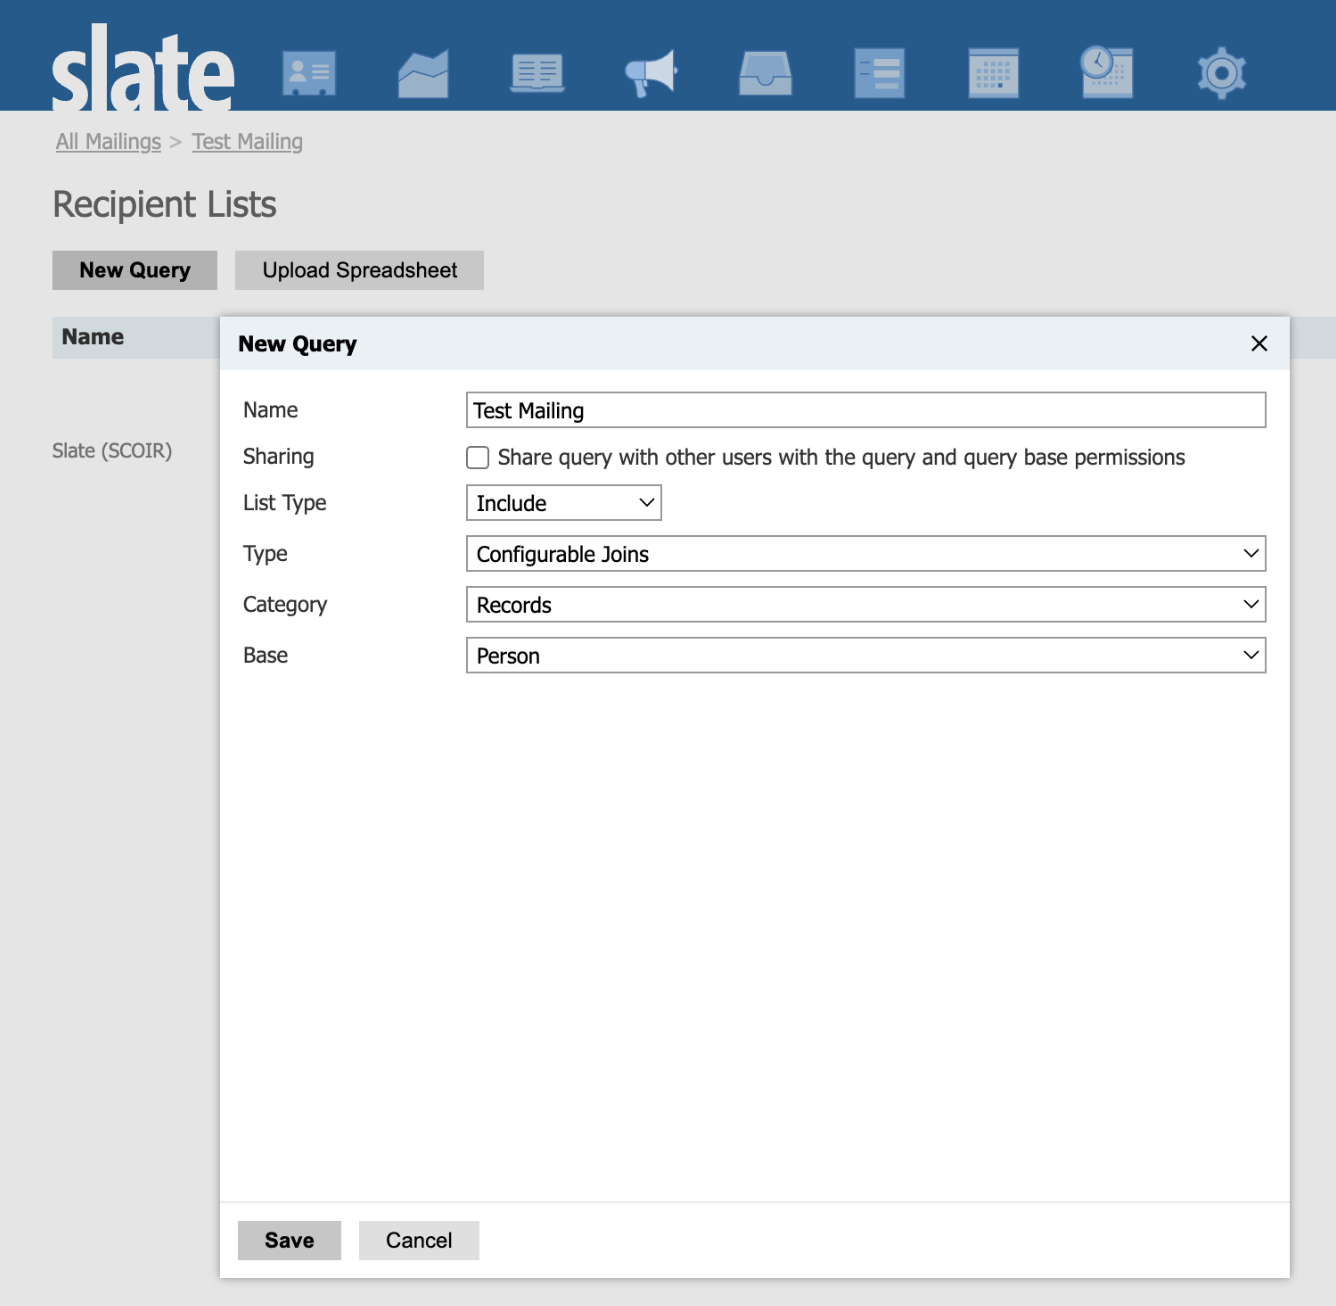
Click New Query.
Name your query to identify it as the recipient list for your mailing. The base of your query depends on the nature of your recipient list (inquiry or applicant). If you’re messaging Scoir followers who have not yet applied, then the Configurable Joins - Person base should be selected.
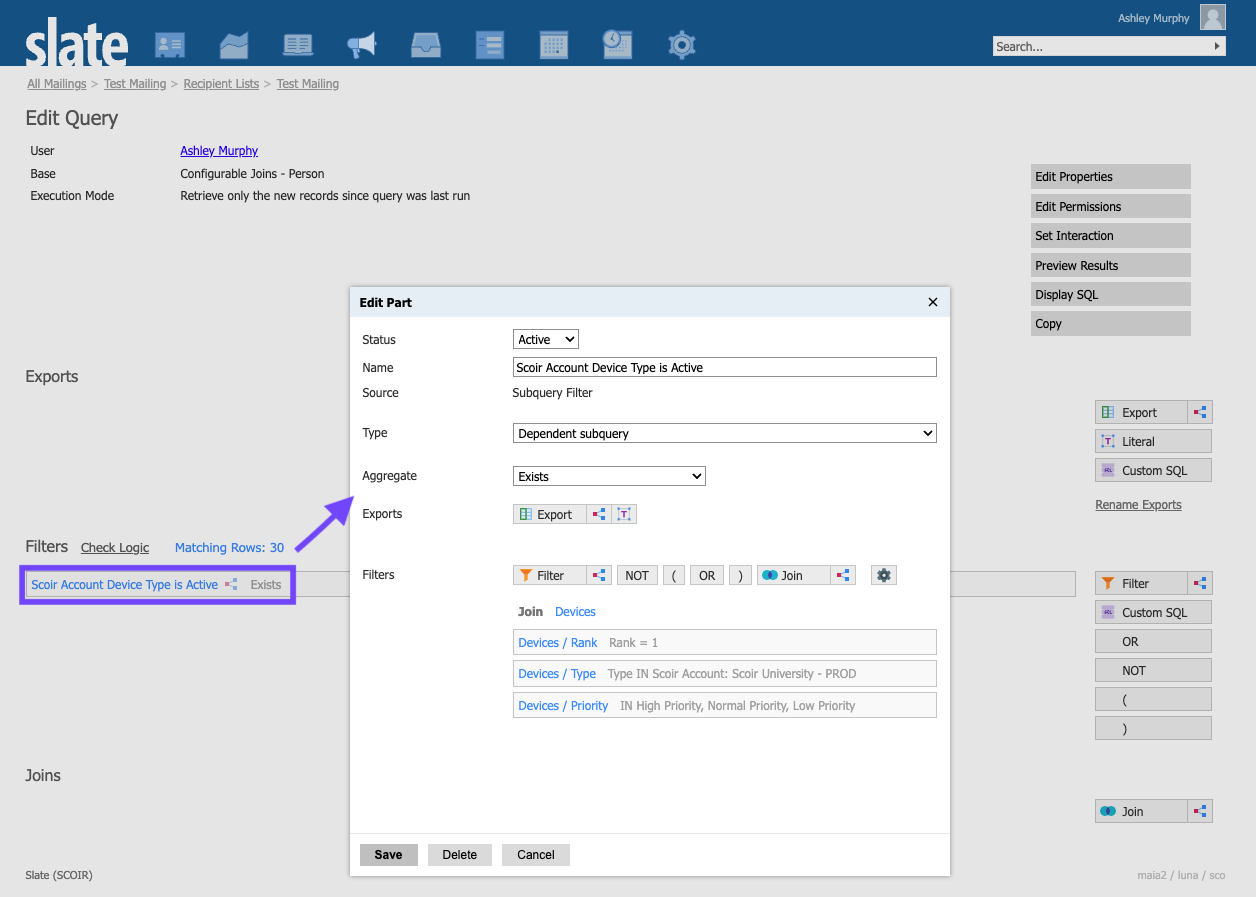
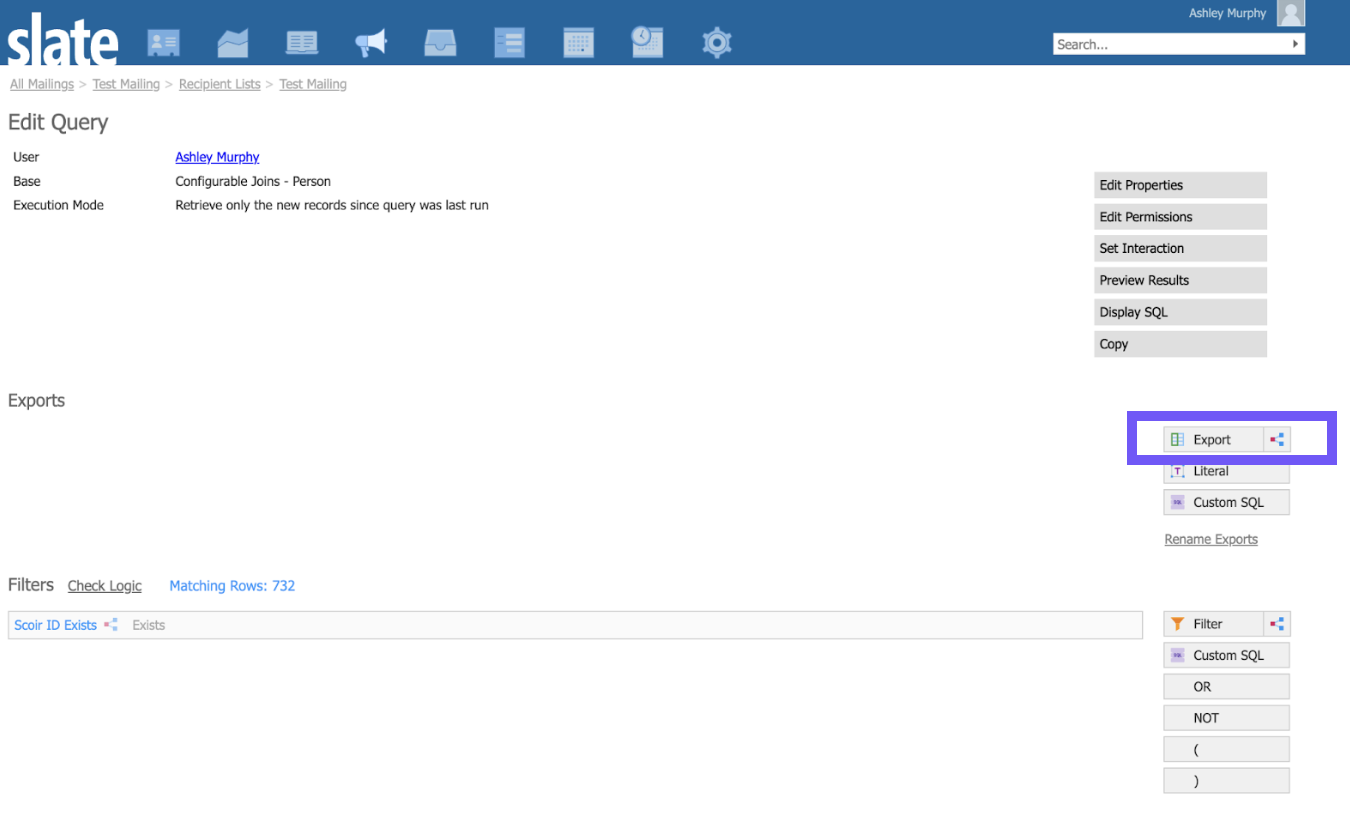
At a basic level, any record with an active Scoir Account Device Type can be messaged in Scoir via Slate. To get started, you might simply filter on the existence of an active Scoir Account Device Type to identify the records in your system that are eligible to be messaged in Scoir.
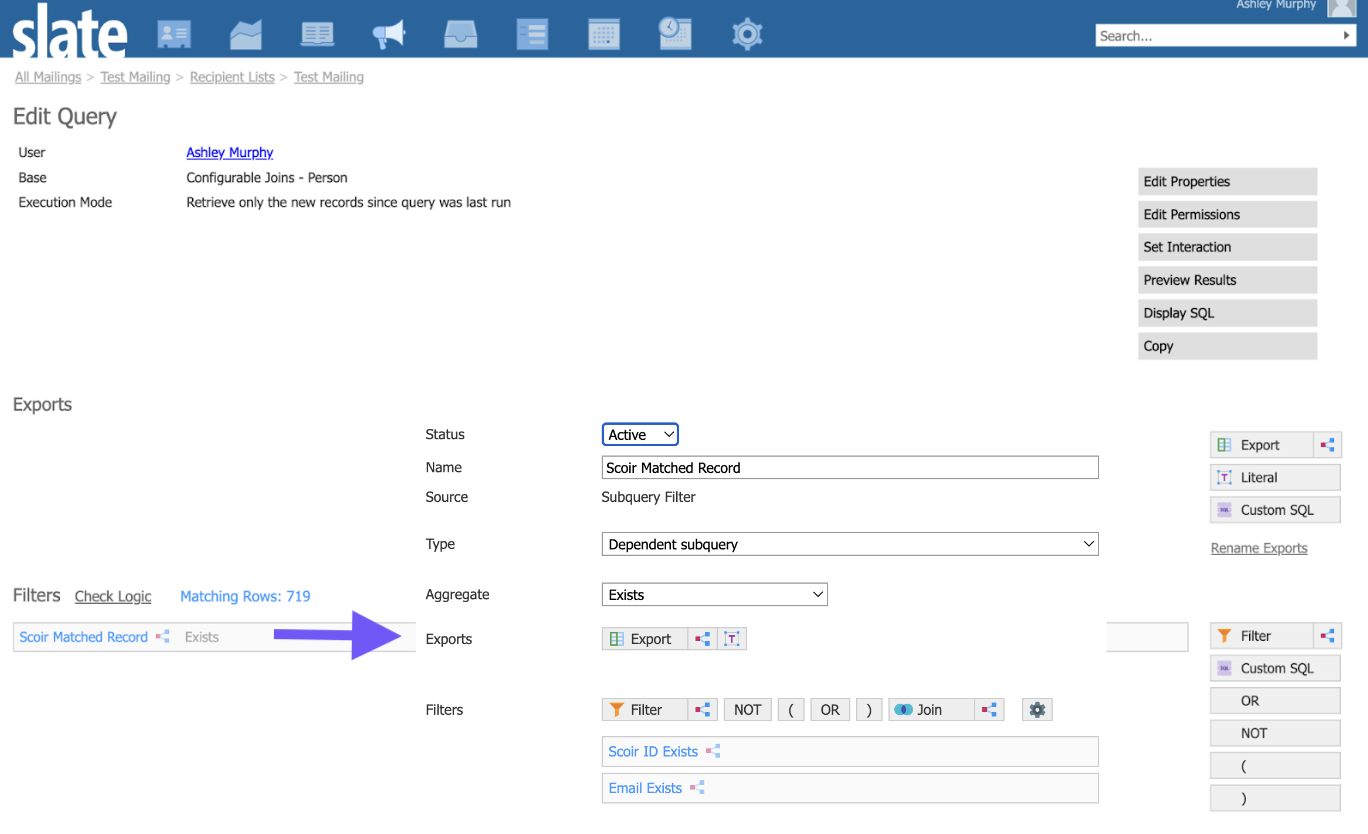
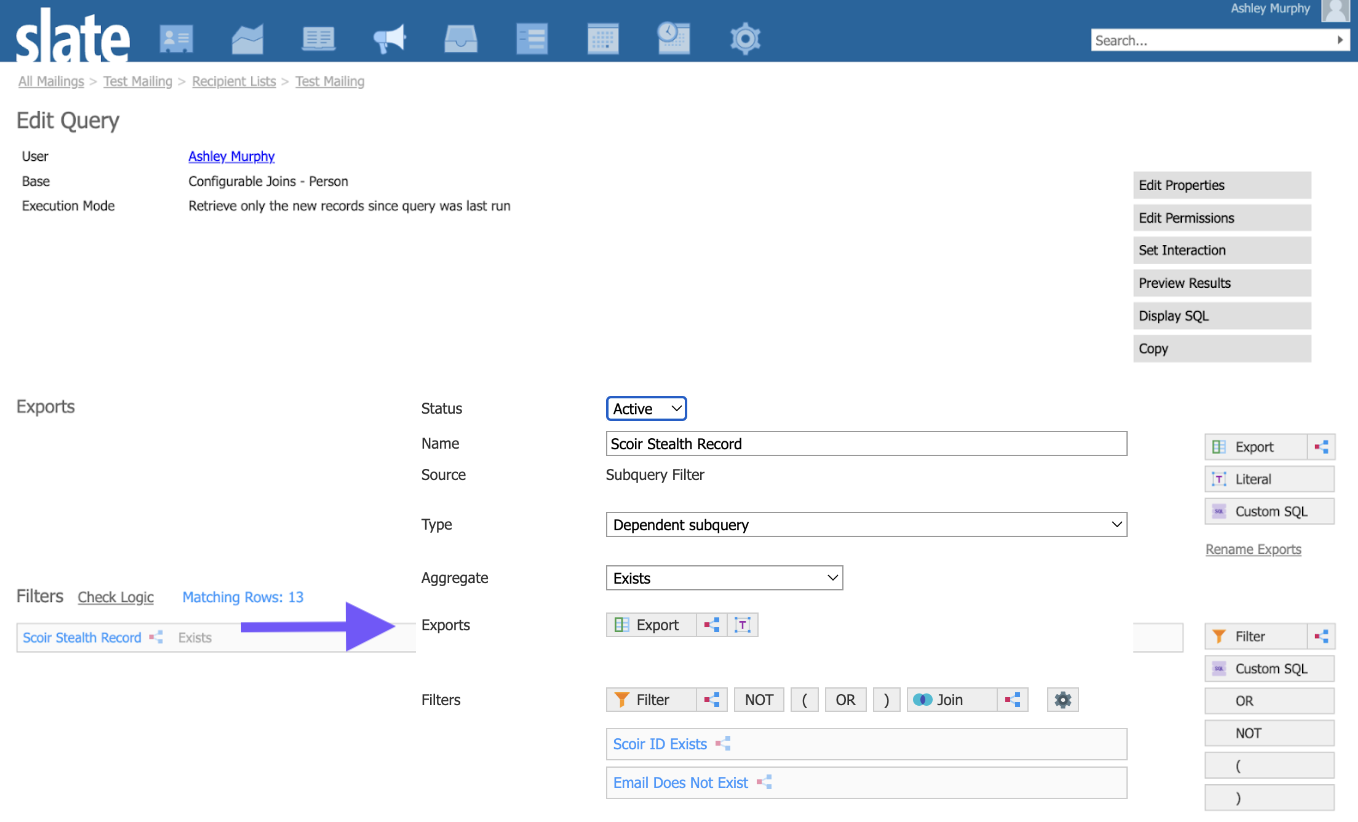
You might also want to identify and distinguish between the followers that were matched to records already in your system vs. the stealth followers that are otherwise unknown to you. We suggest identifying a matched record by the existence of a Scoir ID and an email address and a stealth record by the existence of a Scoir ID and no email address.
bb84b23b-343e-4d6f-8485-9c9a32cdb9f8:sco
You will need to configure the “Scoir Account Device Type is Active” filter to select your Scoir Account Device Type.
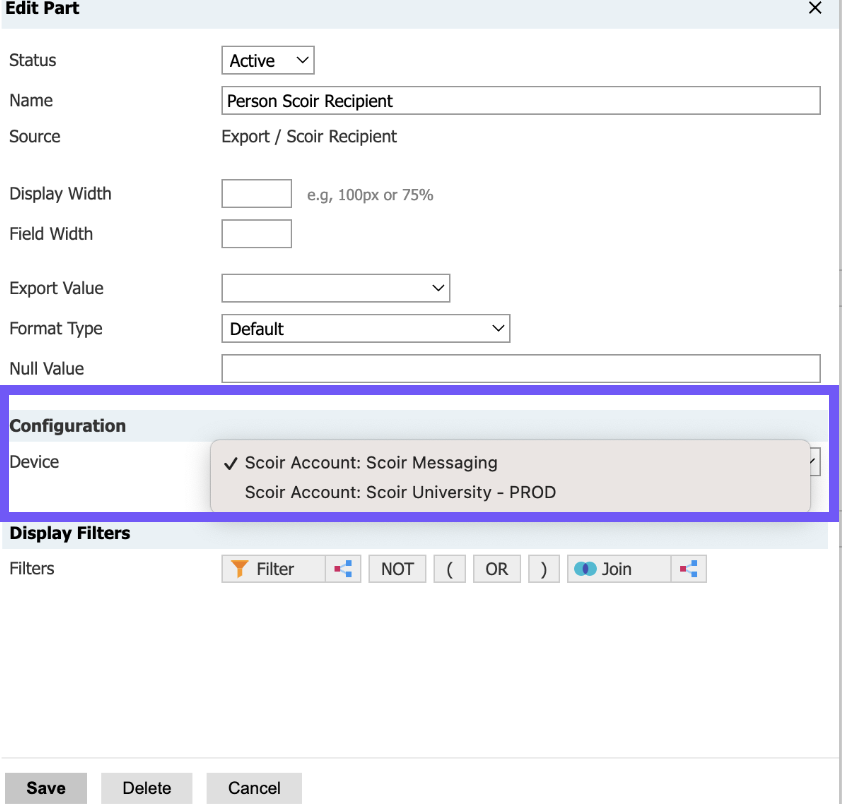
When configuring your recipient list query, Scoir Recipient must be an included export. This is the Scoir Account Device that will be used in the ‘To’ field when building your message. You may wish to include additional exports if you plan to include merge fields in your message for personalization. See Messaging Stealth Records
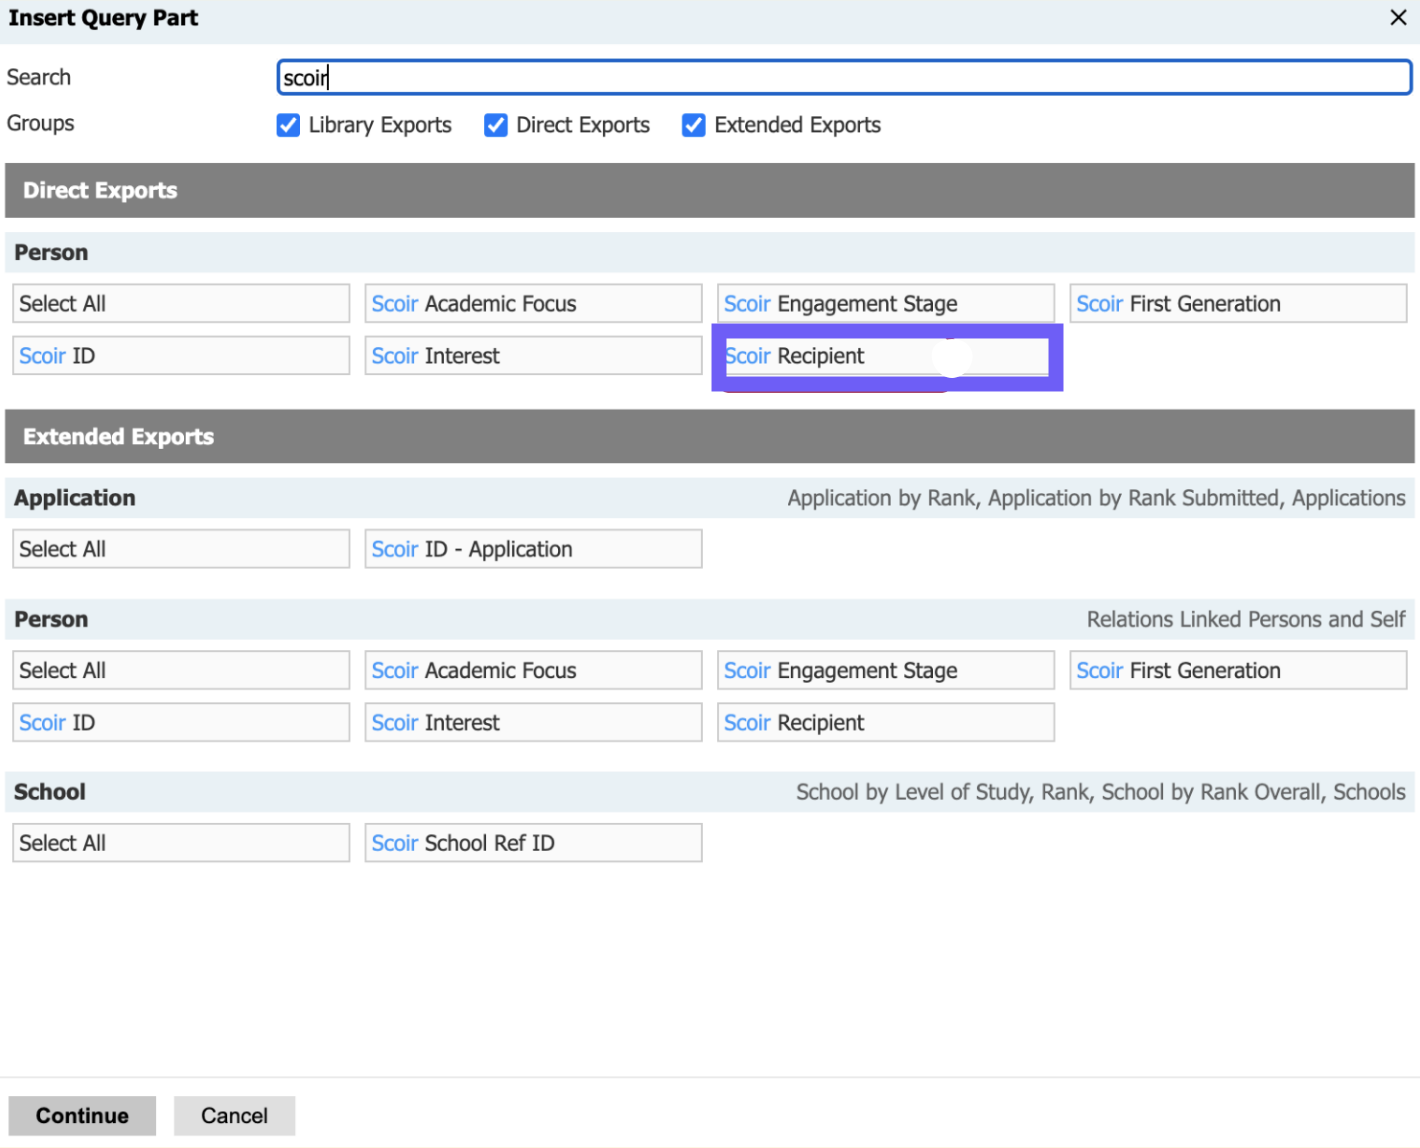
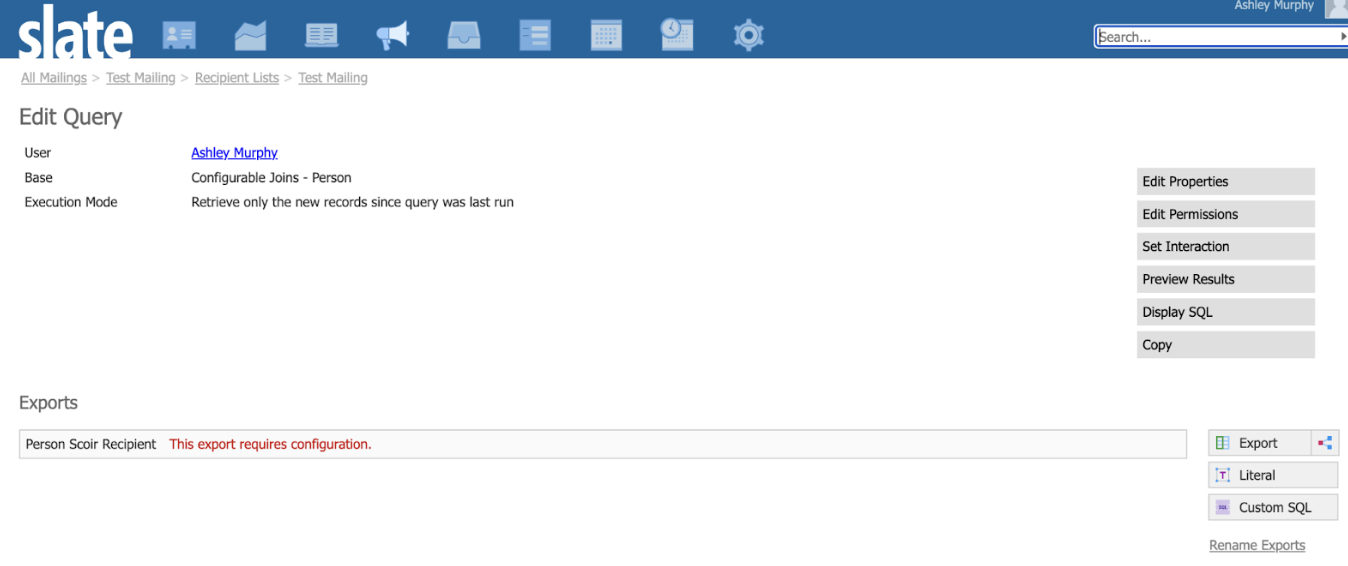
The Scoir Recipient export will require configuration. This is because some colleges may have multiple Scoir Account Devices if they manage more than one campus in the same instance of Slate. Everyone must specify the Scoir Account Device for the Scoir Recipient export even if you only have one.
After you’ve configured your recipient list query, you can begin drafting your message.
You’ll find a simplified message editor that supports all of the capabilities for building a Scoir message. The Recipient field is a drop down menu that will include each Scoir Account Device included in your recipient list query exports. The Account you choose corresponds with the Scoir profile you wish for the message to be sent from. Most colleges will only have one.

If you included additional exports in your recipient list query, the message editor does support the ability to add merge fields. See Messaging Stealth Records
Insert a pair of double brackets anywhere in your message where you wish to insert a merge field. For the subject line, you must manually type in the brackets and name of the field export as it appears in your recipient list query. Click Save.
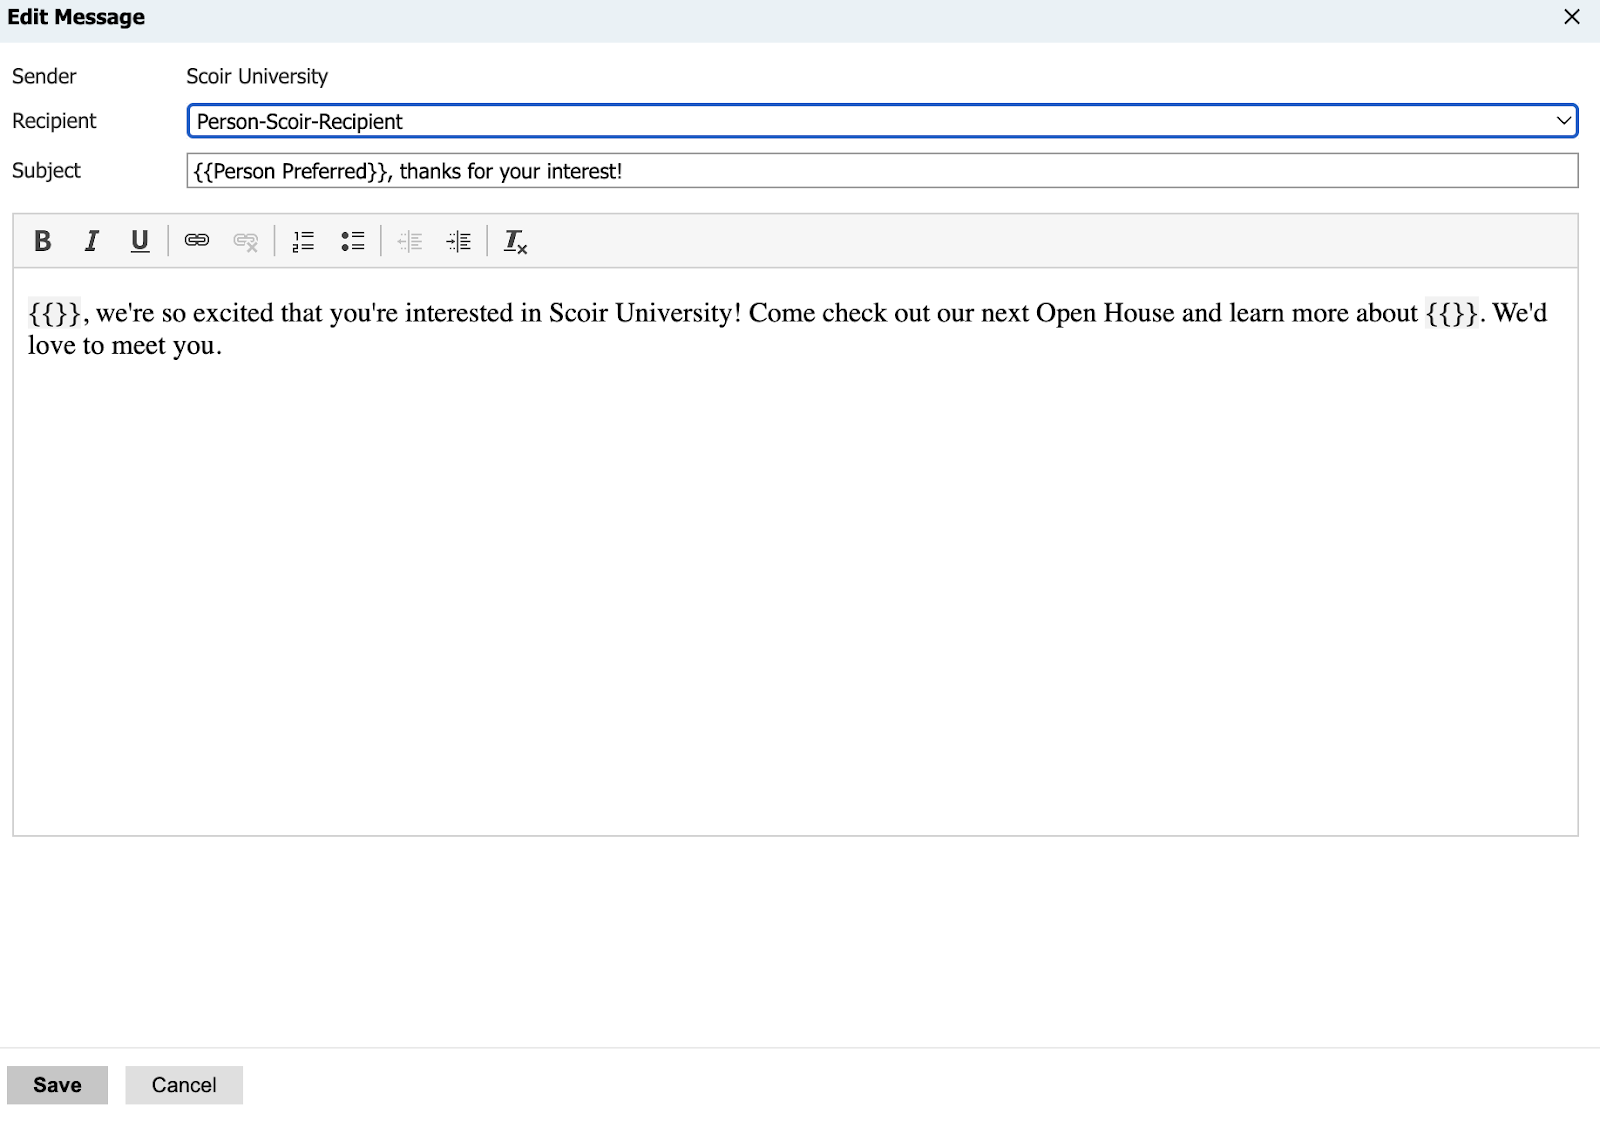
When you go back into the message editor, you’ll be able to double click on each set of brackets in the message body and select your merge field from the dropdown.

Messaging Stealth Records
Use caution when including merge fields in messages that include stealth record recipients. In most cases, you will only know the Scoir ID and Scoir Engagement Stage for these students. Partner Colleges can also include additional attributes available through the Scoir Audience import (Interest, Academic Focus, First Gen). Including merge fields for data not available for a record will result in blank content being displayed in the message for that student.
Inserting a Message in a Campaign
Scoir messages can be built as stand alone messages or be included as part of your existing campaigns. To include Scoir messages in a campaign, simply insert the message in the mix wherever you’re interested in utilizing this channel. It’s not necessary to create separate campaigns for Scoir followers. Folding these messages into existing campaigns reduces the risk of sending duplicate or overlapping messages to the same students.
Unlocking Stealth Insights
The integration also includes the ability for you to share information back to Scoir about your Scoir records so that Scoir can provide a more detailed engagement analysis, including improved first source attribution for both matched and stealth records.
Data sent includes Deliver Account ID, Person ID, Person Created Date, and a Stealth/Known indicator.
Add the Scoir Audience Match Results query from the Slate Template Library.
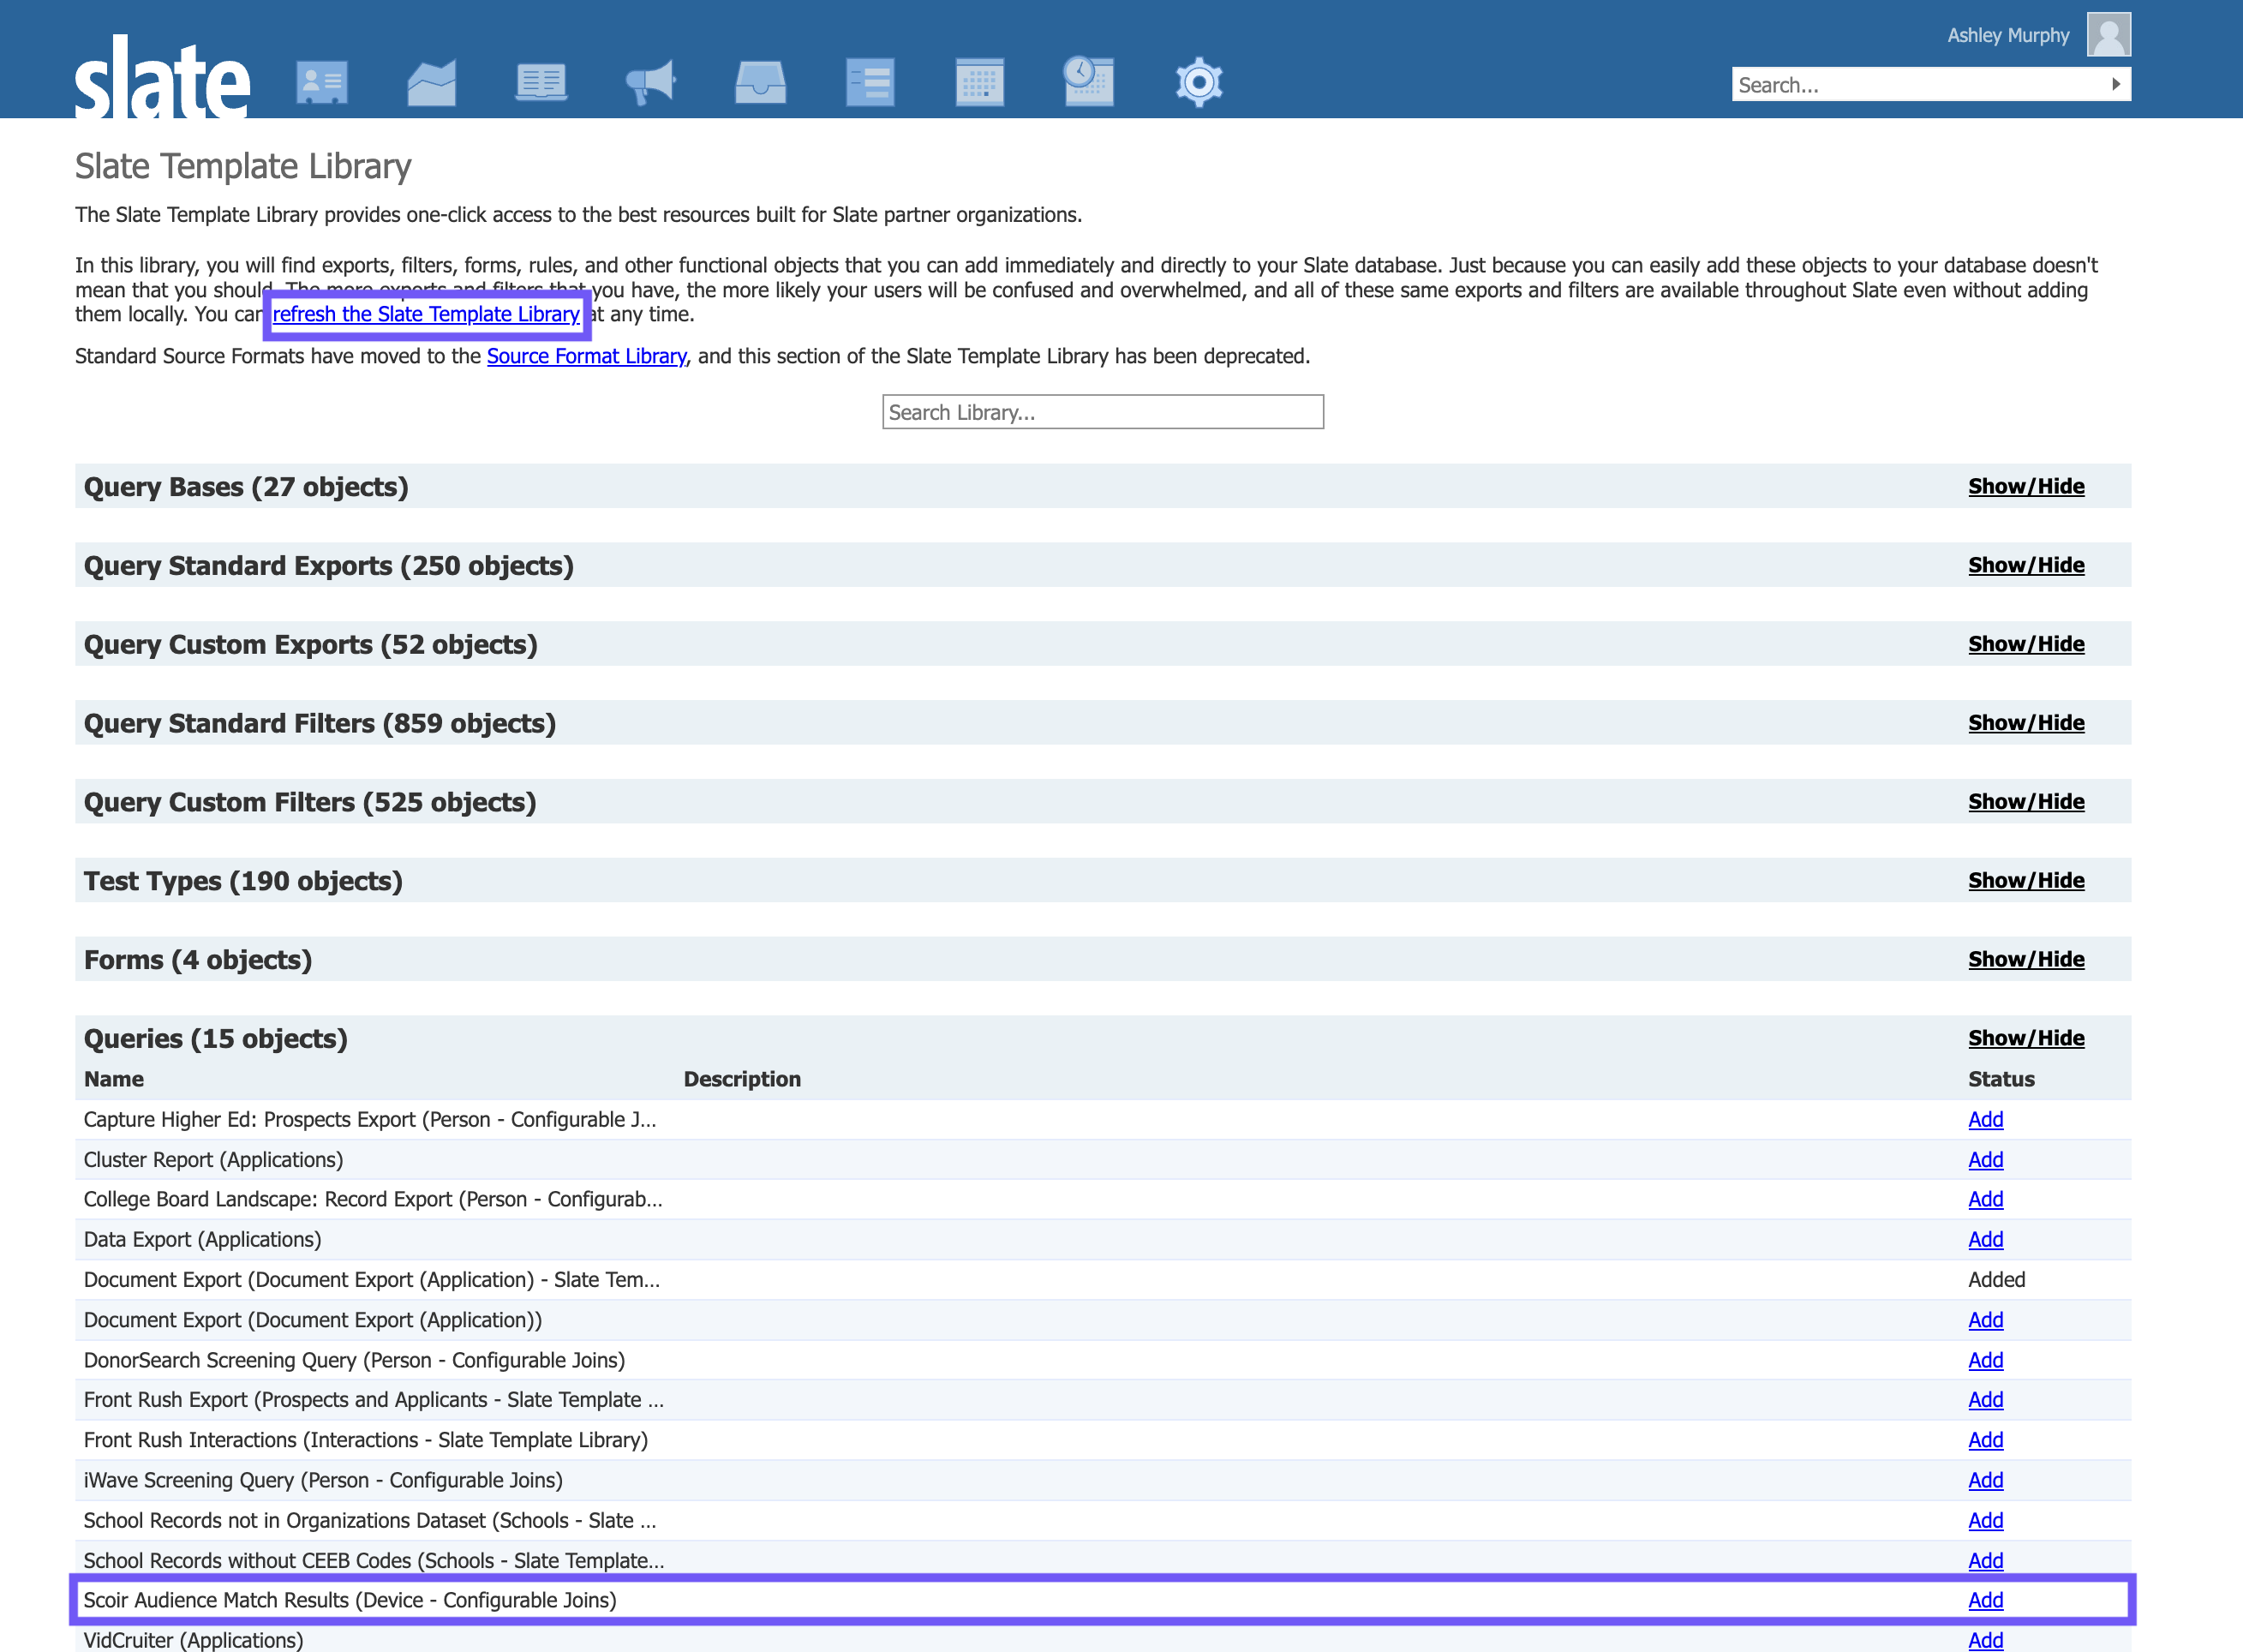
Navigate to the query and click Edit Query.
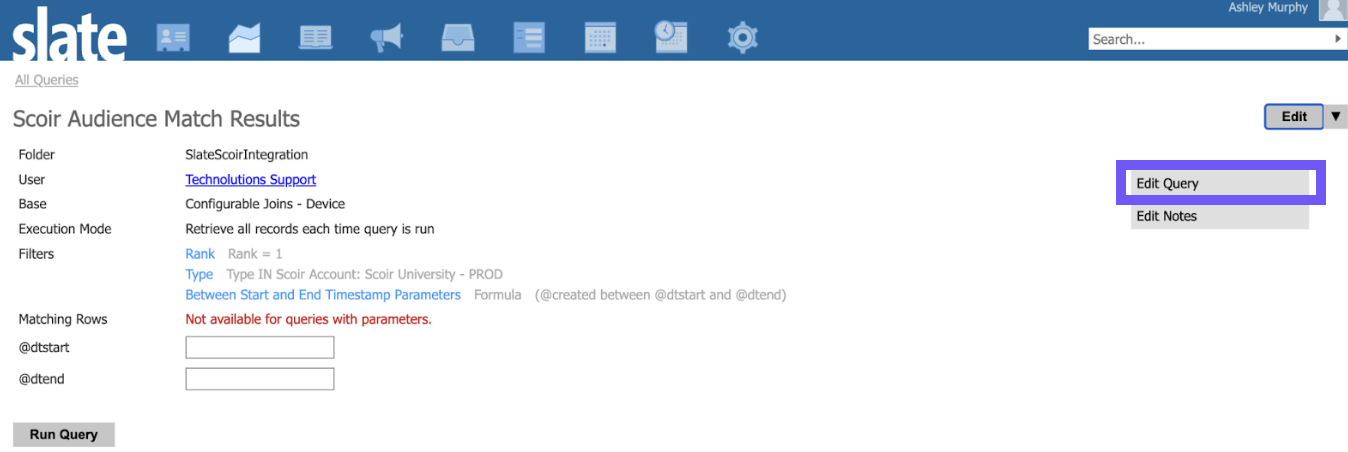
Click on Edit Permissions.
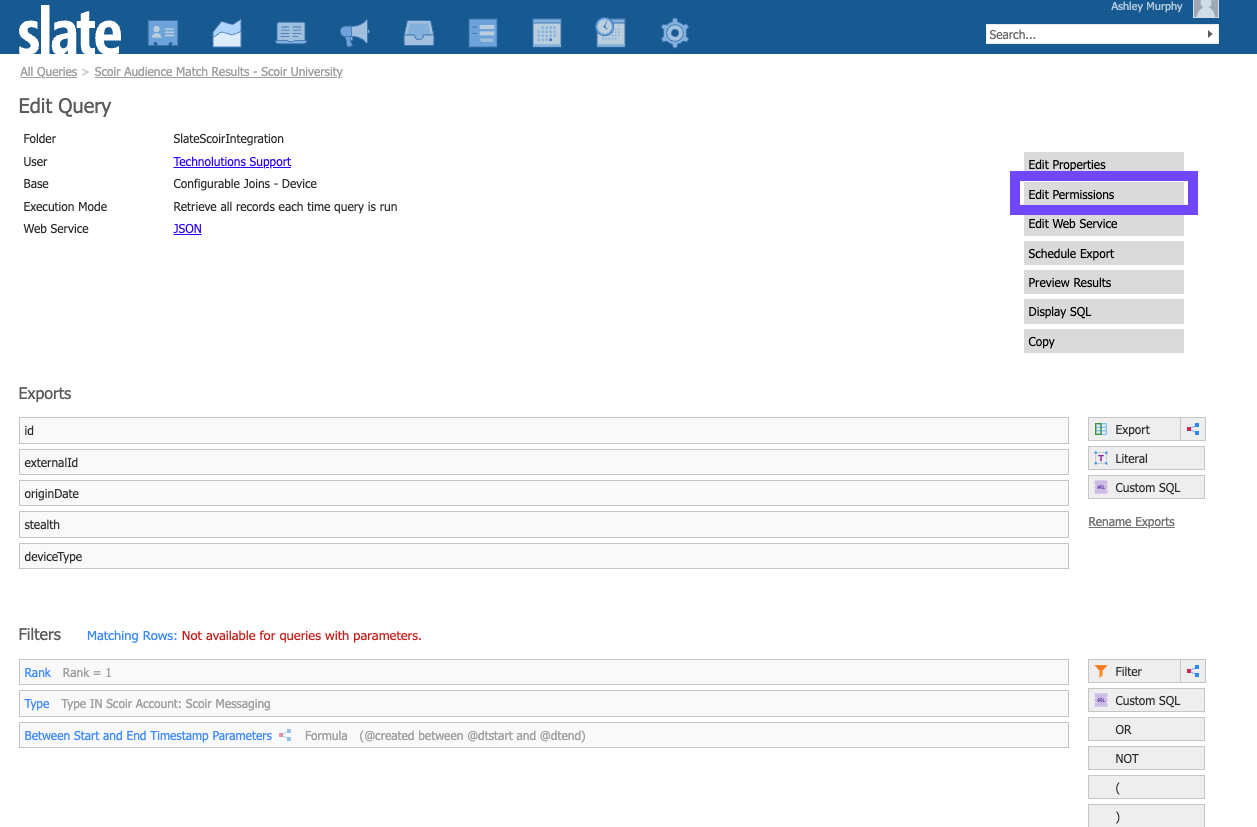
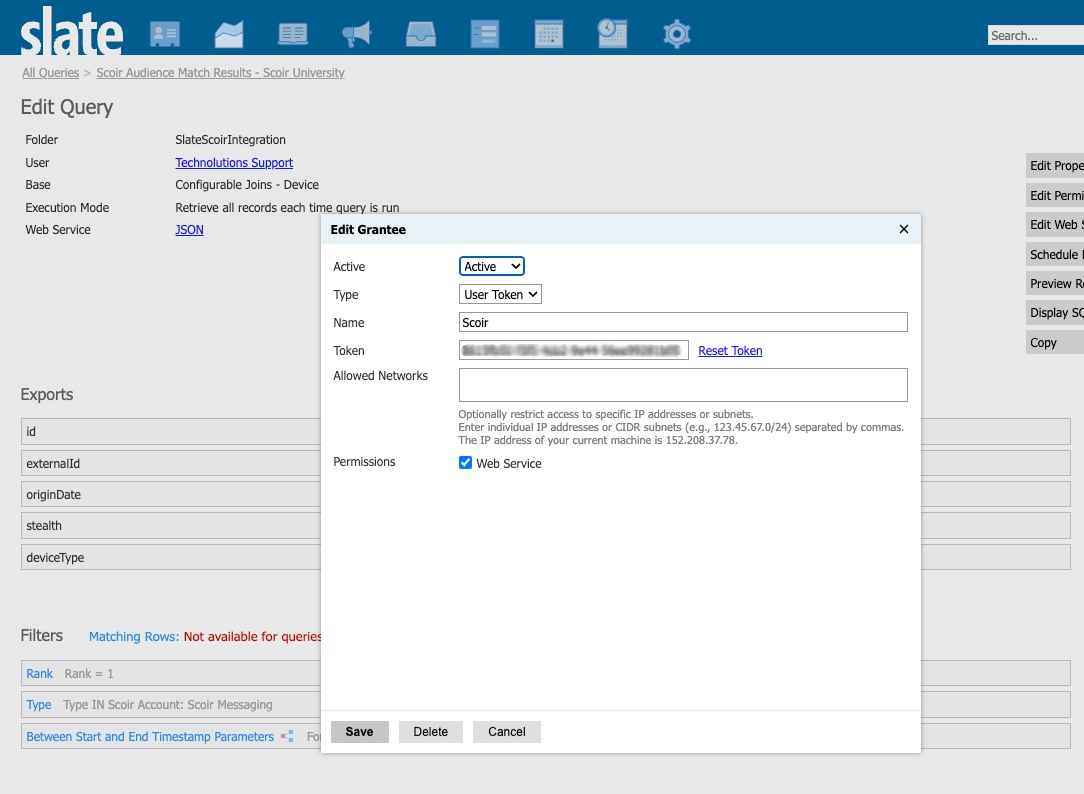
And Edit/Add a Grantee.
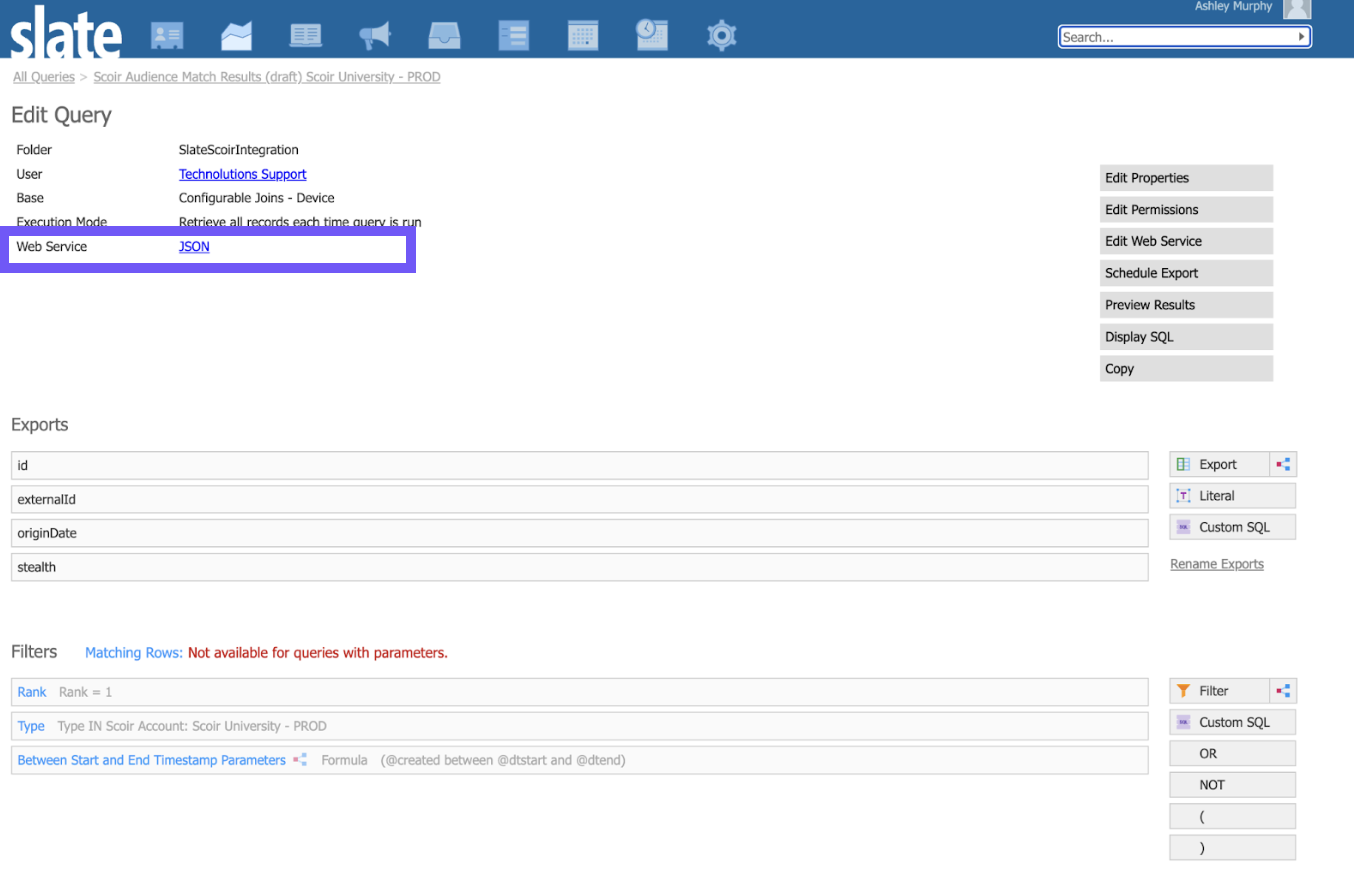
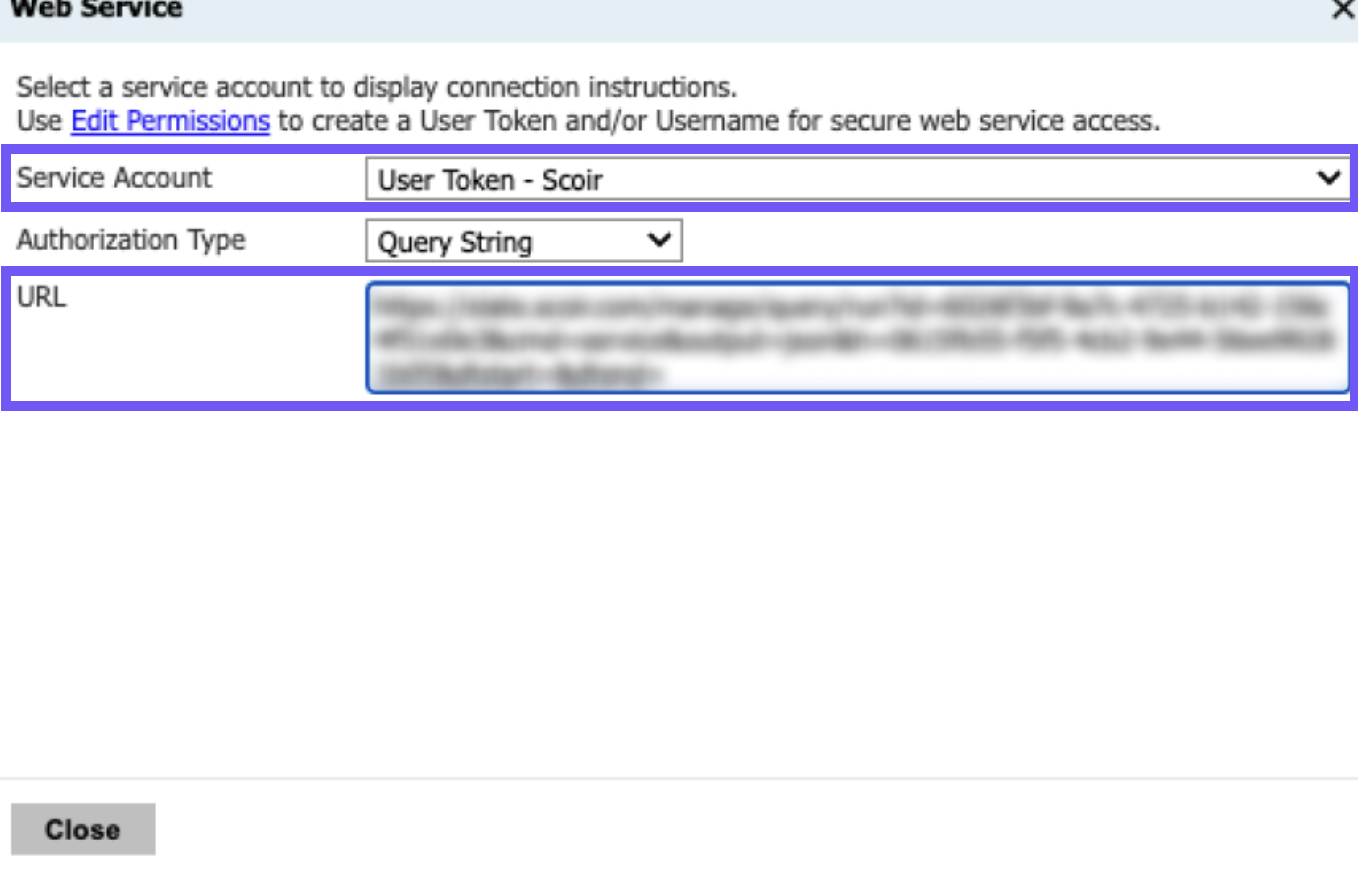
Click on the Web Service link.
Select User Token - Scoir from the Service Account dropdown and copy the complete URL that’s displayed in the box.
Return back to your account in Scoir, and paste the URL into the box as shown below. Click Unlock Stealth Insights.
