Only users with the Application Manager role can create Application Document Requirements. If you're unsure of your access, reach out to your Scoir Account Administrator or contact support@scoir.com.
Creating your Application Document Requirements is the first step in setting up an Application Round in Scoir.
These requirements specify which documents you want—or don’t want—to receive from students applying to your institution. You can create as many sets as needed to support different programs or admission pathways, or use a single set that applies to all applicants.
Once you've defined your requirements, you'll pair them with an Application Deadline to complete the Application Round setup.
Step 1: Start a New Set of Application Requirements
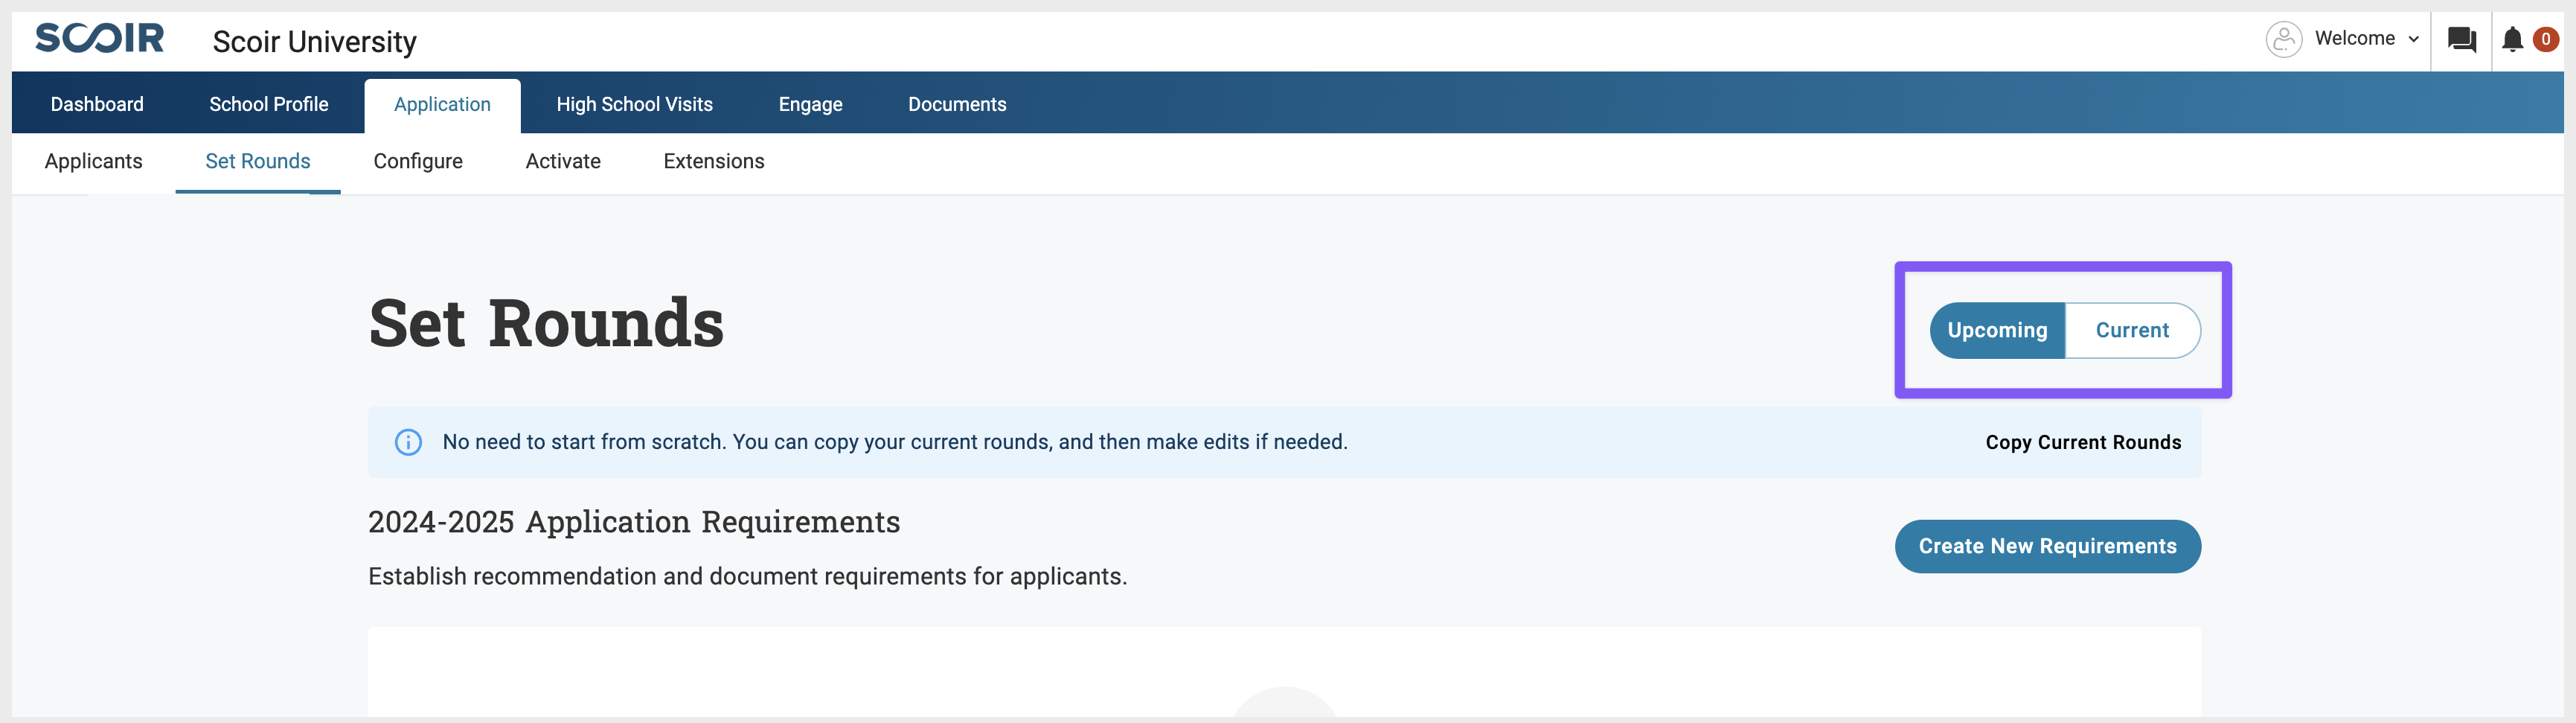
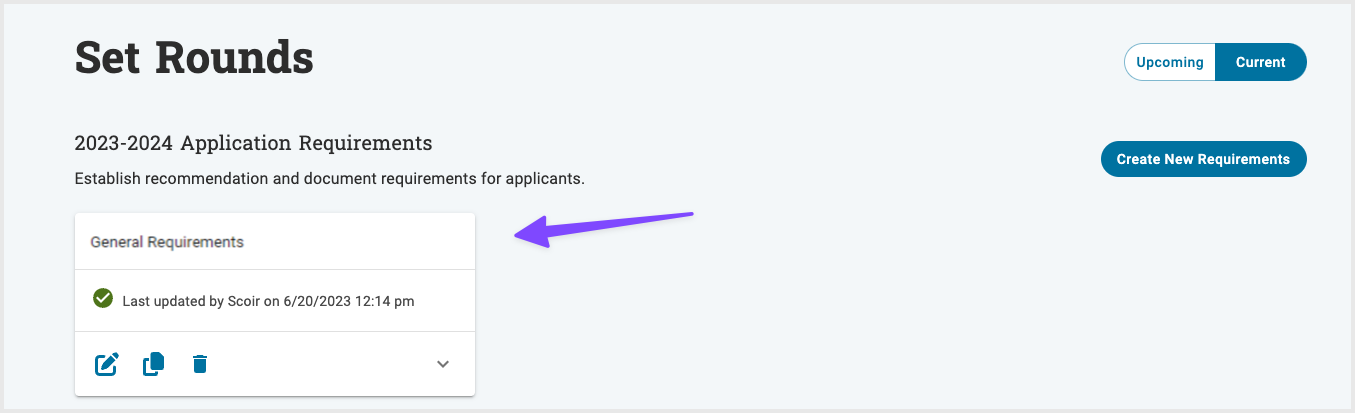
Go to the Application tab and select Set Rounds.When Scoir opens up the ability to create or edit Application Rounds (from late June through August 1), you’ll land on the upcoming application cycle by default. If you need to view or make changes to your current cycle’s requirements, just use the Upcoming/Current toggle to switch views.
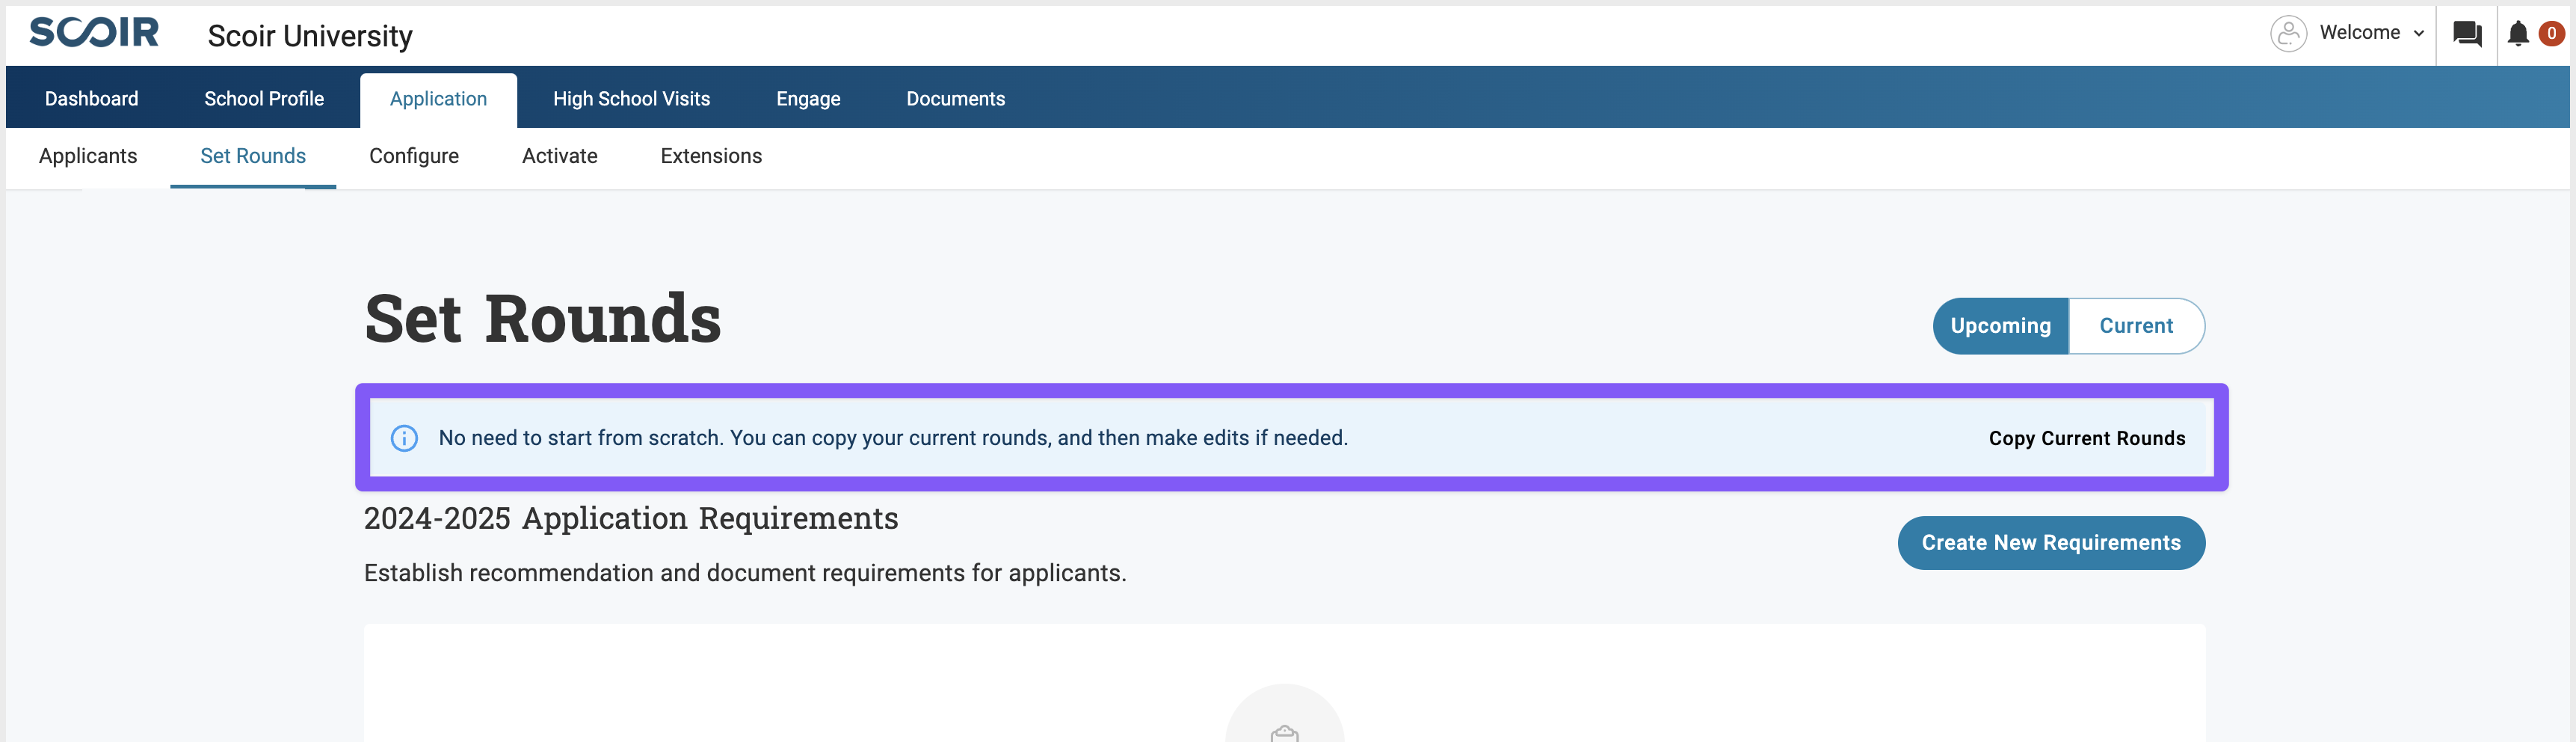
If Rounds already exist for the current cycle but not the upcoming one, you can click Copy Current Rounds to carry them over and make edits.
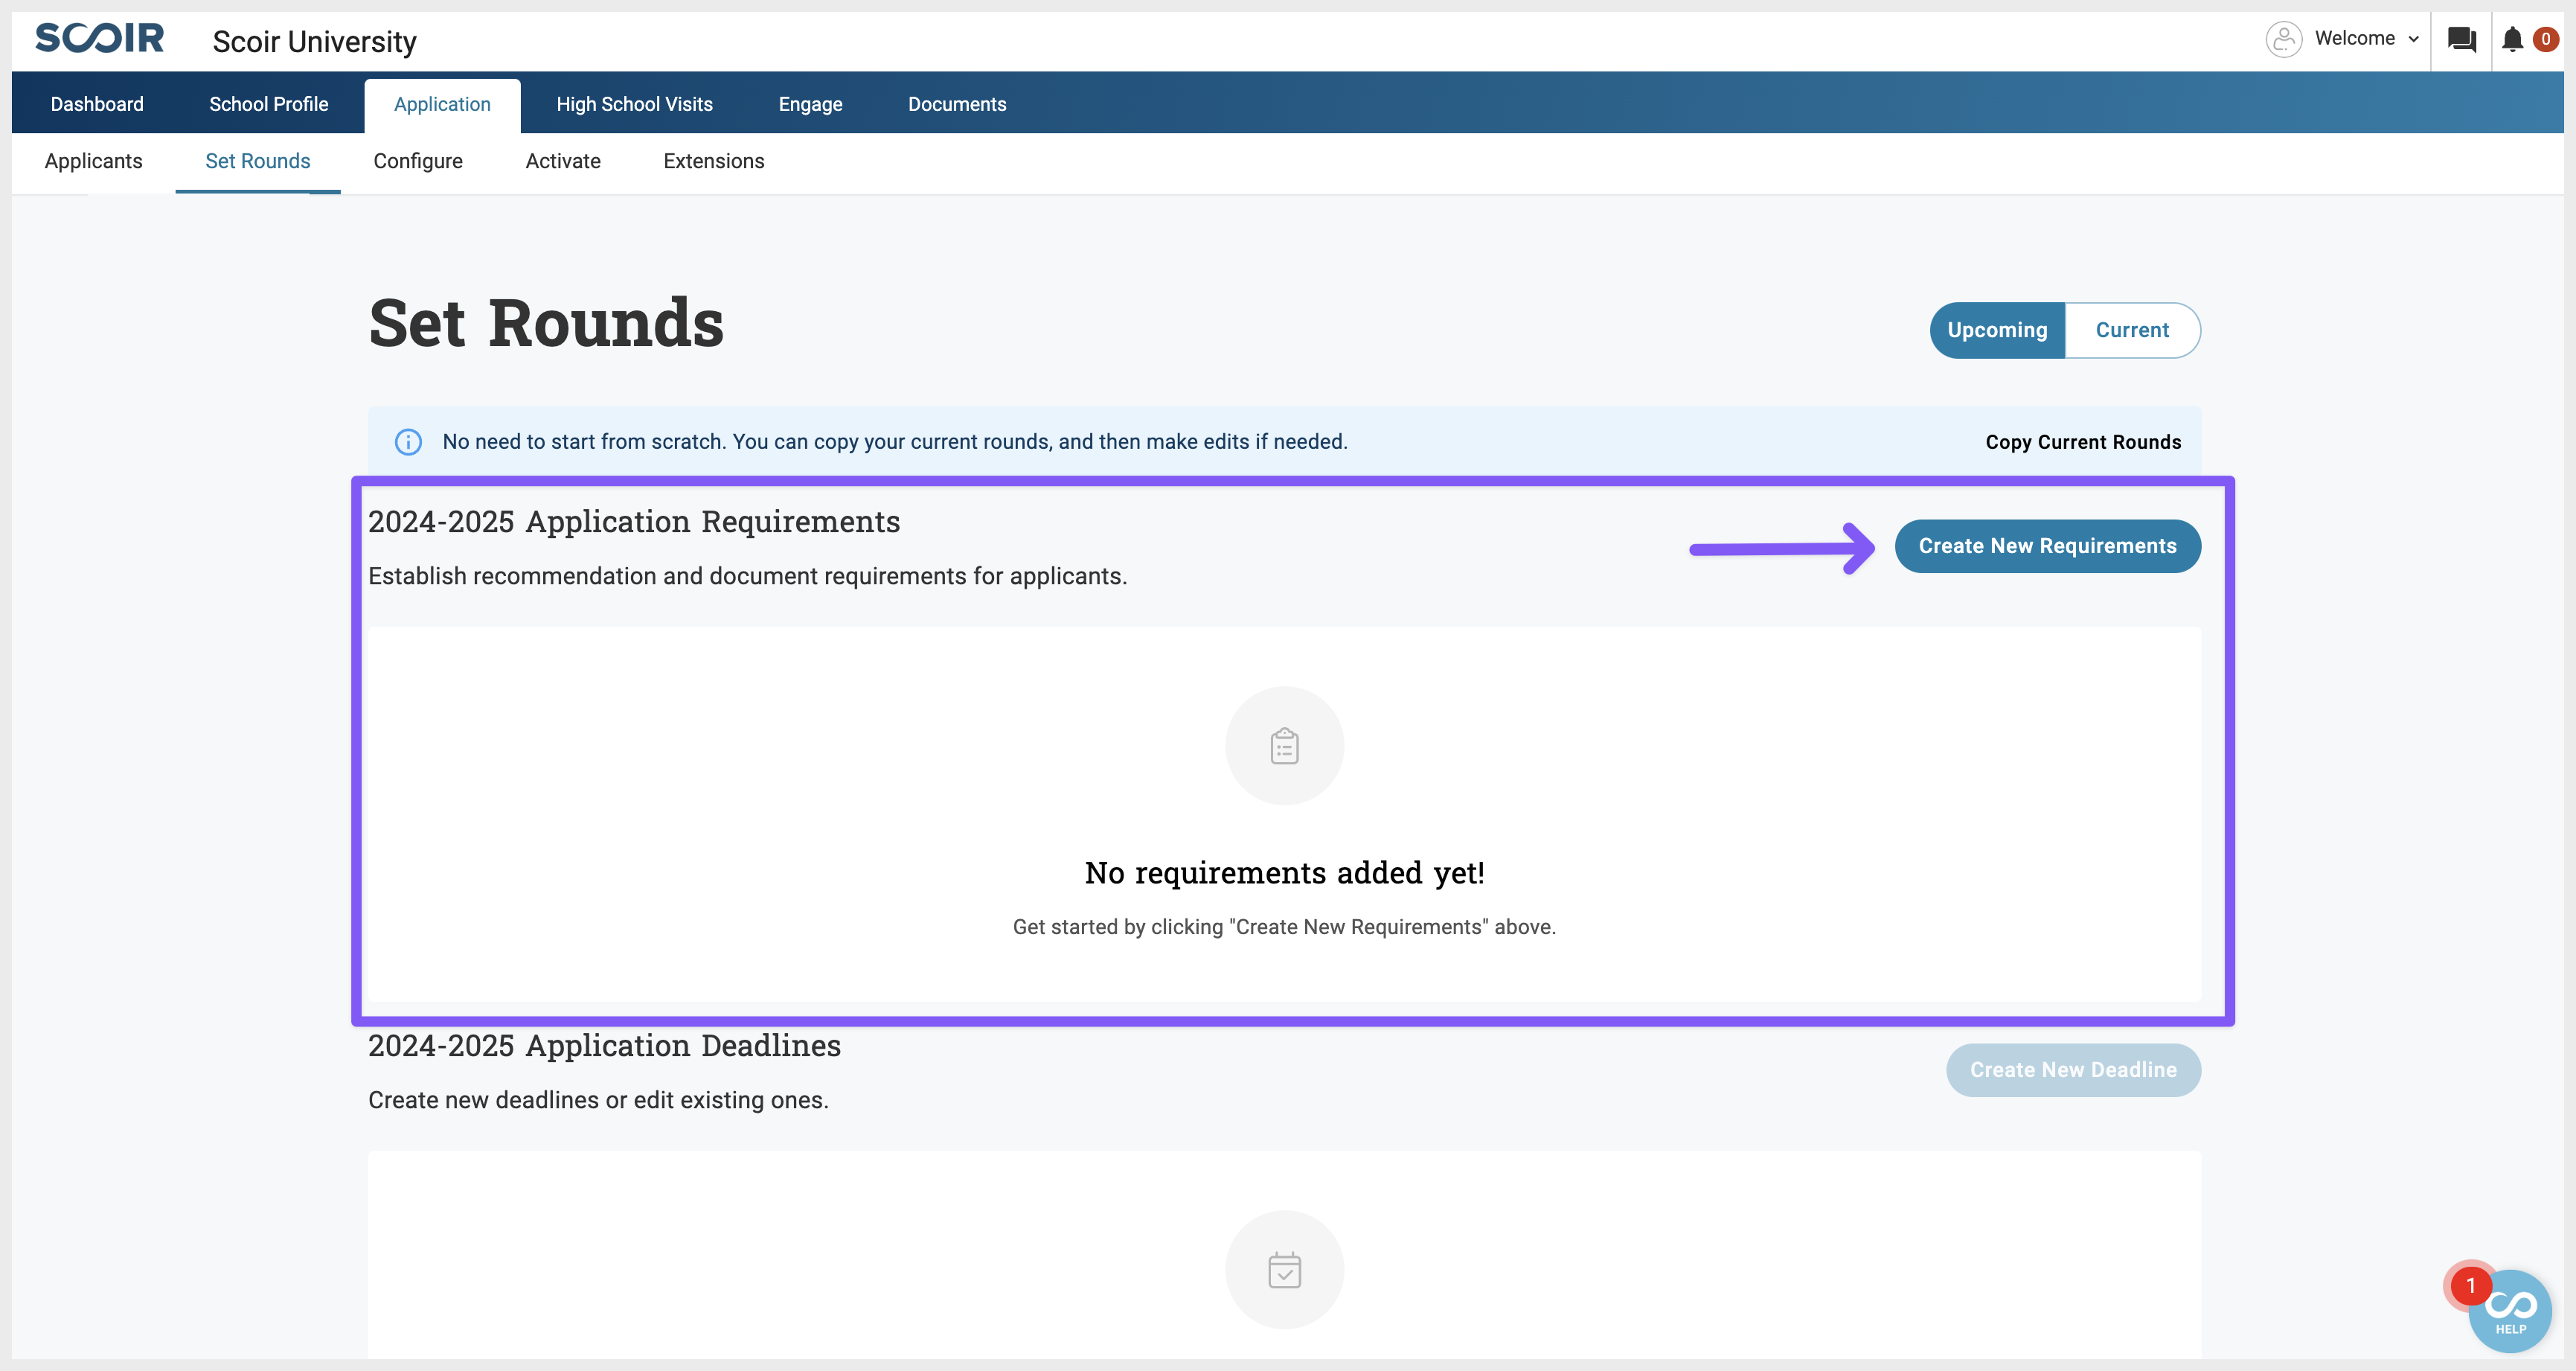
If you're setting up rounds for the first time, click Create New Requirements in the Application Requirements section.
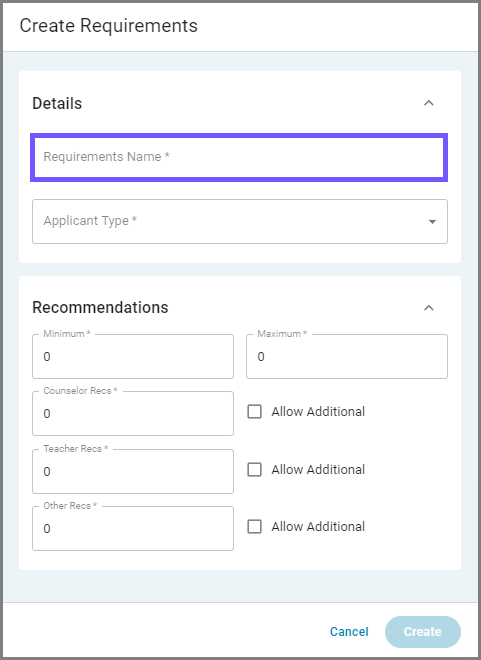
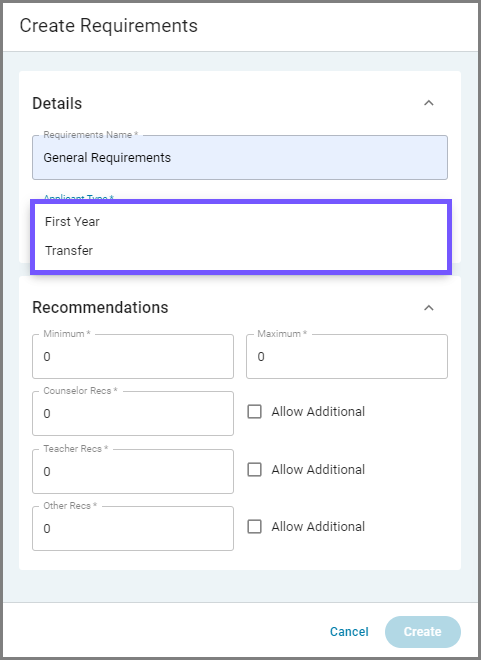
Enter a Requirement Name for your set of document requirements. This is an internal label for your requirement set. It won’t be visible to students, counselors, or supporters.
Choose either First Year or Transfer for the Applicant Type . This determines which types of documents and recommendations you’ll configure in the following steps. This selection cannot be changed once saved. Only students applying as the selected type will be able to use any rounds that you associate the requirements with:
If you select First Year, any round you associate the requirements with would become a First Year-only round.
If you select Transfer, any round you associate the requirements with would become a Transfer-only round.
Step 2: Set Recommendation Preferences
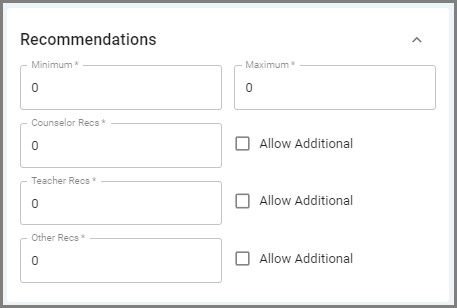
Once your Applicant Type is selected, you’ll configure your Recommendation Letter preferences.
These settings allow you to define whether letters are required, optional, or not accepted—and specify the types and quantities.
Types of Recommendations
You can accept the following types:
Counselor Recommendations
Teacher Recommendations
Other Recommendations – from individuals outside the school (e.g., clergy, employers, community leaders, coaches)
Define your Requirements
Use the Minimum and Maximum fields to indicate how many letters you’ll accept.
We do not require or consider any recommendations
Enter "0" for both the minimum and maximum.
We do not require recommendations, but will consider optional letters
Enter "0" for the minimum, and the maximum number of letters you wish to allow as the maximum.
Then, check the Allow Additional boxes to specify which types of optional requirements you wish to receive; Counselor, Teacher, or Other. You can select as many types as needed.
We require a minimum number of recommendations
Enter the minimum number of recommendations you require as the minimum. Enter the maximum number of letters you wish to receive as the maximum. The maximum can be the same as the minimum, or higher if you want optional additional letters.
Then, check the Allow Additional boxes to specify which types of optional requirements you wish to receive; Counselor, Teacher, or Other. You can select as many types as needed.
About the “Allow Additional” checkbox: This checkbox allows for flexibility in the types of recommendations, and amount of optional recommendations you accept. When you have set a maximum number of recommendations, you will then need to indicate what types of recommendations you'll accept using the Allow Additional option.
If you do not set a specific quantity for each letter type, checking the "Allow Additional" box next to a recommendation type will allow users to send you letters of that recommendation type in any amount up to your overall maximum.
You can select the "Allow Additional" option for all types at once, or any other combination of recommendation types. You can also set a specific limit of one type of letter, while using Allow Additional on another type that you can leave open-ended. Remember, your overall maximum number of recommendations is the limit that you can receive, regardless of what you select for individual recommendation types.
Check the examples below to see how this works in different scenarios.
Indicate quantities for specific recommendation types if necessary. If you require a minimum number of specific recommendation types, such as teacher or counselor recommendations, you can indicate this as well. Enter the quantity of each type of recommendation you wish to receive. These amounts must add up to equal the overall maximum number of recommendations you have indicated, or use the Allow Additional checkboxes to allow for students to send the required number of letters as any combination of letter types selected.
OR
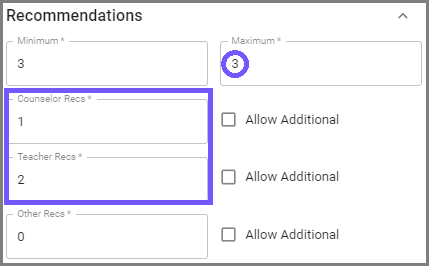
Three recommendations are required. One must be a 'counselor recommendation' and 2 must be 'teacher recommendations' equaling the three total that can be sent to the college.
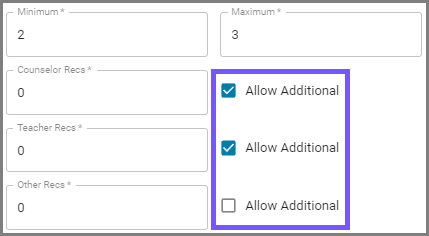
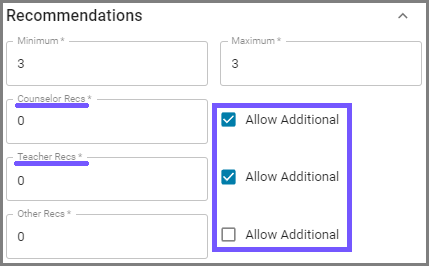
Three recommendations are required. No specific quantities of each recommendation type have been indicated.
The Allow Additional checkbox allows for 'counselor recommendations' and 'teacher recommendations' to be sent in any combination until the maximum is met. 'Other' recommendations are not able to be sent because the Allow Additional box for this recommendation type is unchecked.
Some additional examples of Recommendation scenarios and settings:
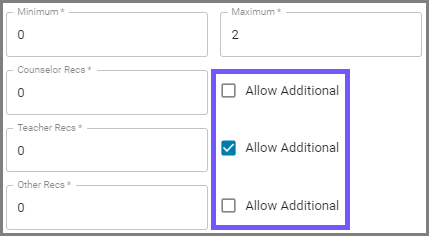
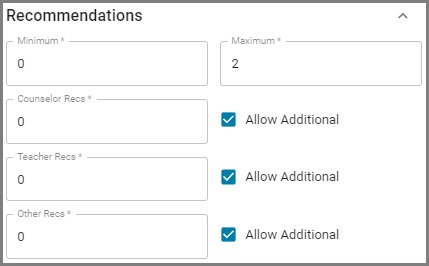
Recommendations are not required, but the college will accept up to two letters. Any combination of counselor, teacher, or 'other' recommendations can be sent.
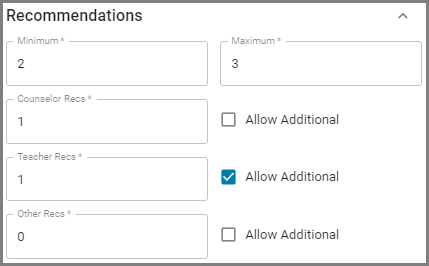
Two recommendations are required. One must be a counselor recommendation, and one must be a teacher recommendation. An additional, optional teacher recommendation can also be sent. No other recommendation types can be sent as optional extra letters.
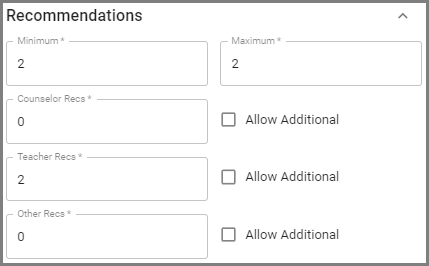
Two recommendations are required, and both must be teacher recommendations. No other recommendation types are accepted and no additonal optional recommendations can be sent.
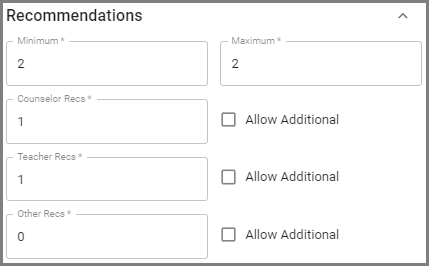
Two recommendations are required. One must be a counselor recommendation, and one must be a teacher recommendation. No additional optional recommendations can be sent.
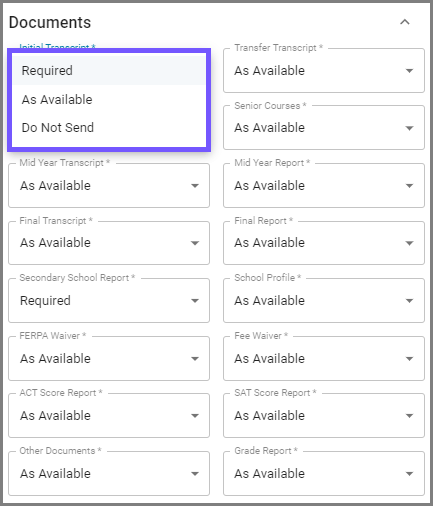
Step 3: Document Selection
After configuring recommendations, you’ll choose which application documents you will require or wish to receive, and those you do not wish to receive.
Each Document Type can be set to:
Required – Must be sent. If it’s missing, school staff will be alerted.
As Available – Optional. Use this option if your institution would like to receive the document if it's available.
Do Not Send – Will not be sent, even if the student has uploaded it.
The documents that you select as Required or As Available will be automatically added to any document batch for your institution from the student's central collection of documents uploaded by their school.
To view a list of all Scoir document types and their descriptions, click here.
Use the dropdown menu next to each document type to set your preference.Note: If you chose Transfer as the Applicant Type, you'll see a different set of document types.
When you have completed your Document selections, click the Create button to save your Document Requirements.
Your completed Application Document Requirements will now appear in your Requirements section. You can edit, delete, or duplicate requirement sets at any time.
What’s Next?
Now that your Application Document Requirements are complete, you’re ready to add an Application Deadline to complete the round.