Table of Contents
For Counselors: Using Forms

◦ Counselors will no longer be able to create or publish new surveys.
◦ Access to historical survey responses will remain available.
◦ Any survey published before the sunset will stay open for users to respond.
Going forward, you'll use Forms to collect information in the same way! We encourage you to explore Forms and share any questions, concerns, or suggestions.
Easily gather information and data from students or parents using Forms, accessible in Assignments.
For quicker navigation, use the table of contents on the right to jump to a specific section 👉
Step 1: Set up a new Form
- From your Scoir account, go to Assignments > Forms. This is where you and your team can create and manage Forms.
- Select +Add Form
- Name your untitled form and add an optional description
- (Optional) Within the Advanced Options, check Visible to teachers to make the form responses visible to teachers who have been asked to complete letters of recommendation
- (Optional) Within the Advanced Options, check Users cannot resubmit to limit each respondents to one response
Step 2: Build your Form
After you've created a form, you can add and edit content, such as questions and instructions. You can also add form elements like section headers and text blocks to help organize your content, making it easier to complete and read.
Add questions, section headers, & text blocks
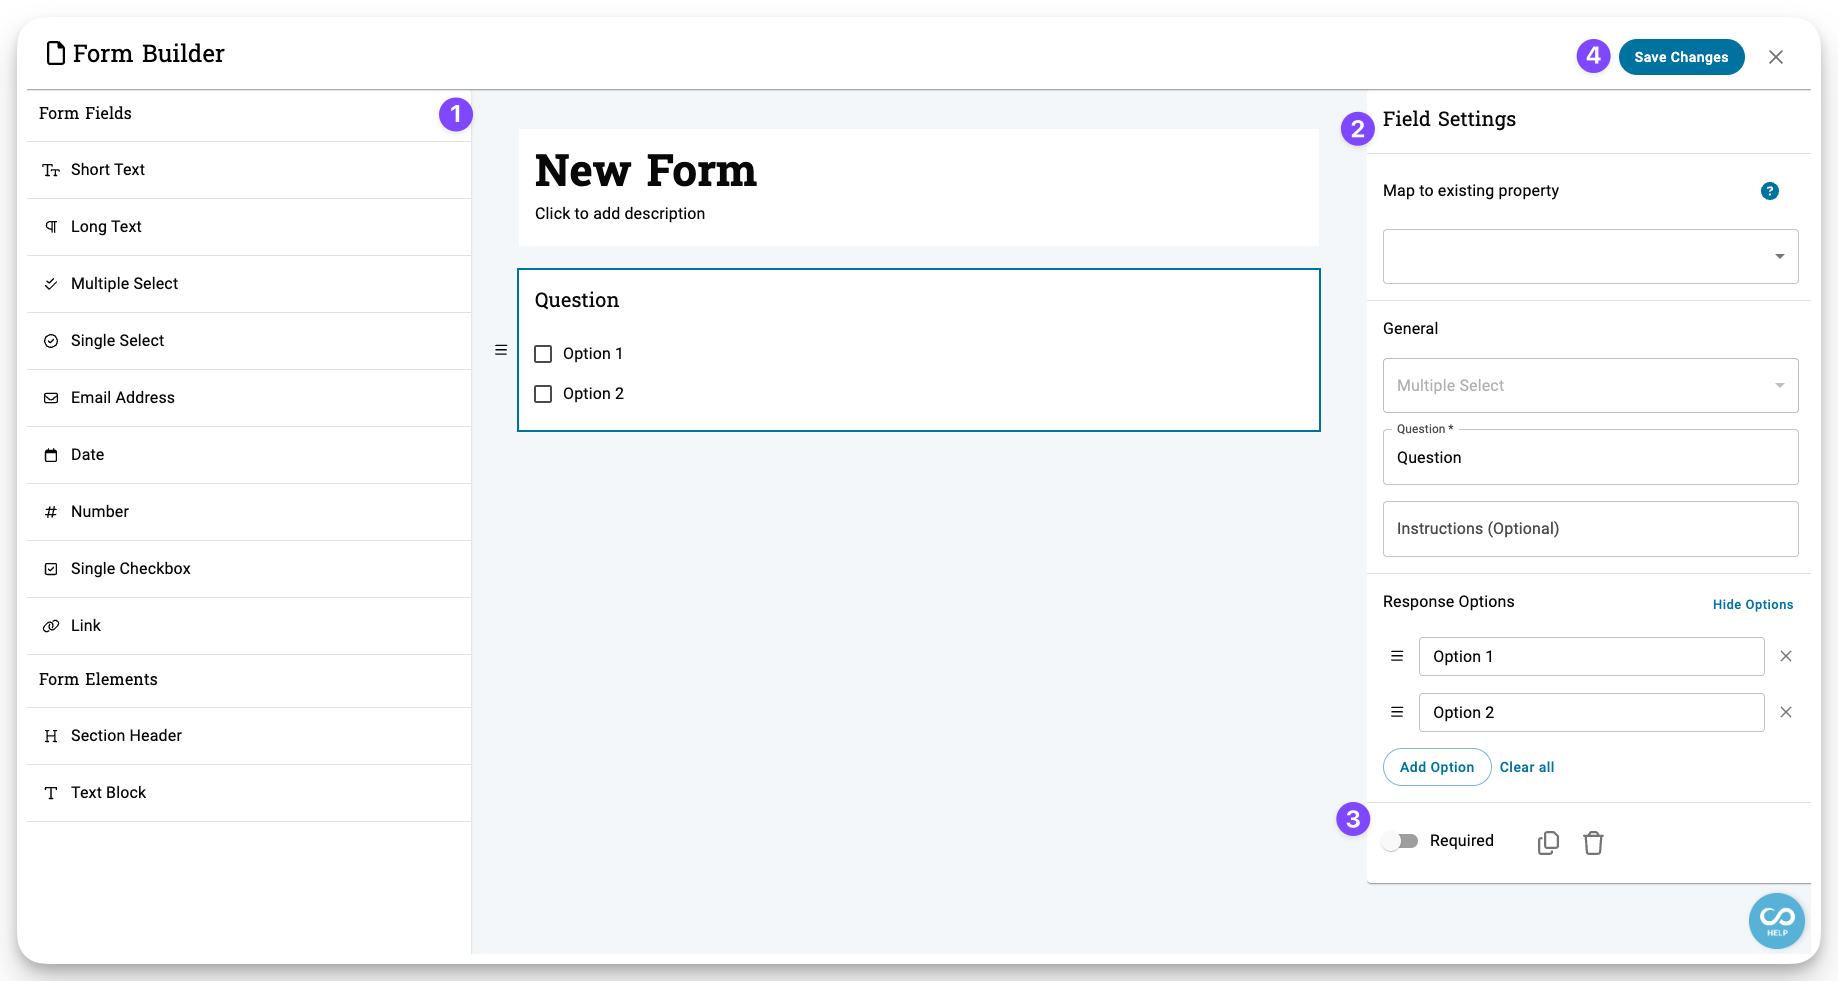
- To the left of your form, click on the type of question or form element you want to add
- Use the Fields Settings to the right of the form to add a question and instructions, add response options for multiple & single select questions, and map to existing custom properties
- Turn on Required to ensure students and/or parents respond to this question before submitting
- Once you have your form set up to your liking, click Save Changes
Your new form will now appear in the table on the Forms tab. To preview it, click the three-dot icon next to the form's row and select Preview Form.
Editing and deleting
-
Edit a question : Click on it, then adjust settings on the right
-
Reorder questions: If you have multiple items, drag and drop them to rearrange
- Delete a question: Click on it, then select . Refer to the FAQ section below to understand the implications of deleting a question after a form has been assigned
-
Duplicate a question: Click on it, then select
How do I edit or delete a form once its created?
2. Click on the three dots to the right of the form you want to edit or delete
3. Click Edit Form or Delete Form
4. If you're deleting a form, you'll be asked to confirm the deletion
Please note: Deleting a form results in its permanent removal, along with its responses. If a form linked to a student or parent task is deleted, it becomes inaccessible to them, although the task remains visible. For full removal of assignments from students/parents, tasks must be deleted separately.
Step 3: Send your Form for students to fill out
Once created, send your form to students and/or parents to collect their responses by including it in a task and assigning it to them.
Step 4: View & manage Form responses
To access collected responses, go to Assignments > Forms and select a form. Responses are displayed in a table, with columns for each question and details like:
- Respondent Name
- Respondent Type - Can be student or parent
- Class Year
- Status - Options include In Progress, Complete, or Not Started
- Last Updated - Displays the most recent time a respondent made any update, including saving changes to an in-progress response, submitting a response, or re-submitting a response)
For longer text responses, click View Response in the respective column to view them in a popover. Use the toggle in the top right to only show submitted responses.

There are three ways to find responses from a specific student or parent:
1. Search the table by name:
- Enter the student's or parent's name in the search bar. This will filter the table to show only their responses.
2. View Responses from the table:
- Click on the respondent's name directly within the table.
- A panel will then open, displaying their individual responses.
- To download these responses as a PDF, click the "Download PDF" button in the response panel.You can also find this PDF download on the student's profile in the Assignments section.
3. Access responses from the student's profile:
- Go to the student's profile and navigate to the Assignments section in the left-hand menu.
Select Form Responses next to the specific parent or student assignment. Status indicators show whether a form is complete, in progress or not started, making it easy to track progress.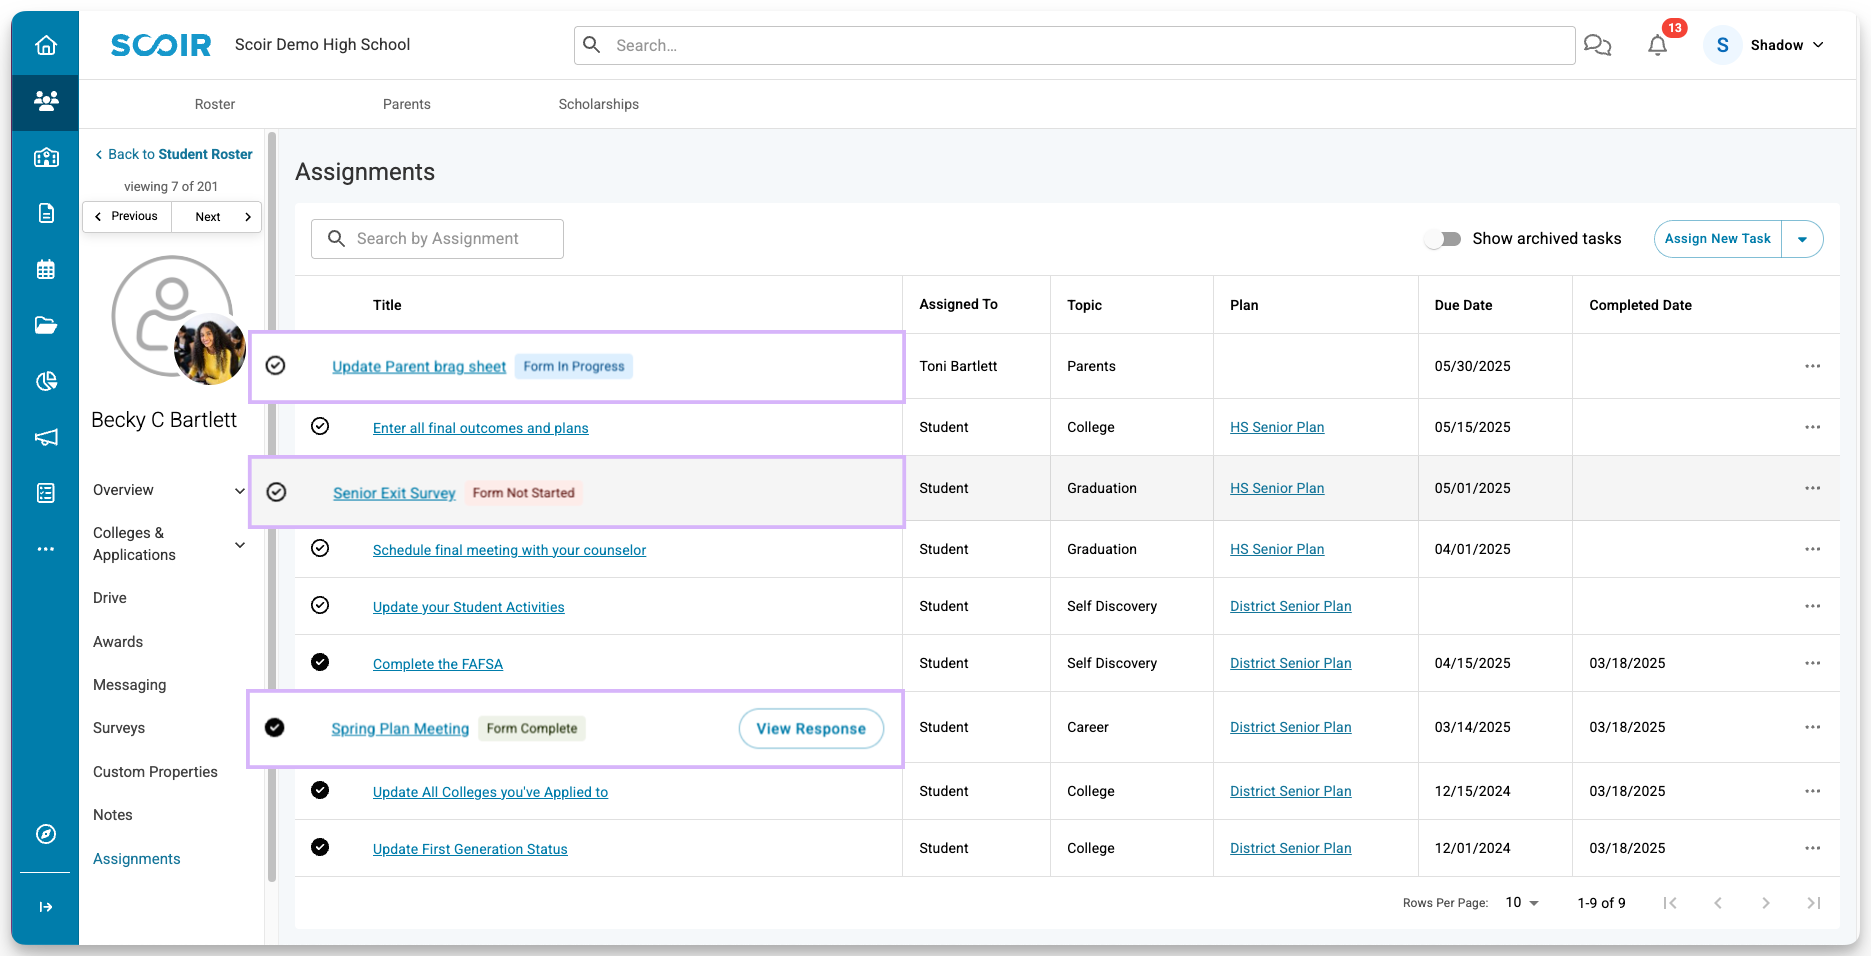
Export Form responses
- Go to Assignments > Forms and click on the name of the form
- Turn on Only show submitted responses if you only want to export the submitted responses
- In the top right, click Export to download a CSV file of the responses for that specific form
Add a PDF Copy of Form responses to a student's My Drive
- Navigate to Assignments > Forms and select the form you want to upload to MyDrive
- Click on the student's name within the table to open a panel with their responses
- In the top right corner of the panel, click the three-dot icon and select Add to Drive
- Choose whether to hide the file from parents and add an optional message
- Click Save. The student will now see a PDF version of their responses in MyDrive. You can also access the file from the My Drive section of the student’s profile
Close Form and stop accepting responses
- Go to Assignments > Forms
- Click the three dots next to the form you want to close and choose Edit Form
- In the Form Settings panel on the right, toggle off Accepting Responses to stop collecting responses and close the form.
Connecting Form Fields to Custom Properties
When creating or editing a form, you can map form fields to custom properties. This allows you to capture data from student or parent responses and view it in the student roster using filters, columns, or saved views.
How It Works:
- When a form field is mapped to a custom property, the property updates with the response after the form is submitted.
- If the property already contains data, respondents can view and update it during form submission.
- Note: Avoid editing custom properties after forms are submitted, as it may unintentionally overwrite or alter student responses.
Example: If a student completes a form in 9th grade with a mapped property (e.g., "Career Interests") and is assigned a similar form in 11th grade, they will see their previous response and have the option to update it. The updated response will overwrite the previous entry in the custom property.
To map a question to an existing custom property:
- Choose a question type that supports mapping
Which form fields can be mapped to custom properties?
✅ Short Text fields can be mapped to text-based custom properties.
✅ Multiple Select fields can be mapped to multiple select custom properties.
✅ Single Select fields can be mapped to single select custom properties.
✅ Date fields can be mapped to date custom properties.
✅ Number fields can be mapped to number custom properties.
✅ Single Checkbox can be mapped to single checkbox custom properties.
- Open the Map to existing property dropdown menu and select the property you want to map to
- Edit the pre-filled question or leave it as is and add instructions. For multiple and single select questions, response options are pre-filled from the custom property and can't be editedWhen mapping to a custom property, edits cannot be made to the response options within the form. If necessary, edits can be made directly to the custom property.
Be aware that changing the name or options of a mapped property will update the corresponding fields in the form. If you delete a property, the mapping will be removed, but the form question and its answer choices will remain unchanged. - Continue building your form or click Save Changes and exit
Duplicating Forms
Need to reuse a form without starting from scratch? Whether you're creating similar forms for different purposes, updating an existing form while keeping the original intact, or simply saving time on setup, duplicating a form makes the process quick and easy.
Here's how to do it:
- Go to Assignments > Forms. There, you’ll see all the forms you or your team have created.
- Find the specific form you’d like to copy. If you're having trouble, just use the search bar at the top and type in its name.
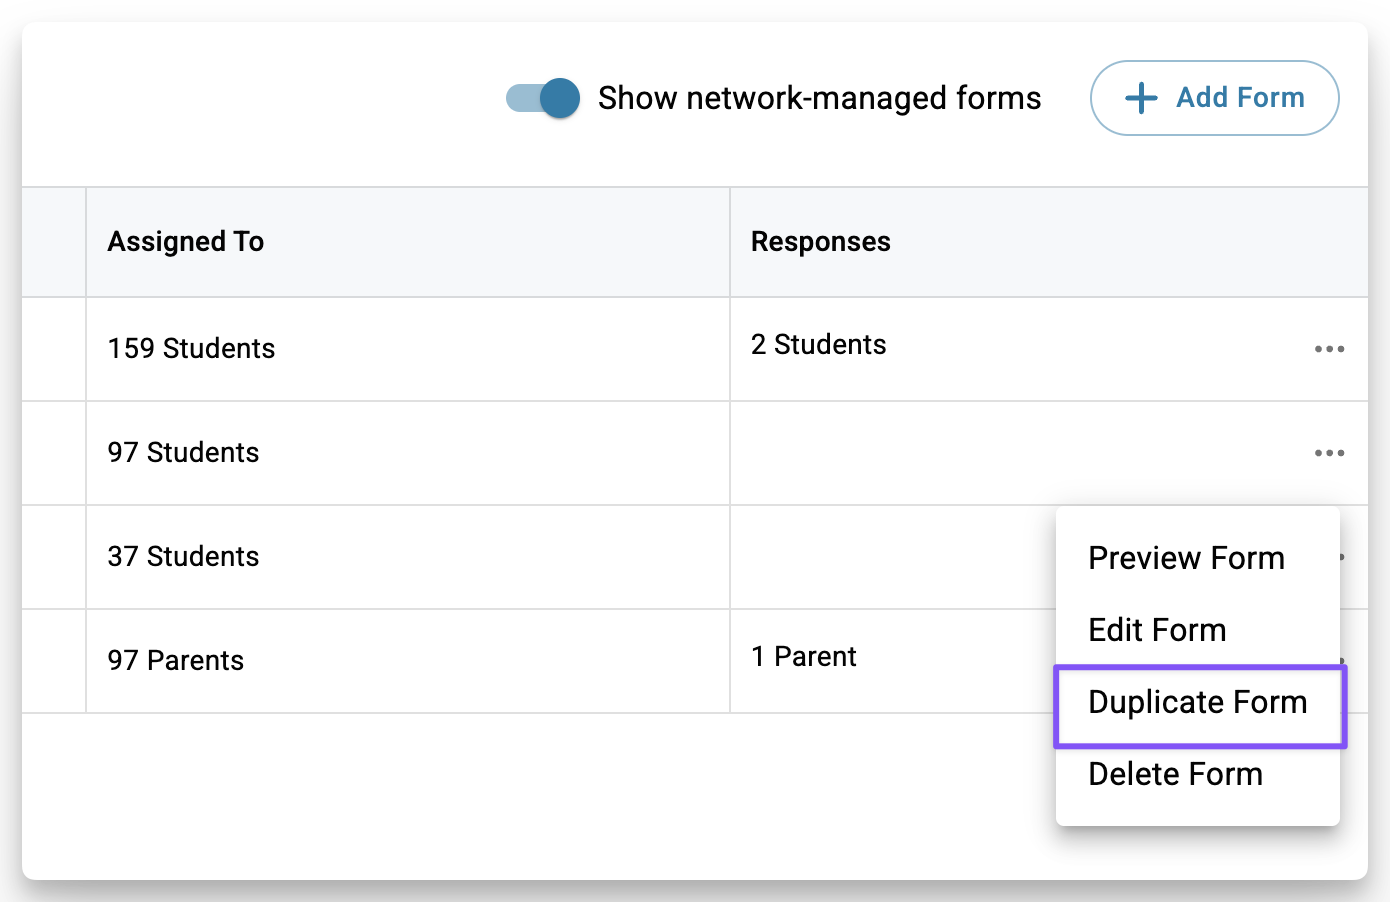
- Once you’ve found it, click the “More” option, which looks like three horizontal dots (•••) to the right.

- In the menu that appears, select Duplicate Form. This will make an exact copy of the original and open it right in the Form Builder.
- Now that you’ve duplicated the original version, you can edit it as needed. You'll most likely want to rename it since it'll start as "[Original form title] (Copy)."
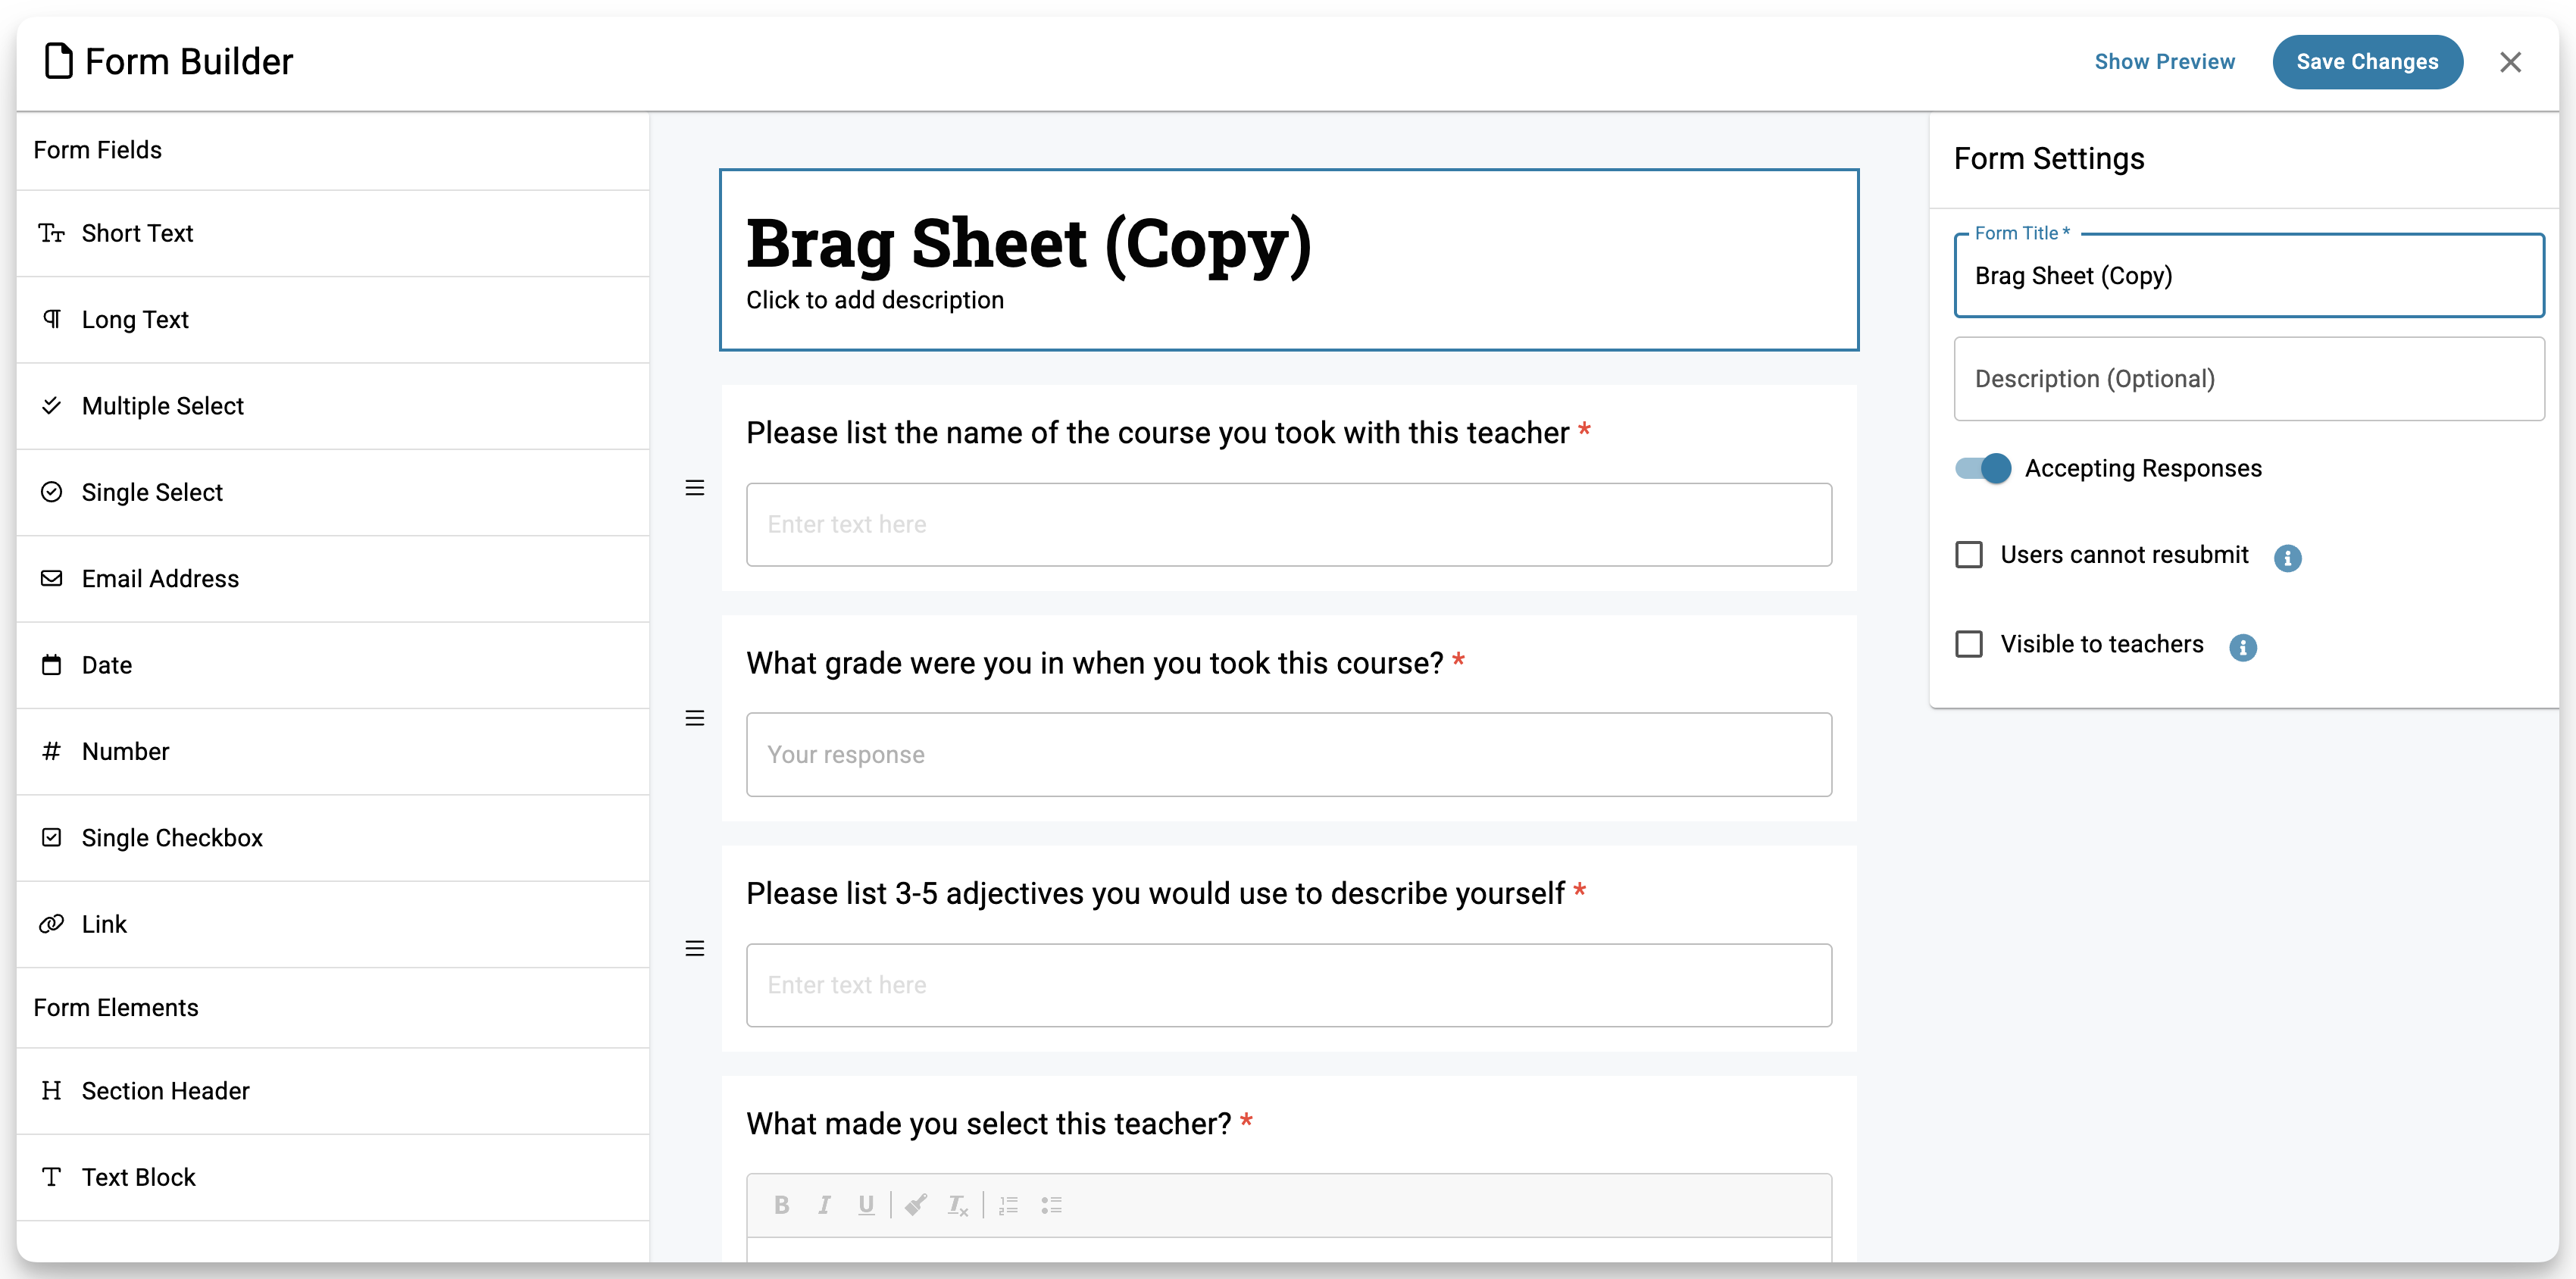
- Any changes you make will be saved automatically. If you haven’t already, change the title and description to fit the new form.
- When you're happy with the duplicated form, you can add it to a task and assign it to students or parents/guardians to start getting responses.
Keep in mind:
- You can customize the copied form by changing the name, description, or other details
- The copied form is a separate entity that you can edit
- Copying a form doesn't transfer any existing responses
Access your district's Forms
Districts can create Forms to gather specific information using the same guidelines above. If your district has any Forms that apply to the students at your school, you can easily view them by turning on the Show network-managed forms toggle.
Frequently asked questions
What does mapping to a custom property mean?
We do not recommend counselors modifying custom property values that are mapped in a form. Any changes a counselor makes to the student’s custom property will be visible to the student within a form. Form updates made by the student will overwrite the counselor input value. If the counselor modifies the value after the student has responded, that modified value will be reflected as the student’s response to the form.
Can I edit a form after it's been assigned to students or parents? What about after respondents submit their responses?
The impacts of editing a form after it has been assigned and/or submitted are as follows:
1. Deleting a question means you won't be able to view its responses because it will be gone.
2. When new questions are added, respondents will see them the next time they open the form.
3. When answer choices are added or removed, respondents will see the changes when they open the form. Previous submissions under old options remain visible until students resubmit with the new options.
Can students or parents resubmit their responses?
1. Mark the task associated with the form as incomplete. This returns the assignment to the respondent's list of incomplete tasks, giving them the chance to complete it again.
2. Assign a new task with an updated description and due date, prompting the respondent to review their original submission. Link this task to the same form. This allows them to modify their responses and resubmit when they access the form.
Can custom properties and forms be used at the Network/District level?
By setting up Network level properties and forms, student data can be recorded and transferred from one school to another within the network. This ensures data consistency and simplifies the data collection process for all schools in the network.
By integrating network custom properties into network forms, student responses will update the property data that can be leveraged on the student roster.
Key things to note:
1. Counselors must create and assign tasks that include network Forms for students to access. However, we're working on simplifying how tasks are created and assigned to a specific audience.
2. Student information collected through network custom properties and forms will not be transferred between schools in different networks. For information to be shared, both schools must be in the same network.
3. Counselors cannot edit or delete custom properties or forms created at the district/network level.